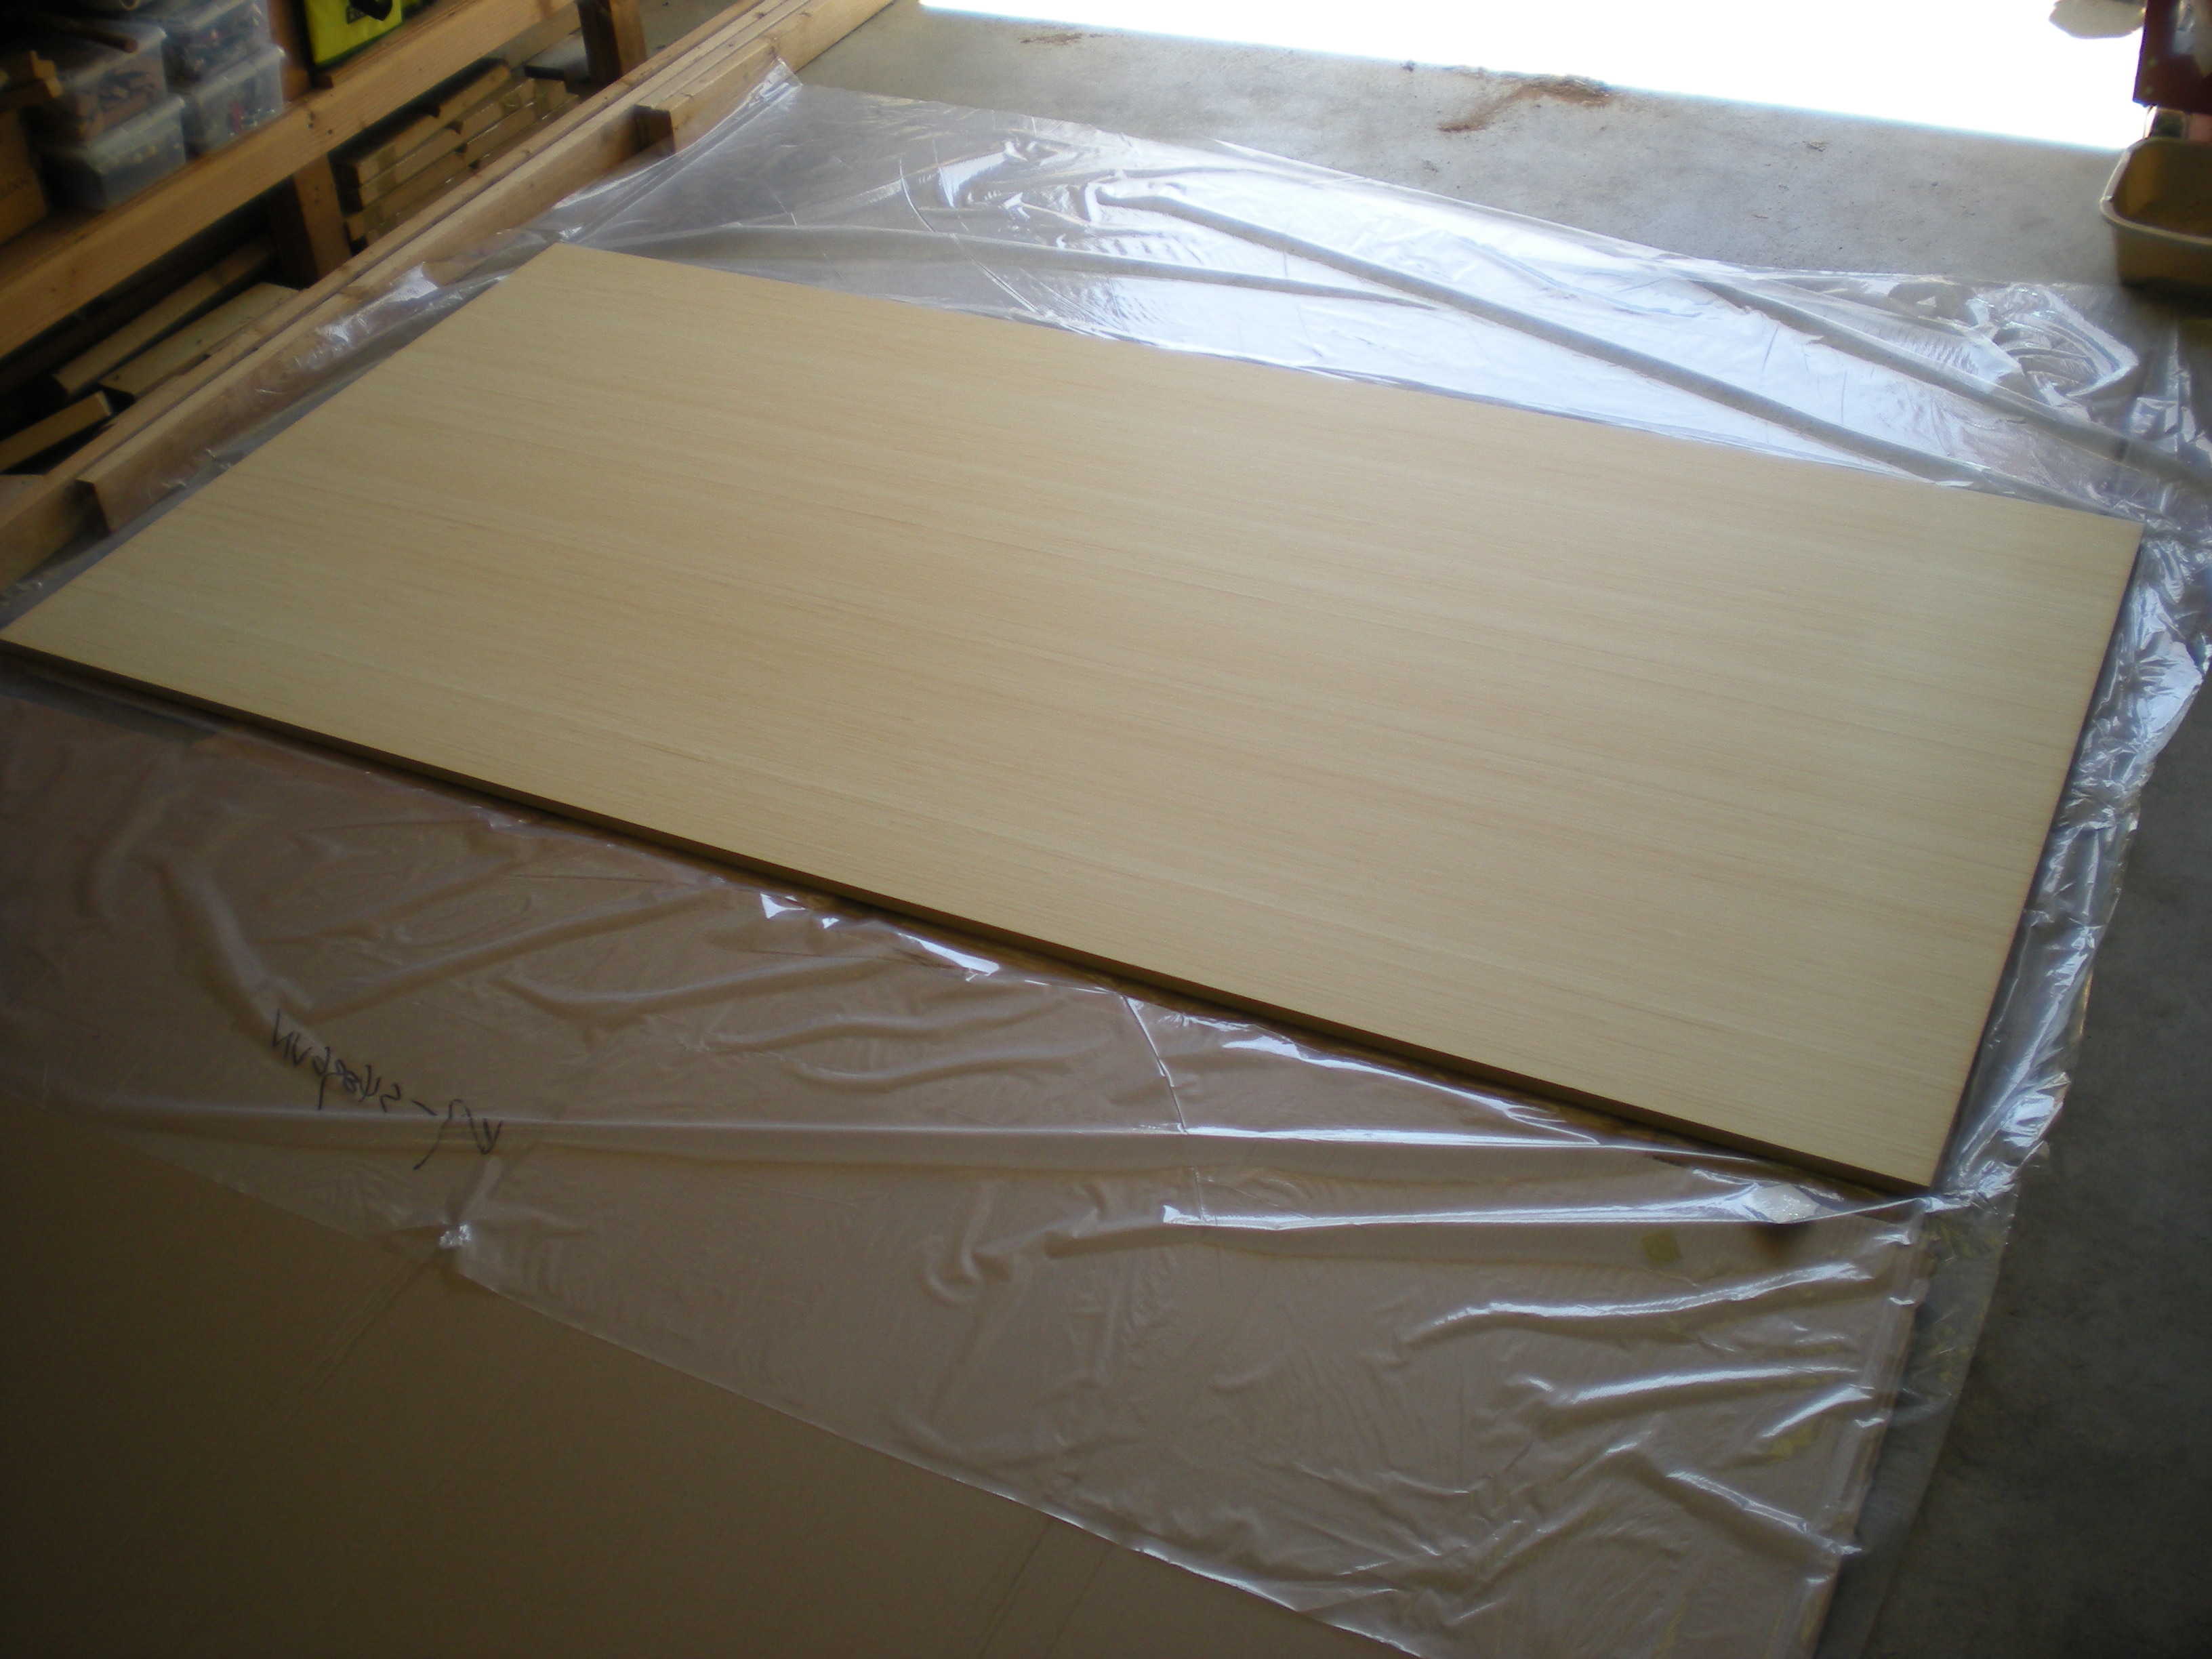
I like bamboo. It looks good. It’s sustainable. Thru Sonoma County Woodworker’s Association, I heard that local furniture and cabinet makers have been making stuff off of bamboo 8′x4′ plywood-like sheets. I looked into it, and found that some of the better ones appear to be Teragren and Plyboo. Both come in various grain patterns and colors. I got small 3”x3” samples of both, and liked them. I talked to Scott Clark at a meeting, and he was able to get a hold of a couple of 9”x9” scraps from a cabinet maker. I played with it, and I was able to make a solid mortice/tenon, and a decent dovetail. I decided to go for it, and ordered an 8′x4′ natural flat-grain Plyboo sheet from Mount Storm. With tax, it was about $250, so for a 32 square foot board it works out to about $8 per board foot – about mid-range for hardwood. Remember that there shouldn’t be any waste.
Turns out, a sheet weights ~90 lbs – ‘stuff it heavy! My dad was visiting when I picked up the sheet, so that came in handy. Here, we can see the entire sheet on the garage floor. Beautiful!
 As a first project, I decided to make a small side table for our media room – a top, four aprons, and four legs. It would be nice if it worked out well enough that we’d end up using it, but the main thing was to try to make a not-too-complicated piece of furniture and learn something about working with Plyboo sheets. I knew I’d have enough Plyboo to make three tables if needed, so the first one could be a prototype.
Time to cut! The 90 lb sheet wouldn’t work well on my little SawStop Jobsite saw, so I cross-cut the plyboo sheet with a skill saw to get a more manageable piece. This is a rough cut, and to add to that you’re cutting across grass fibers, so some fraying would be expected. Here’s the piece we hope will turn into a table.
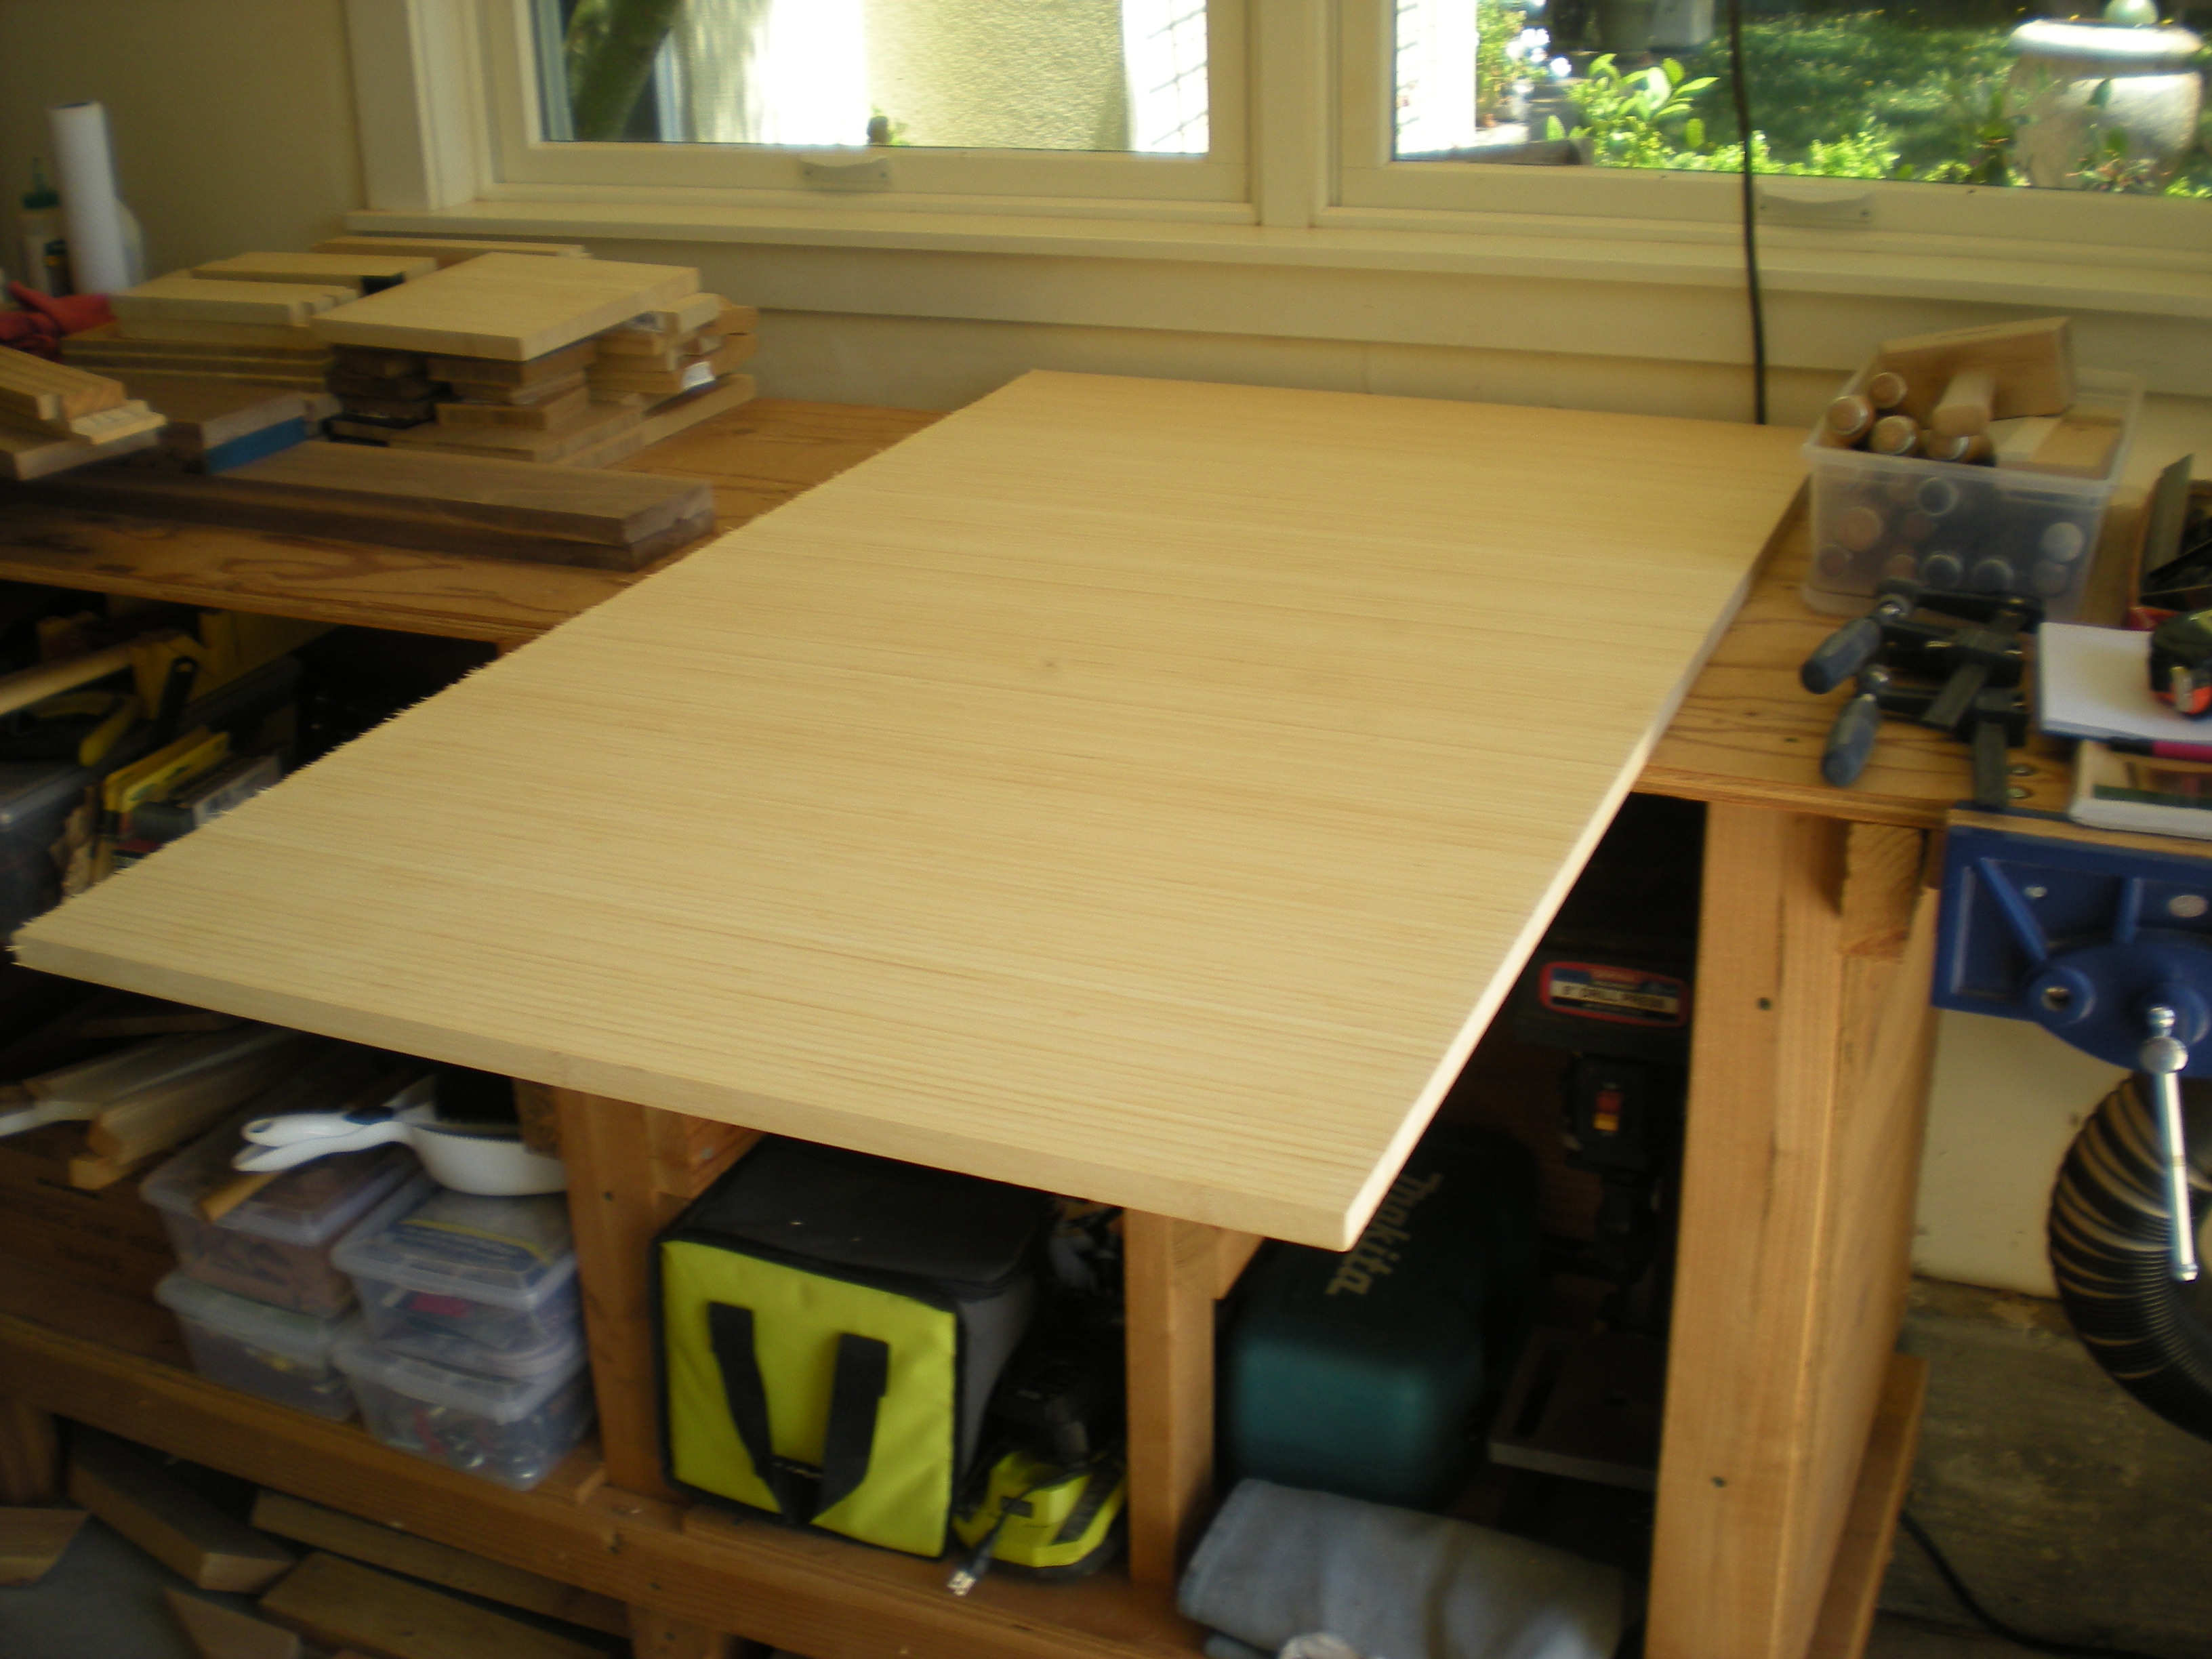 Next, I ripped it to separate the top. This was done on the table saw and is along the grass fibers. Very clean cut.
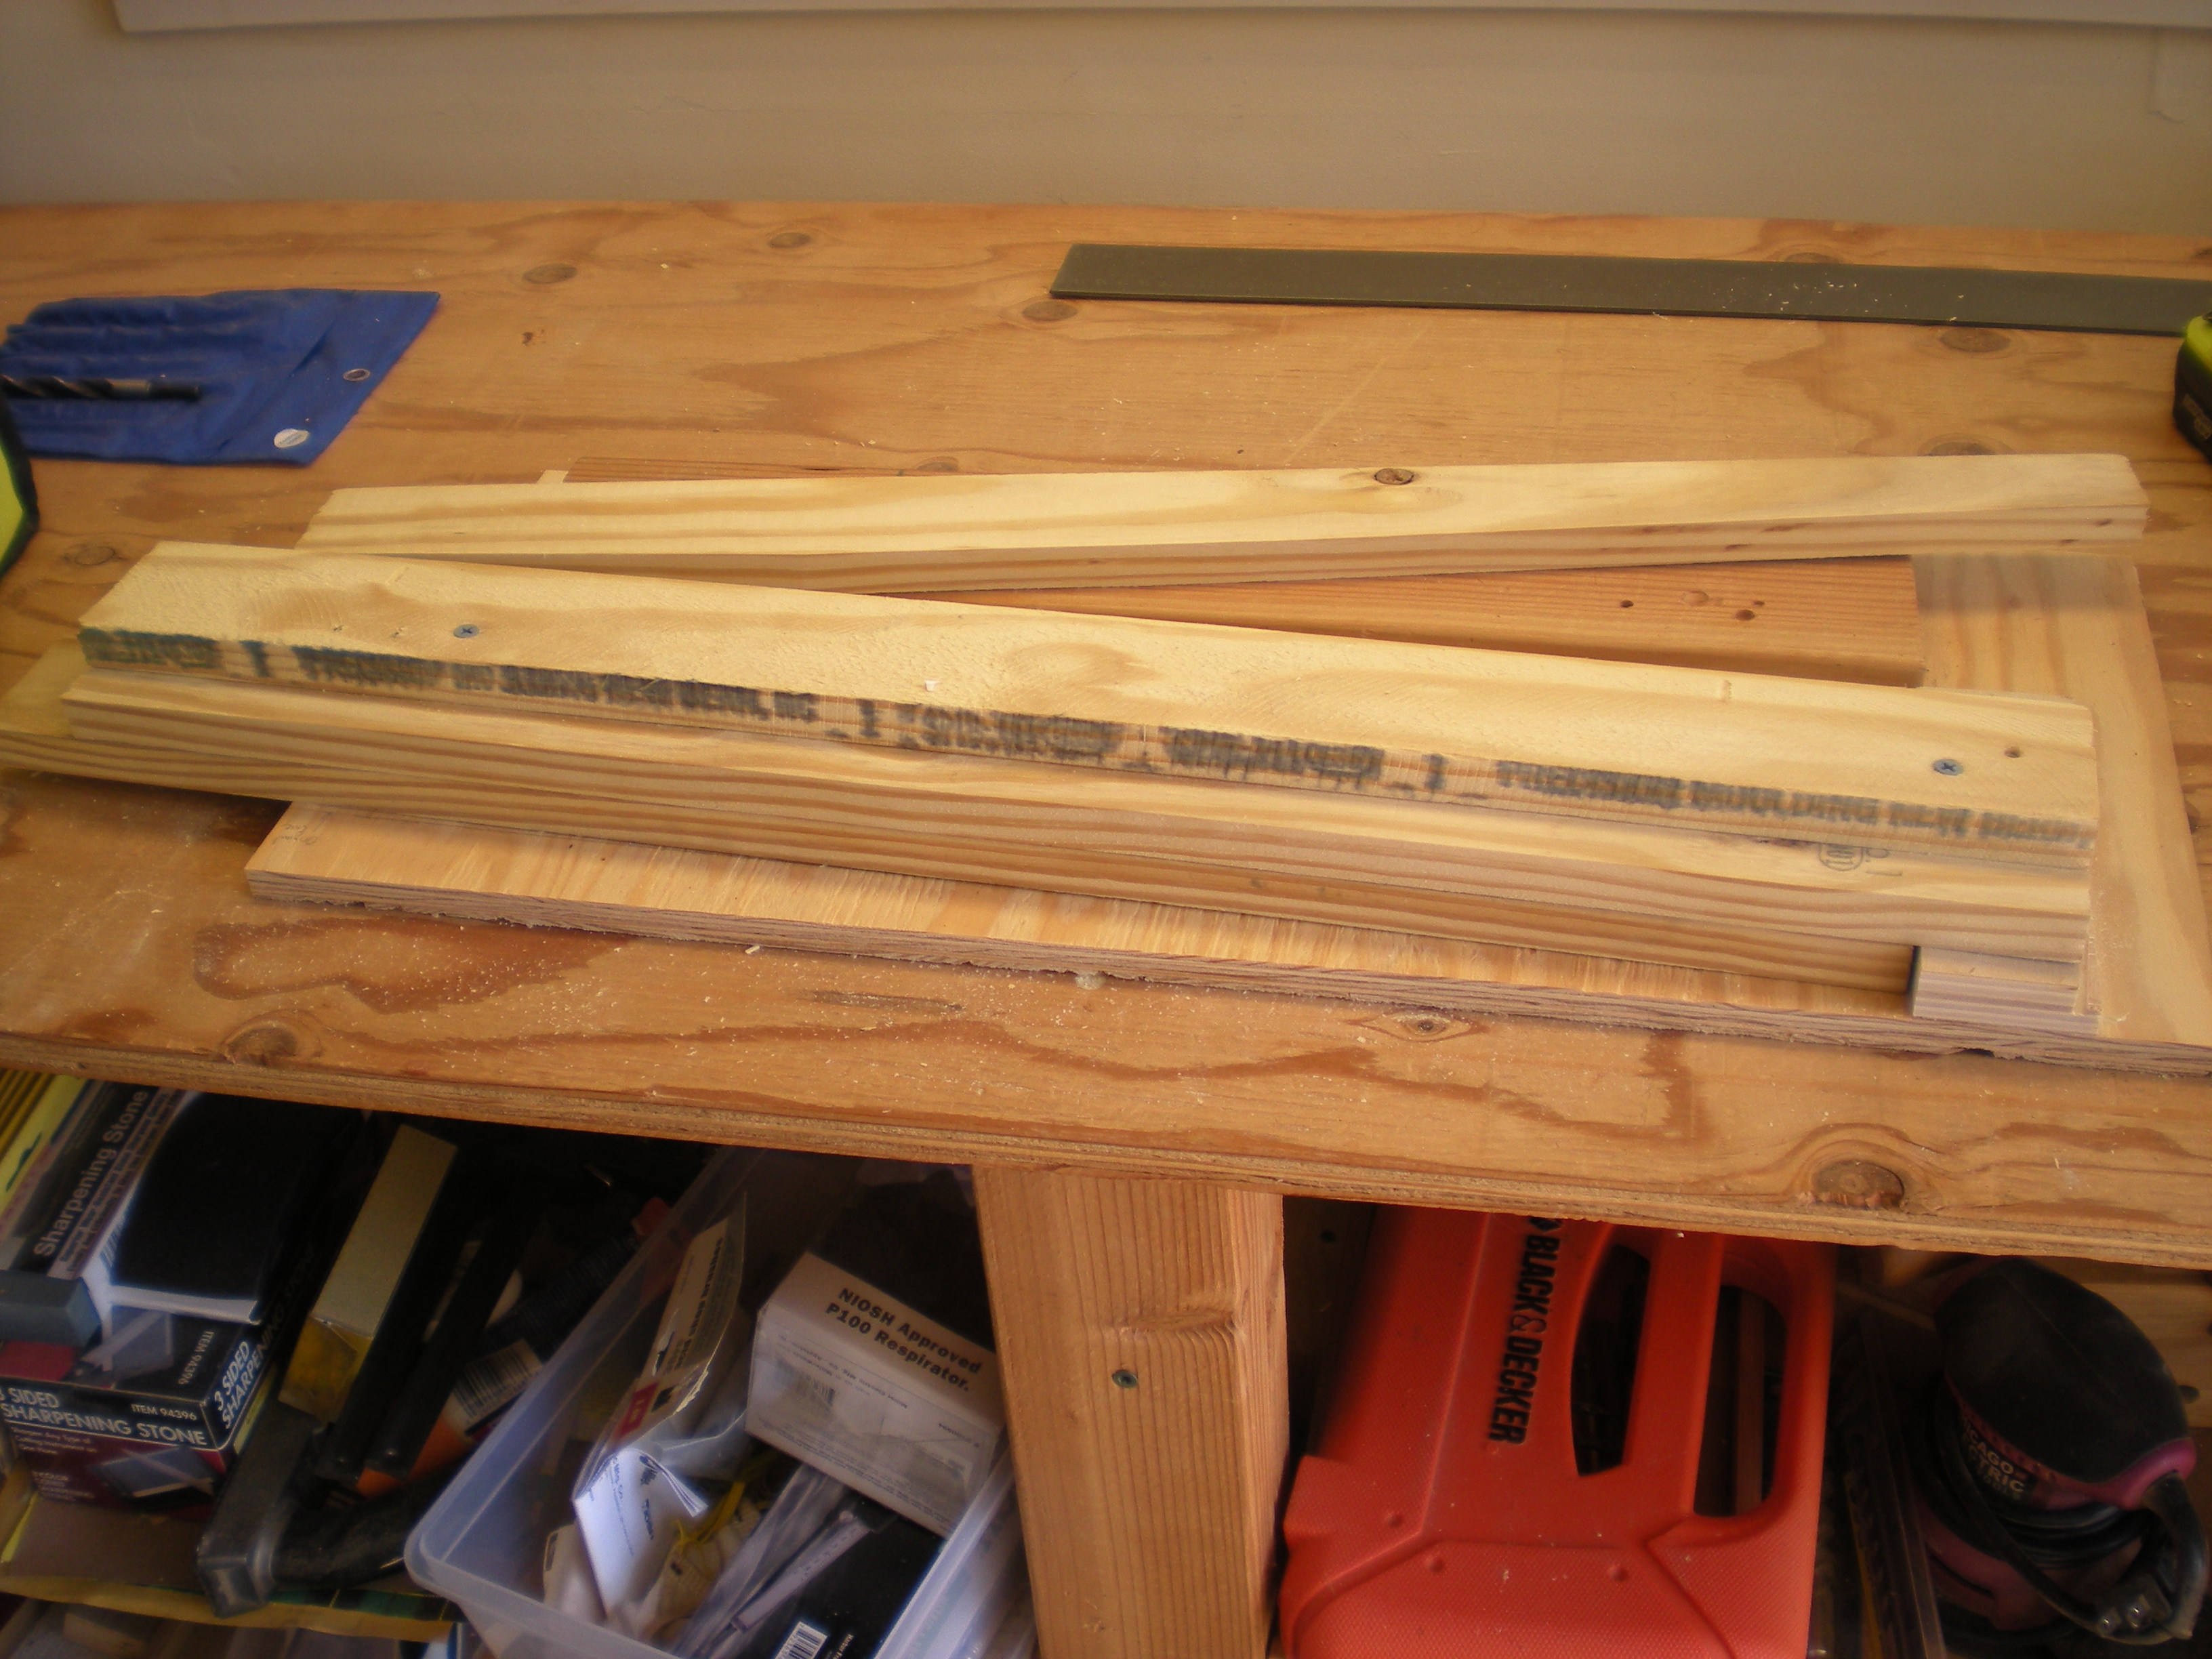
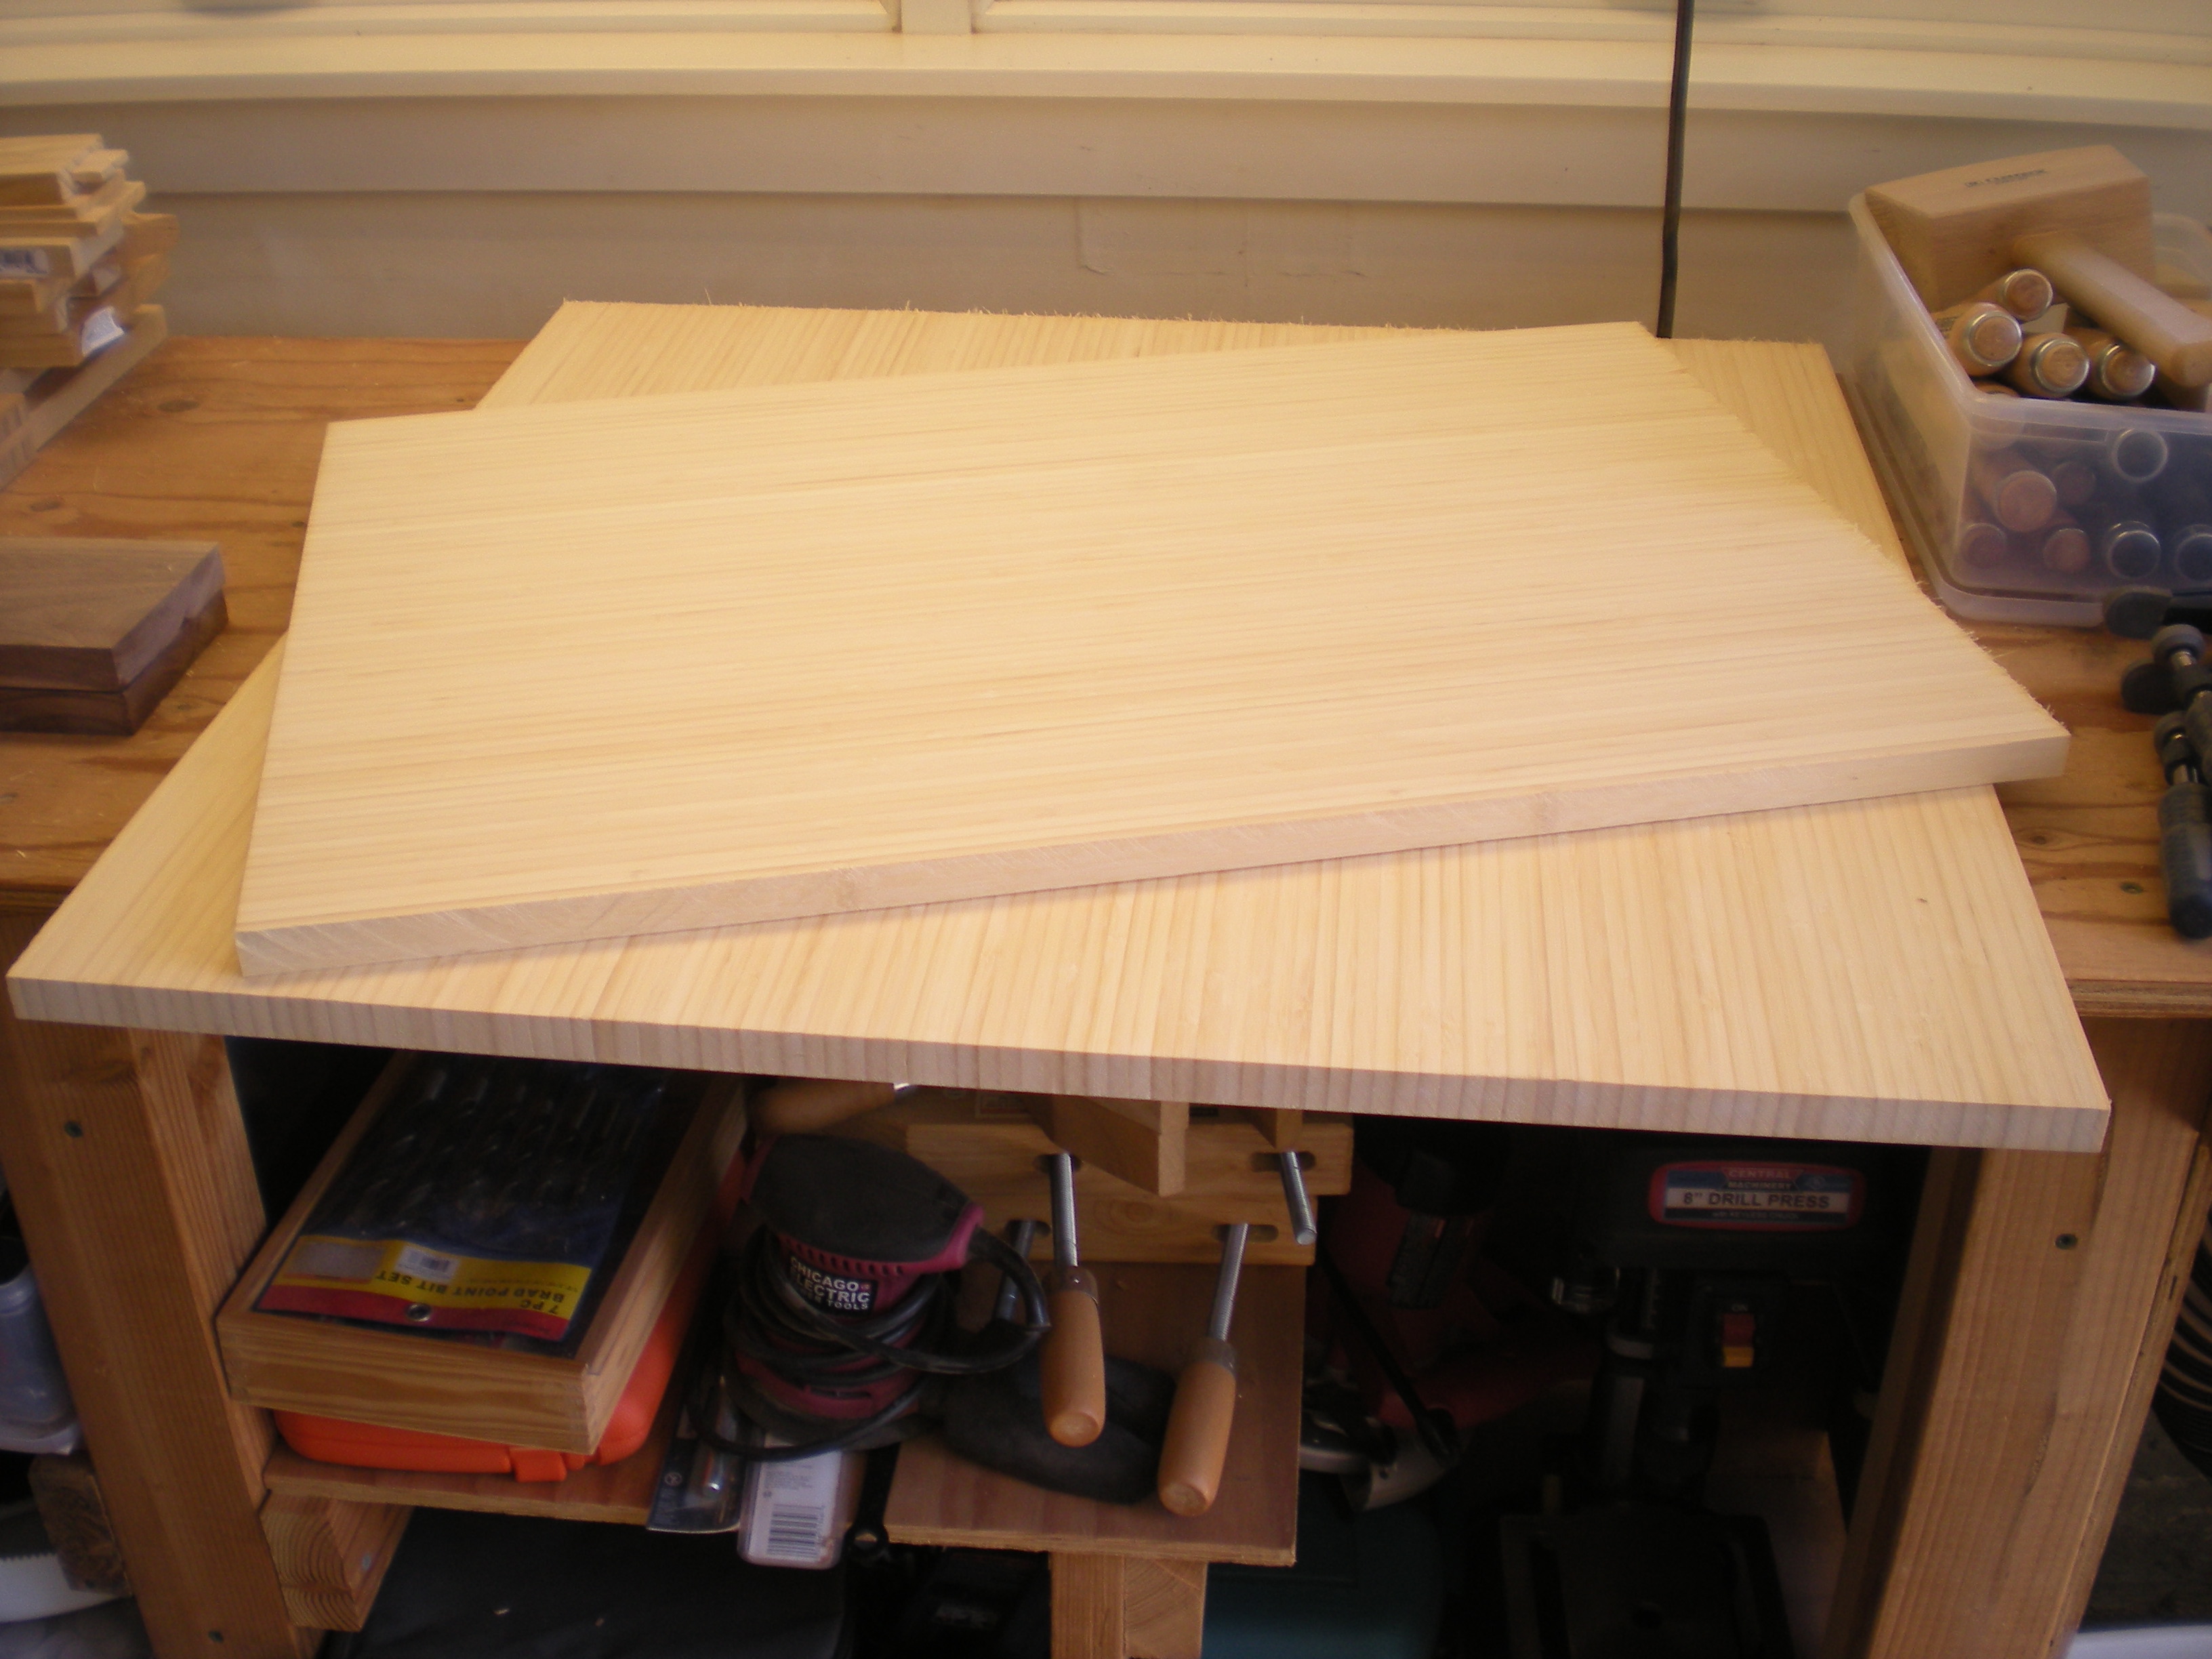 Same thing to get four apron, and two pieces which will become four legs.
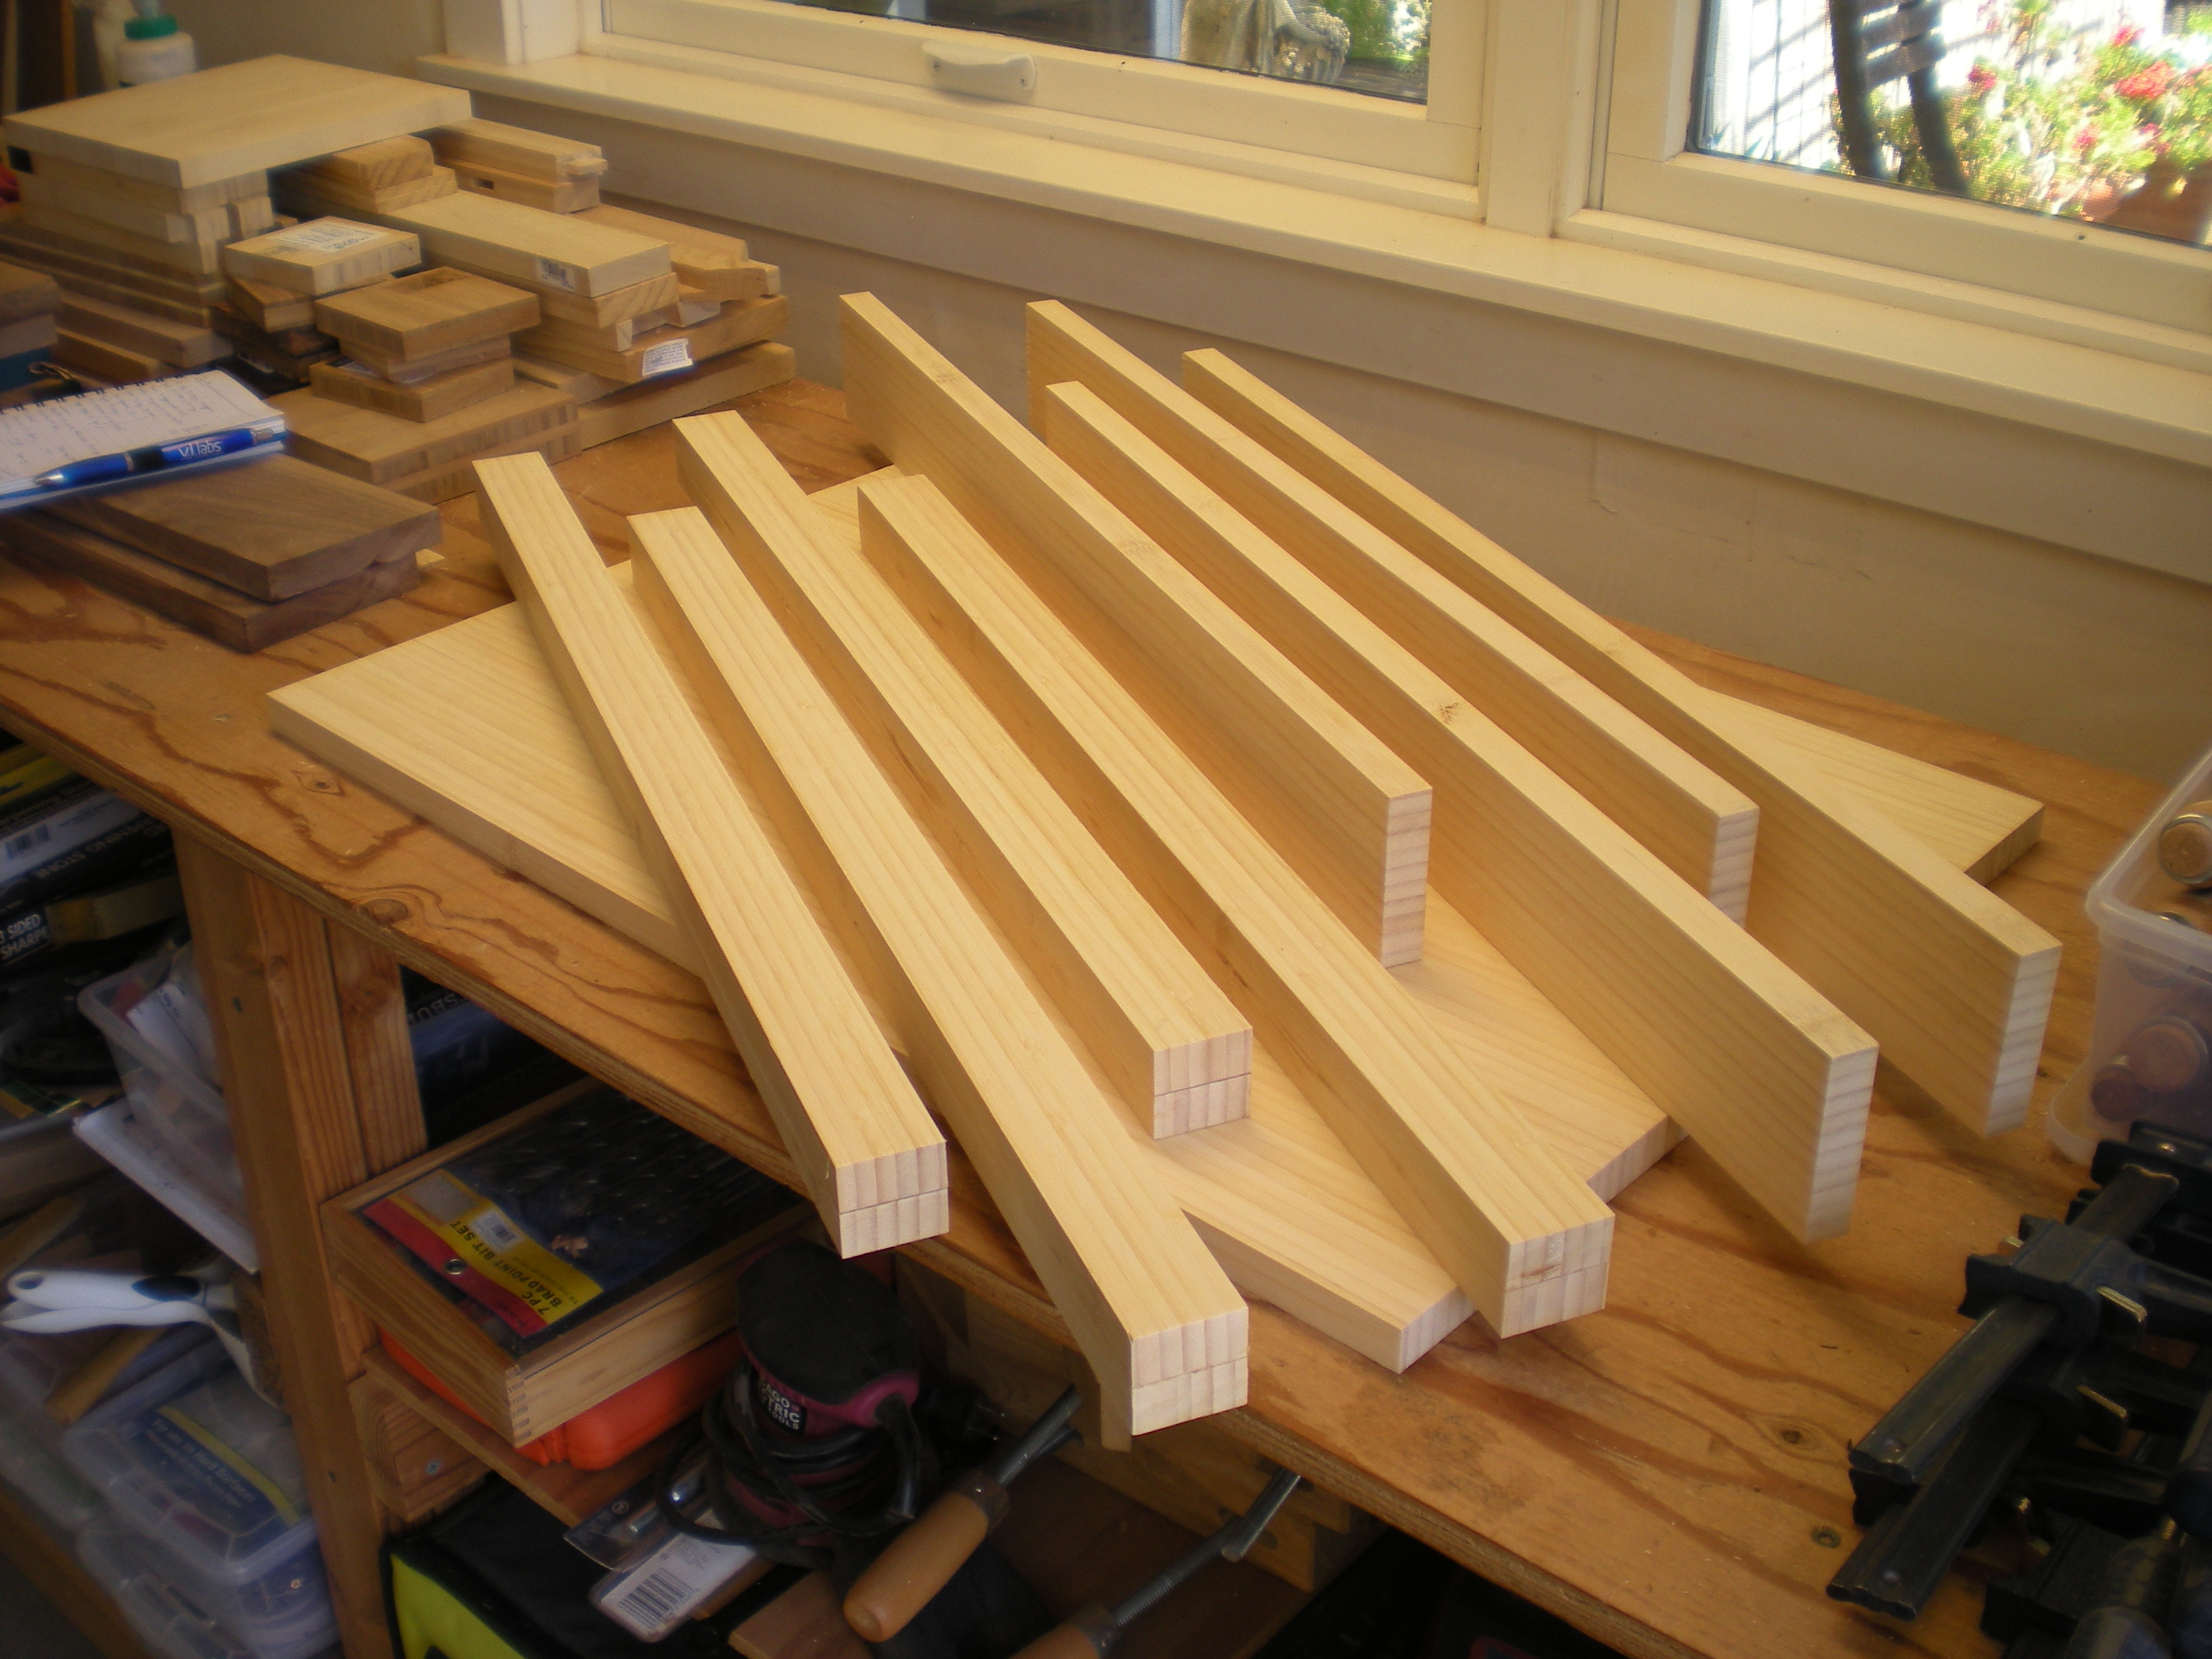
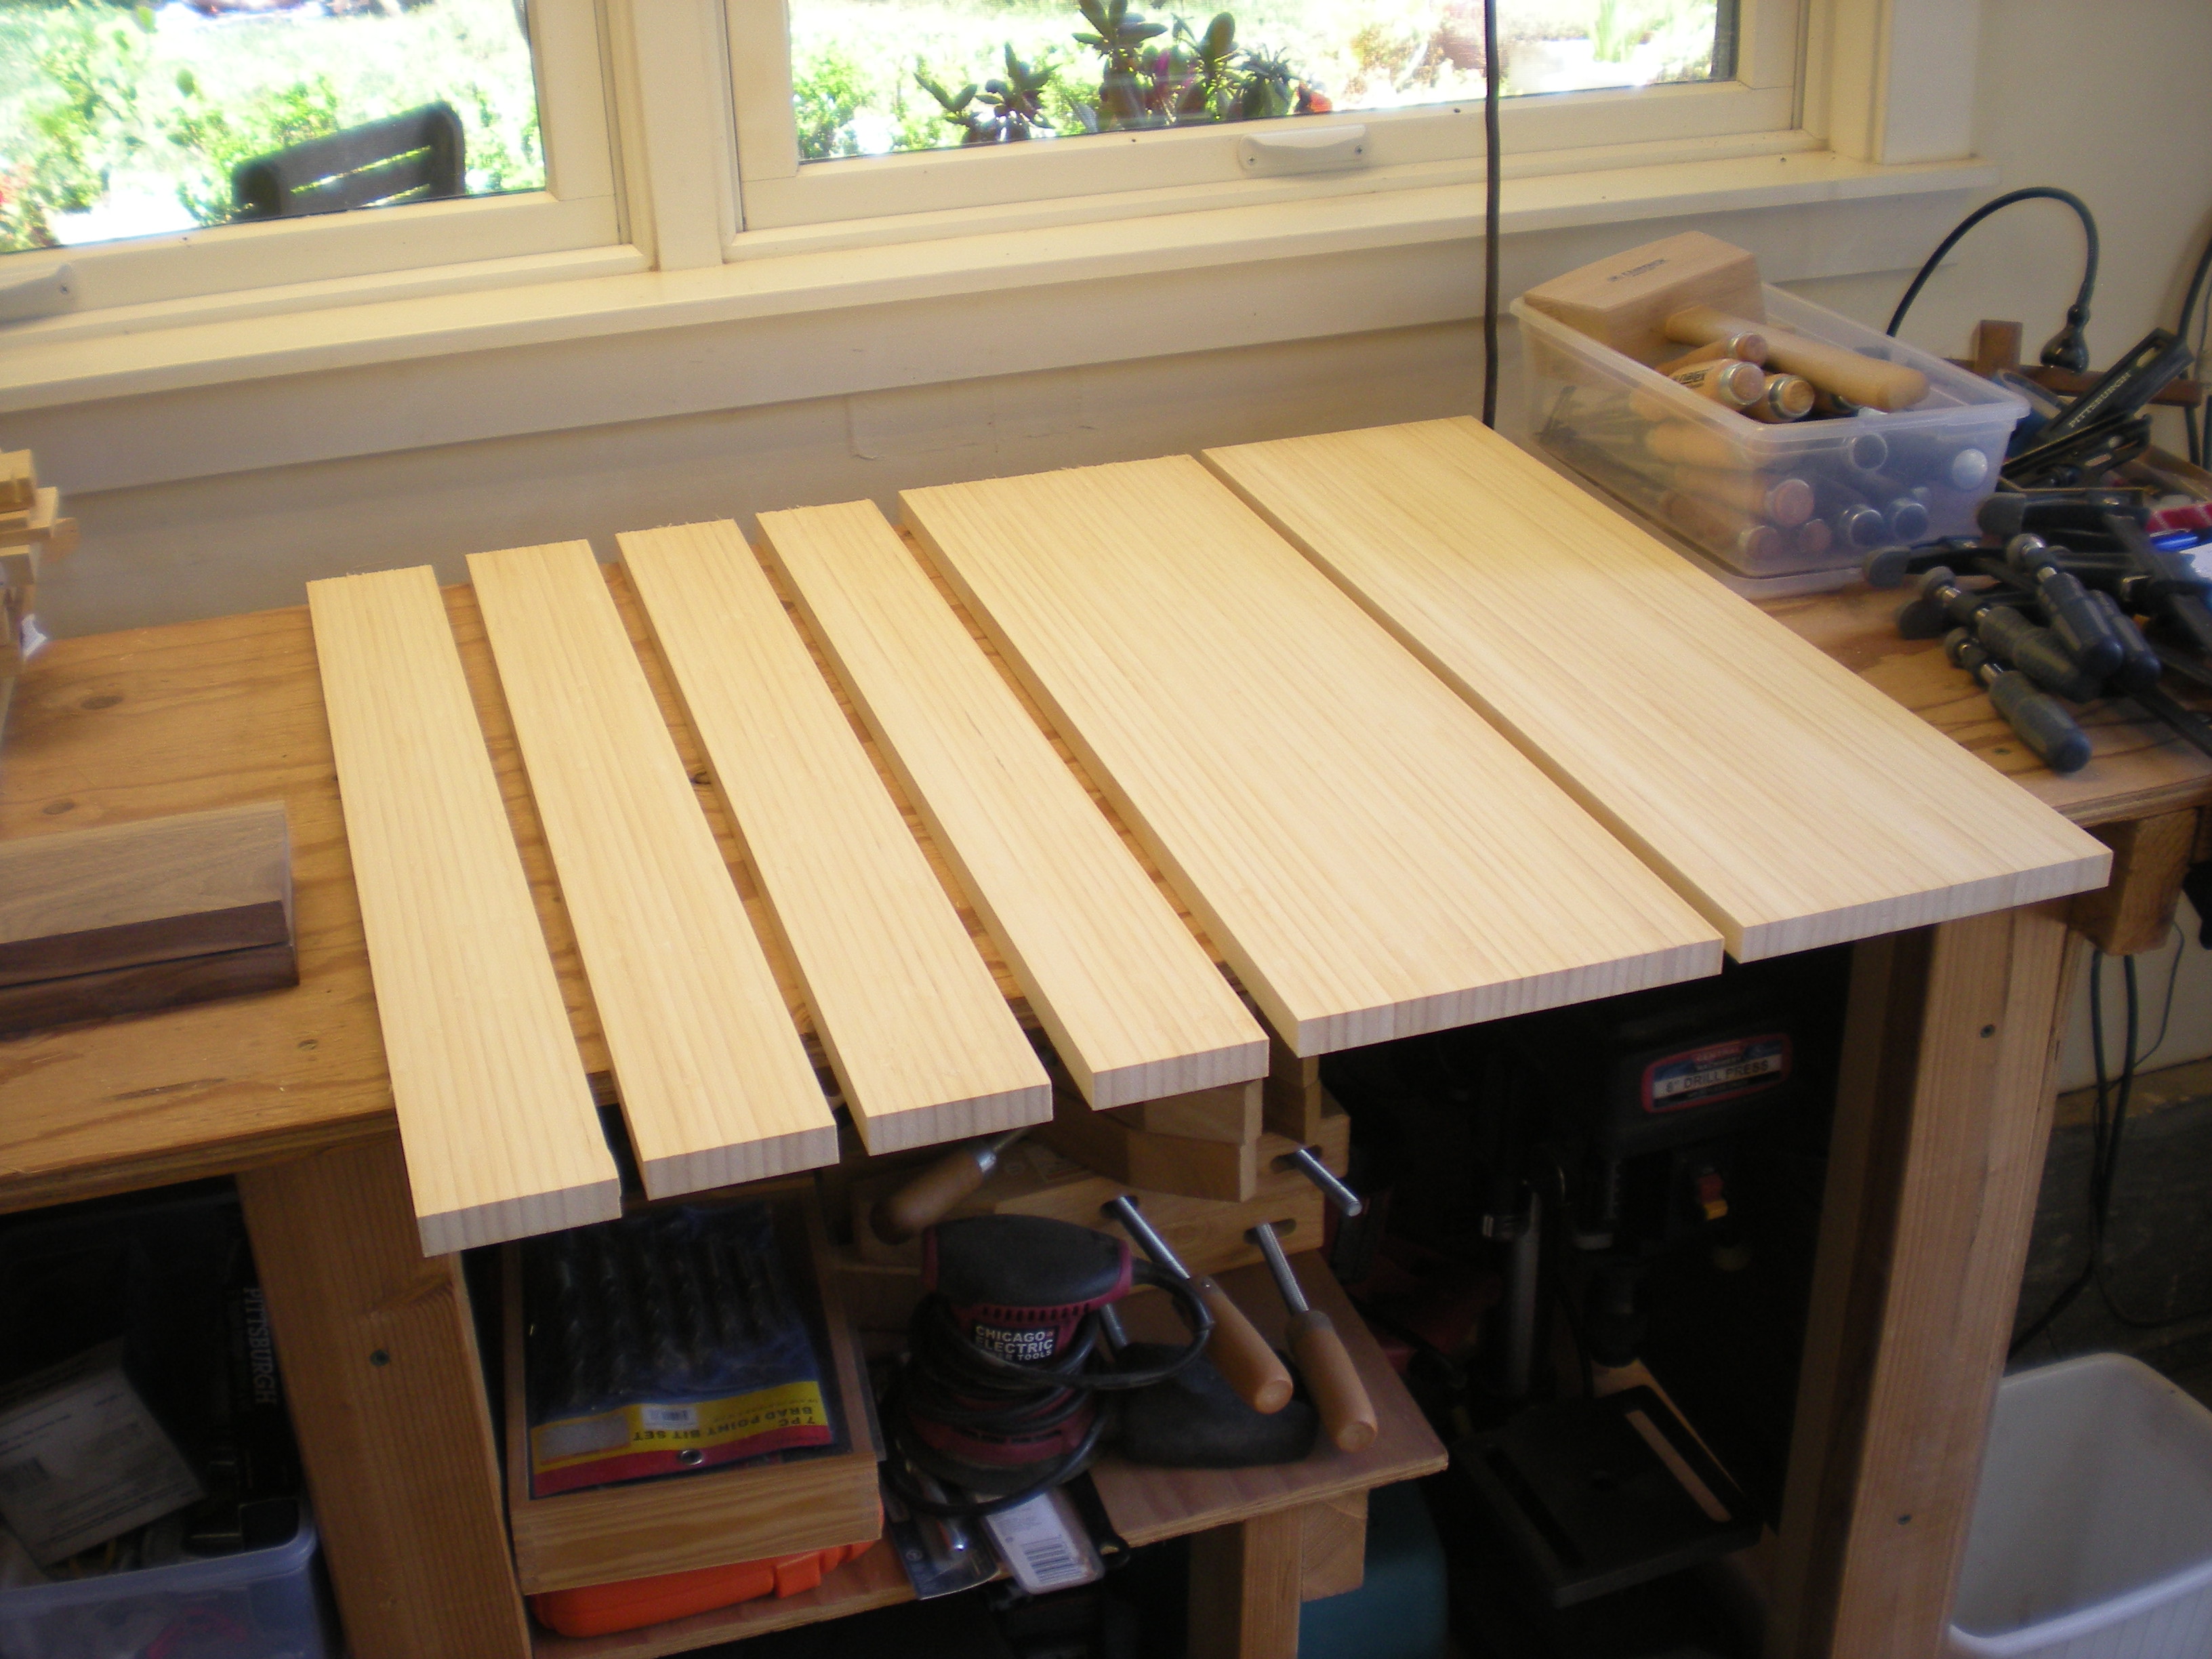 Plyboo does sell dimensional lumber, but an 8′ 2×2 is $22 and an 8′ 2×4 is $60. I’m too cheap for that, and decided to glue myself. I simply face-glued the two 0.75” pieces to get a 1.5” piece.
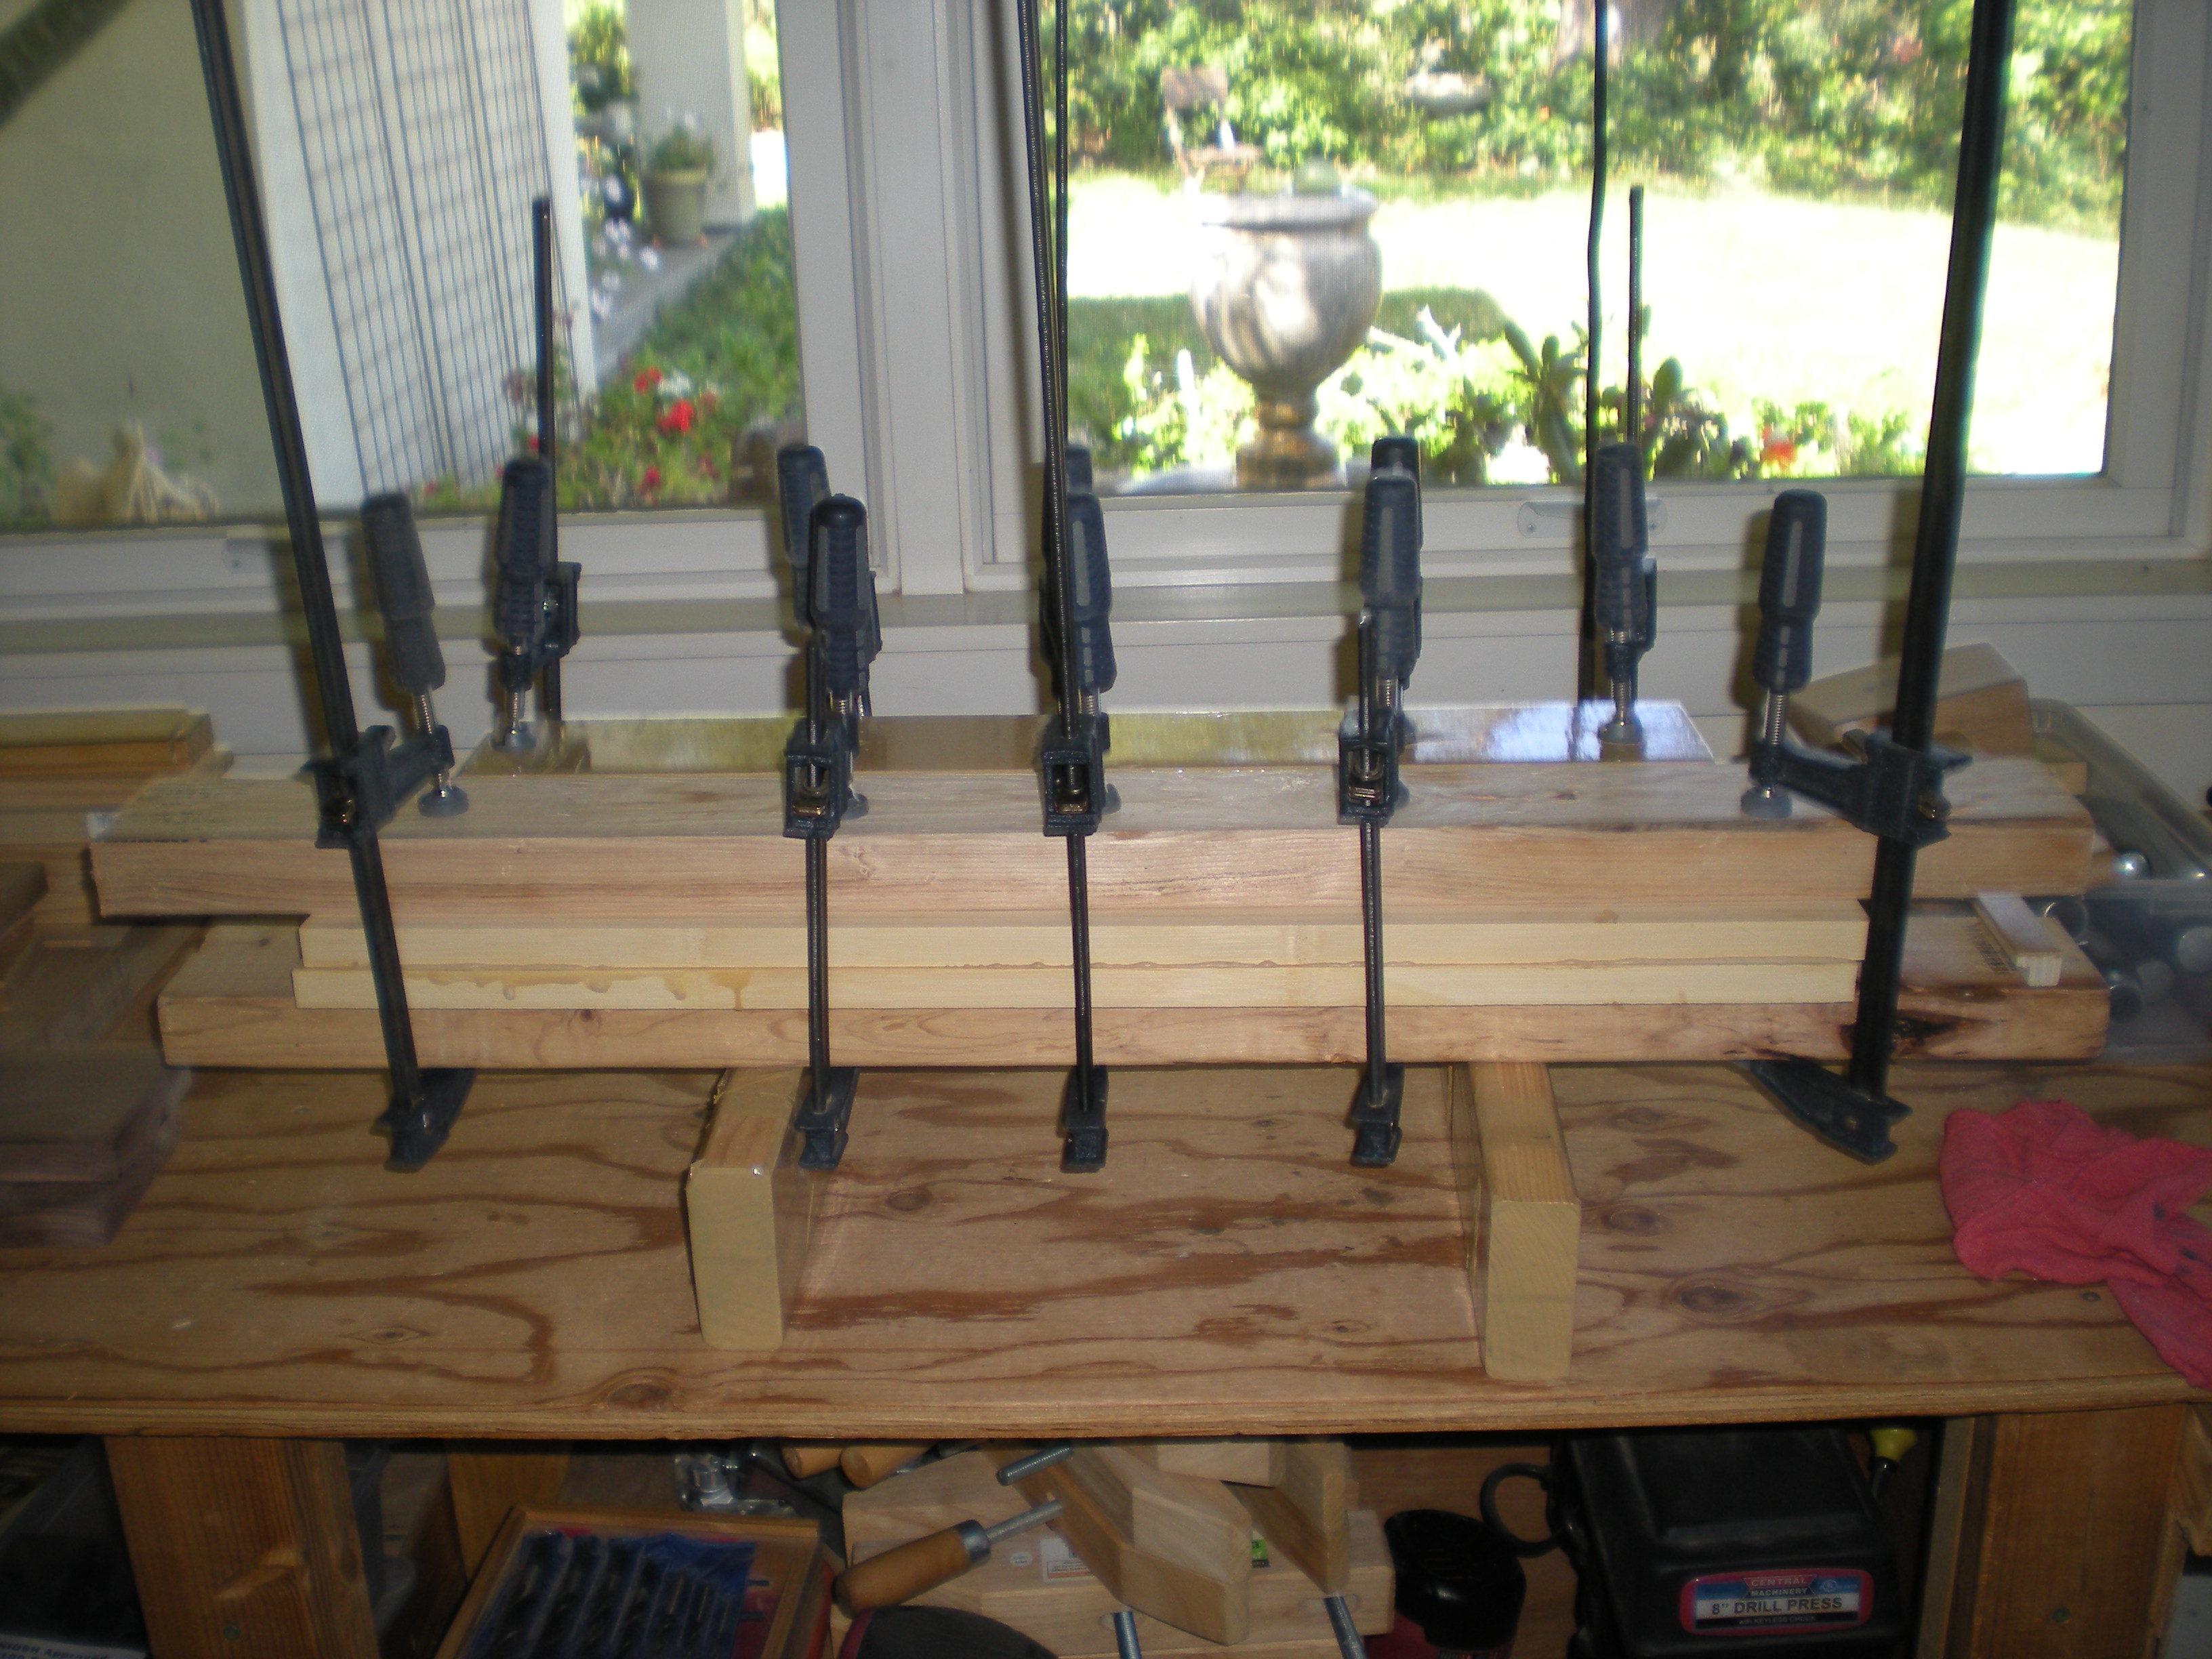 This did not work well. Maybe I had too much glue. Maybe I didn’t have enough clamps. In any case, there were slight gaps at the edges. We ripped them he next day, and the inside was super clean. The piece was wide enough to make five 1.5”x1.5” legs, so I do have a spare. Next time, I think I’ll do this differently. In any case, here are the nine pieces which we hope will turn into a table.
 The table will go next to a deep couch in our media room. We spent a lot of time toying with different sizes and design variations. How wide should it be? How deep should it be? Should the edge of the table be beveled? How aggressively? Should the top float? How much of an overhang do we want – if any? How wide should the aprons be? How tall should the table be? How aggressively should we taper the legs?
We settled on a top with a slight bevel and overhang. Same with the legs – a slight taper. Aprons are countersunk, and joined to the legs with mortises/tenons. I have not decided whether to make traditional mortices/tenons, or open at the top. I also have not decided how to attach the top to the base. I’m thinking about extending each leg above the aprons, and then cut four mortises in the top. I’m not sure if this is and odd choice, or not. I’m not sure how much Plyboo moves with weather/moisture/temperature, but it seems it might be too rigid. I could use pocket hole screws, but not sure I like that idea. I may get some figure-of-eight shaped hardware, and use those.
As far as dimensions, we think the top will be 15.5”x24”x0.75”. After I planed the legs to remove some burn marks from the table saw, the final leg dimensions are 1.4375” x 1.5”. I’ll cut it to 23.25” long later. The aprons are 3”x0.75”. Assuming a 1” overhang all-around, the outside dimensions of the base is 13.5”x22′. For the long aprons, we back off 2×1.5”=3” to get to 19”. Add to this 0.75” for each tenon, and we are at 20.5” long. For the short aprons, we back off 2×1.4375” to get to 10.625”. Add to this 0.75” for each tenon, and we are at 12.125” long. The tenons are all 0.75” long and 0.25” wide. That makes each shoulder 0.25” also. We countersink the apron 0.125” from the face, so each 0.25” mortise should be 0.375” from the edge of the leg. I think I will make the mortise top open – much easier with the router, and just as good. I’m planning to make each mortise 2.5” long. That means the shoulder at the bottom of each tenon will be 0.5” deep.
A nice thing about this design is its flexibility. We (that means my wife!) are not sure if a 3” apron is too wide. This way, it’s made 3” wide, and we can look at it, but if it’s too much I can simply rip each apron at the top and cross-cut the top of each leg, and we now have a table base with a smaller apron. Step-repeat of needed. This is Agile Woodworking, for those of you who know about software development!
First I routed the eight mortises, and squared them up with a chisel. Then I cut the tenons with a table saw, a tenoning jig and a miter gauge. For the tenons, first I got the right length with a fence and a little piece of scrap wood. Then I cut the 0.25” shoulder, flipped it, and cut the other 0.25” shoulder. With the same fence setting, I increased the blade to 0.5”, and cut the 0.5” shoulder. Then I removed the fence, and removed the remaining wood at the shoulder. Finally, with the tenoning jig, I cut the faces. I first cut each side a bit wide, then I snuck up on a tight fit. At the end, I did a bit of clean-up and fitting with a chisel.
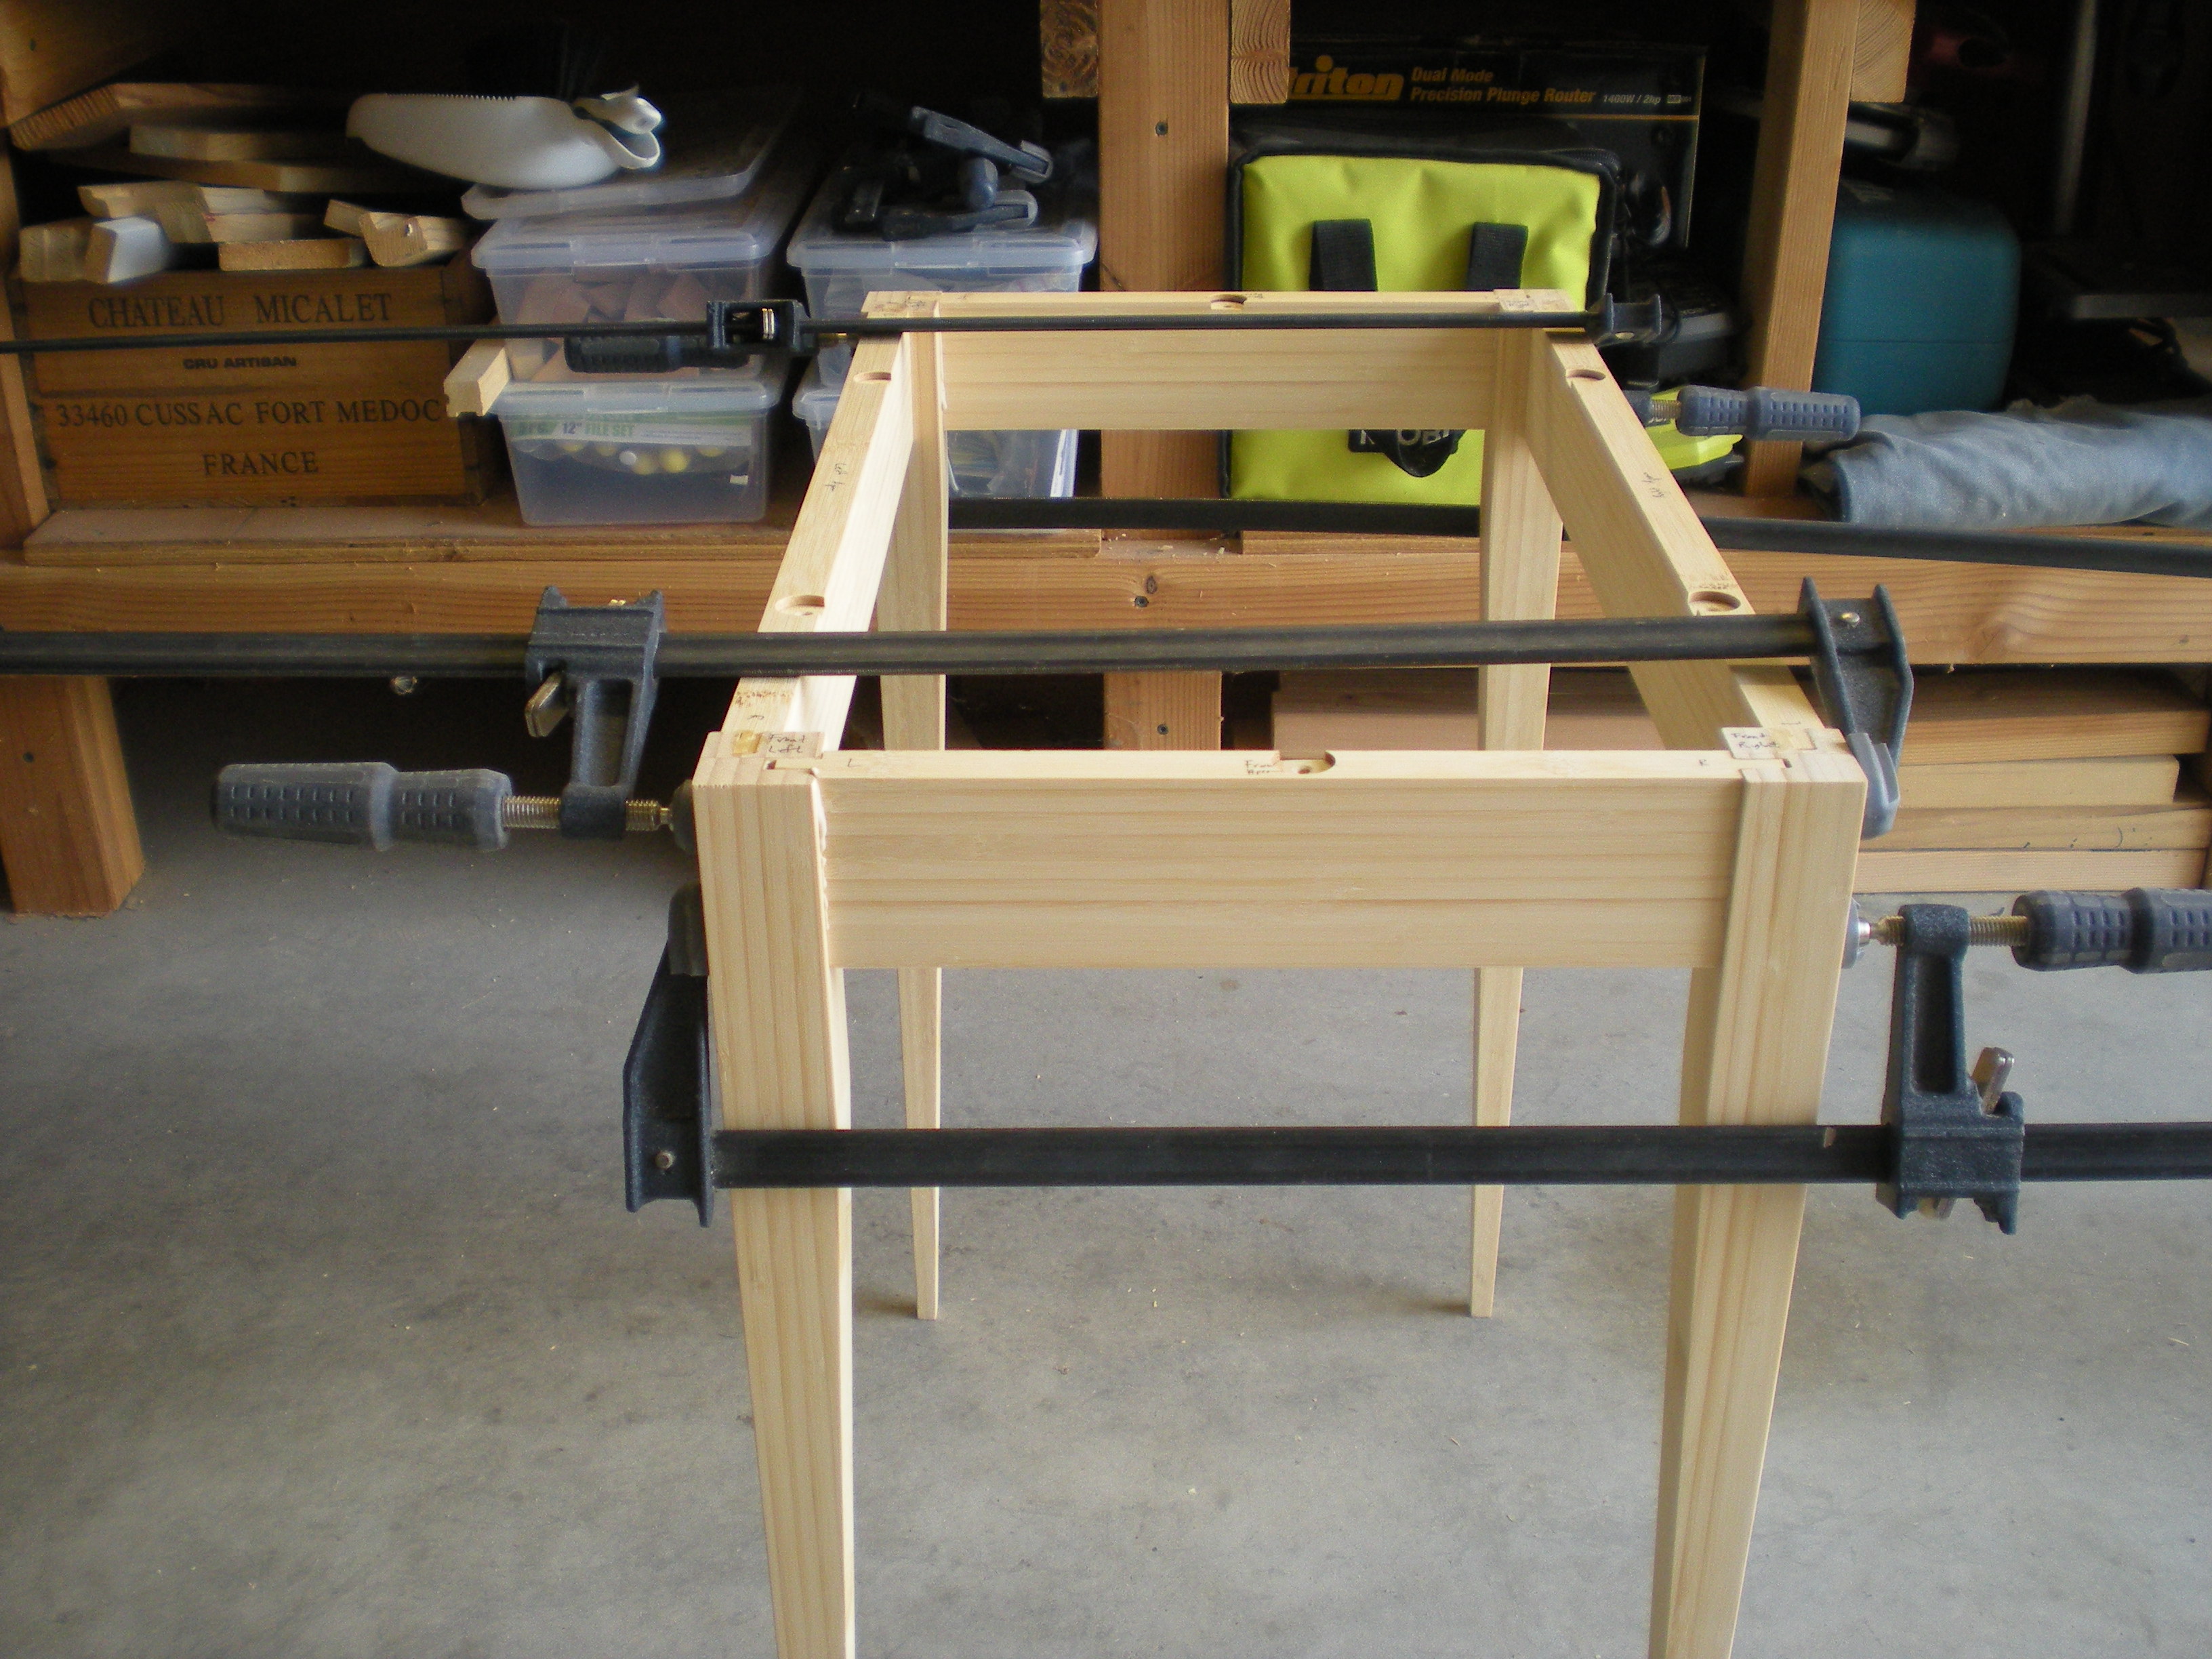
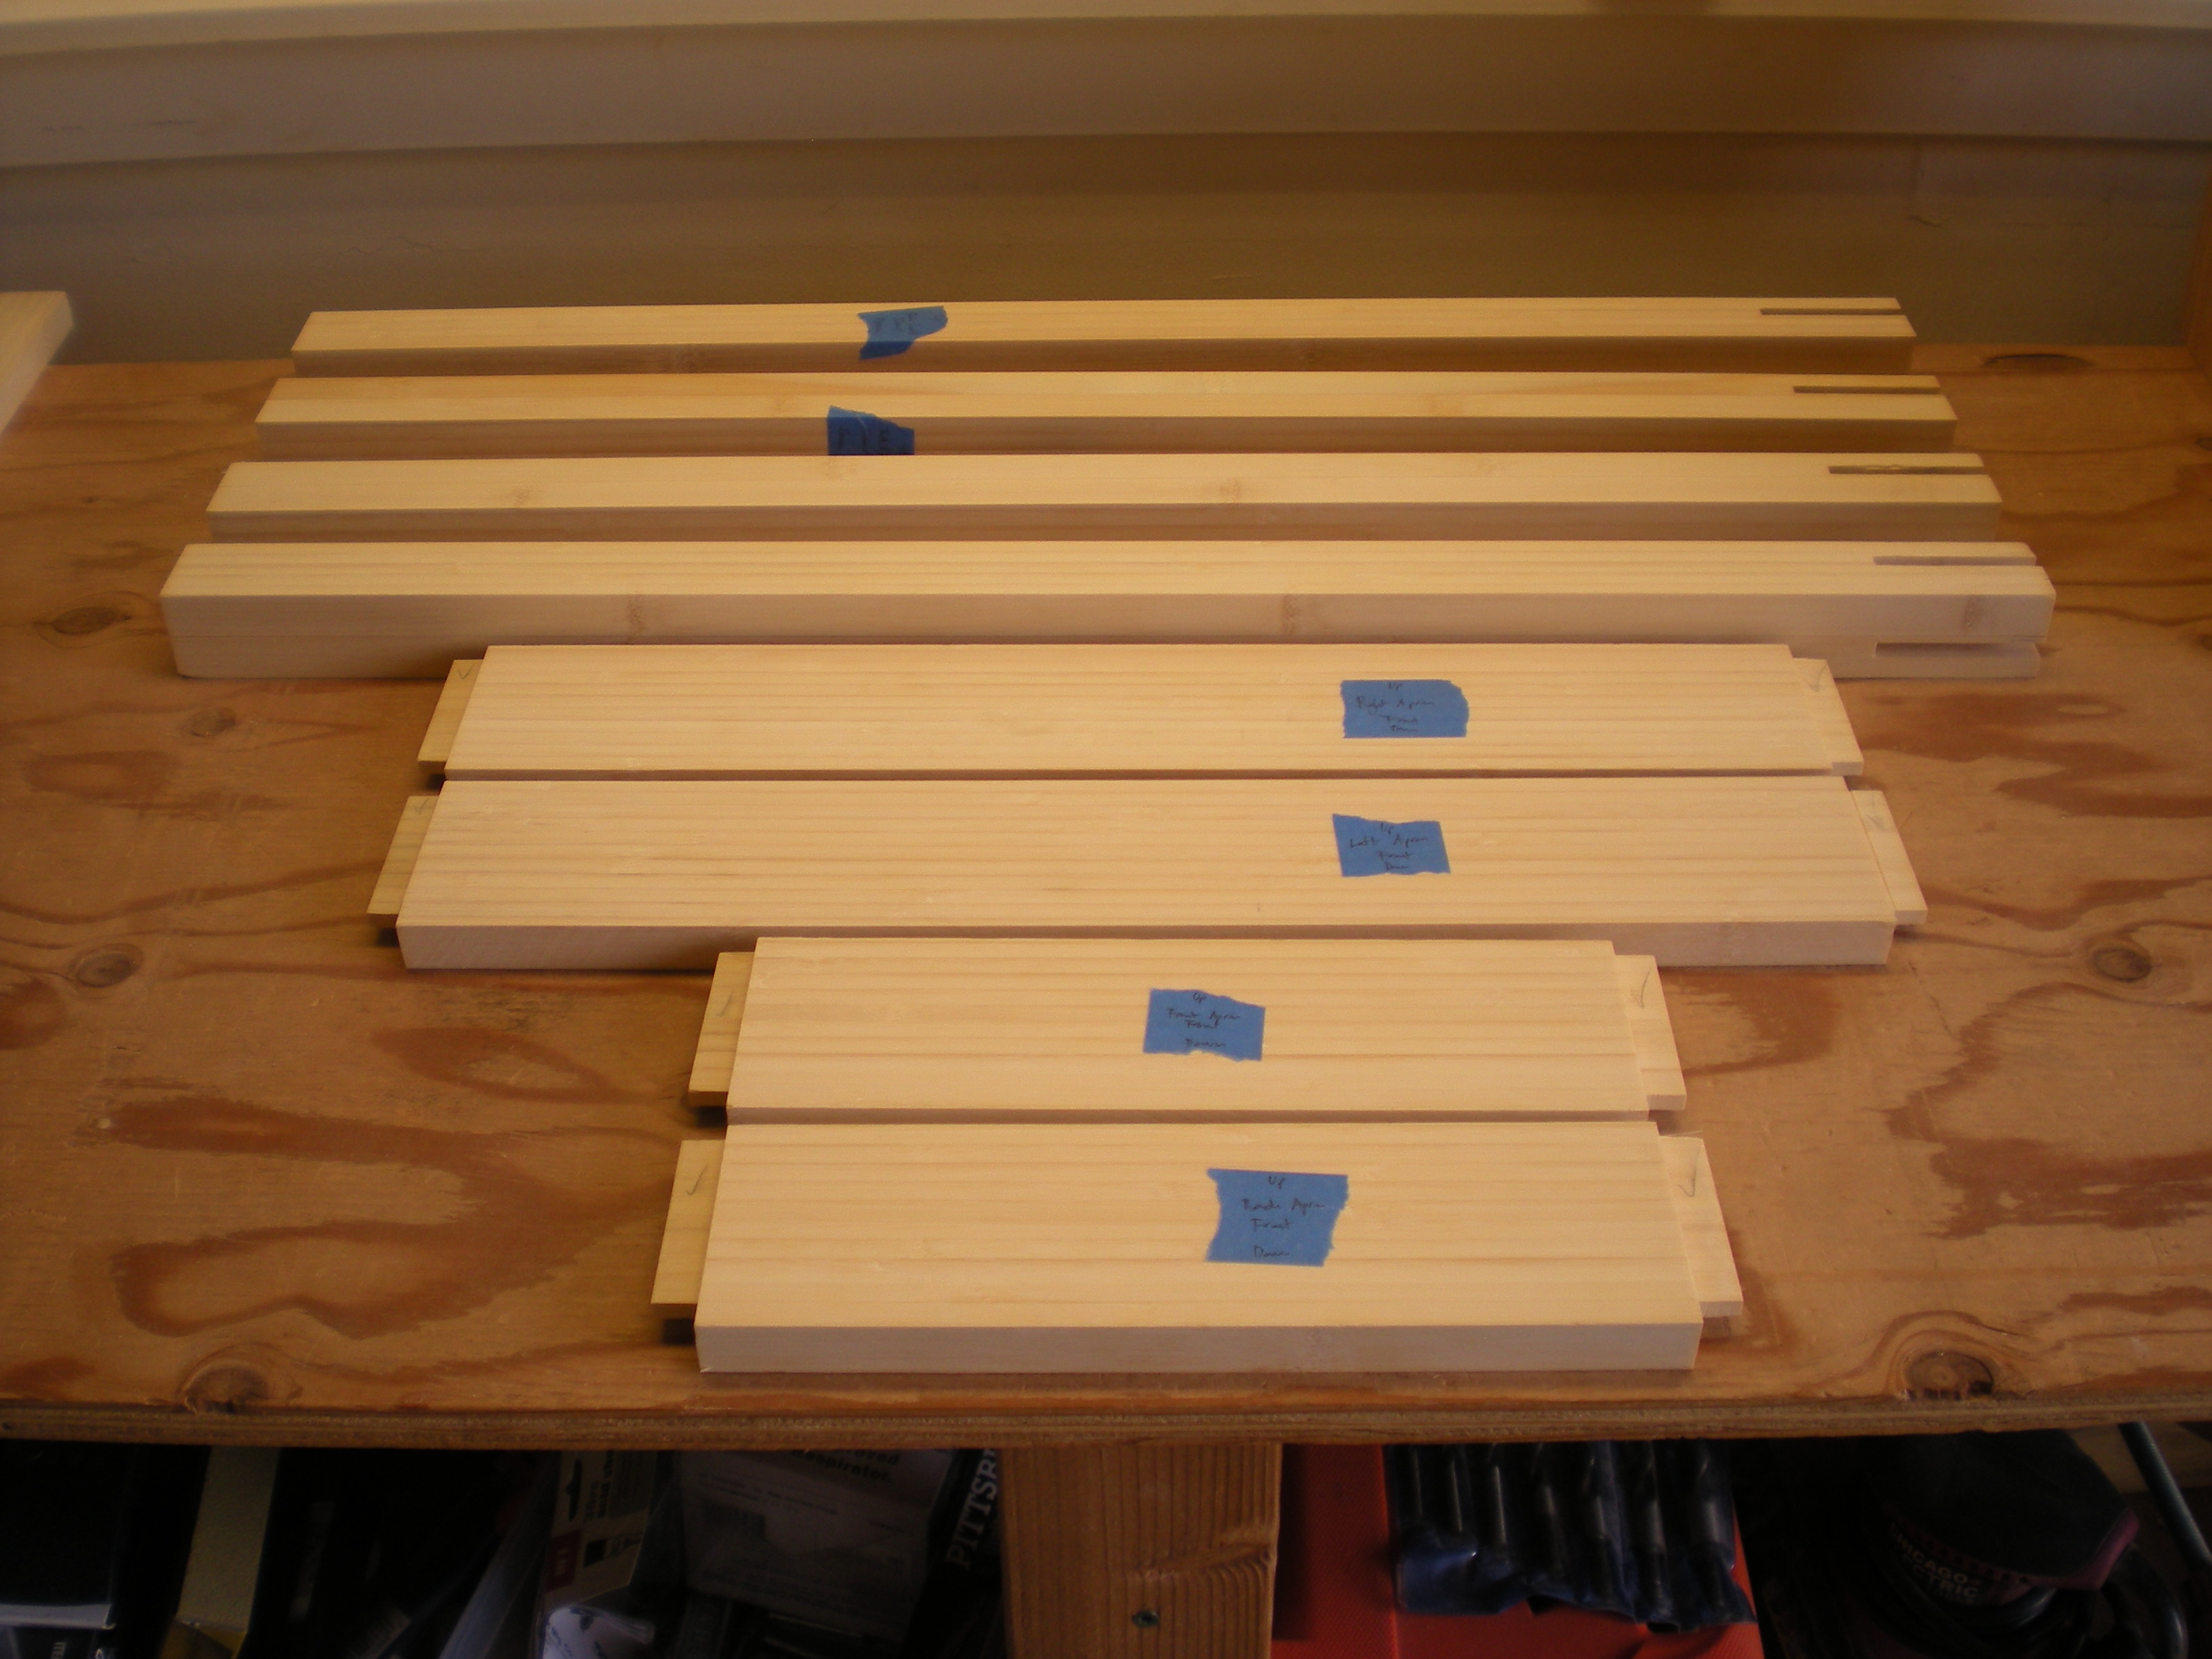 At this point, I was able to dry-fit the base. It came together cleanly. I took it to our media room, we laid the top on, and we looked at it. We knew it needed to be lower, so for now I trimmed 3” off each leg. We also knew the top needed to be narrower, so I ripped that to final 15.5” width. Finally, we decided to make the aprons a bit thinner. For now, I ripped each apron to 2.5”, and cut 0.5” of the top of each leg. We will decide later whether we need another 0.25” to 0.5” off.
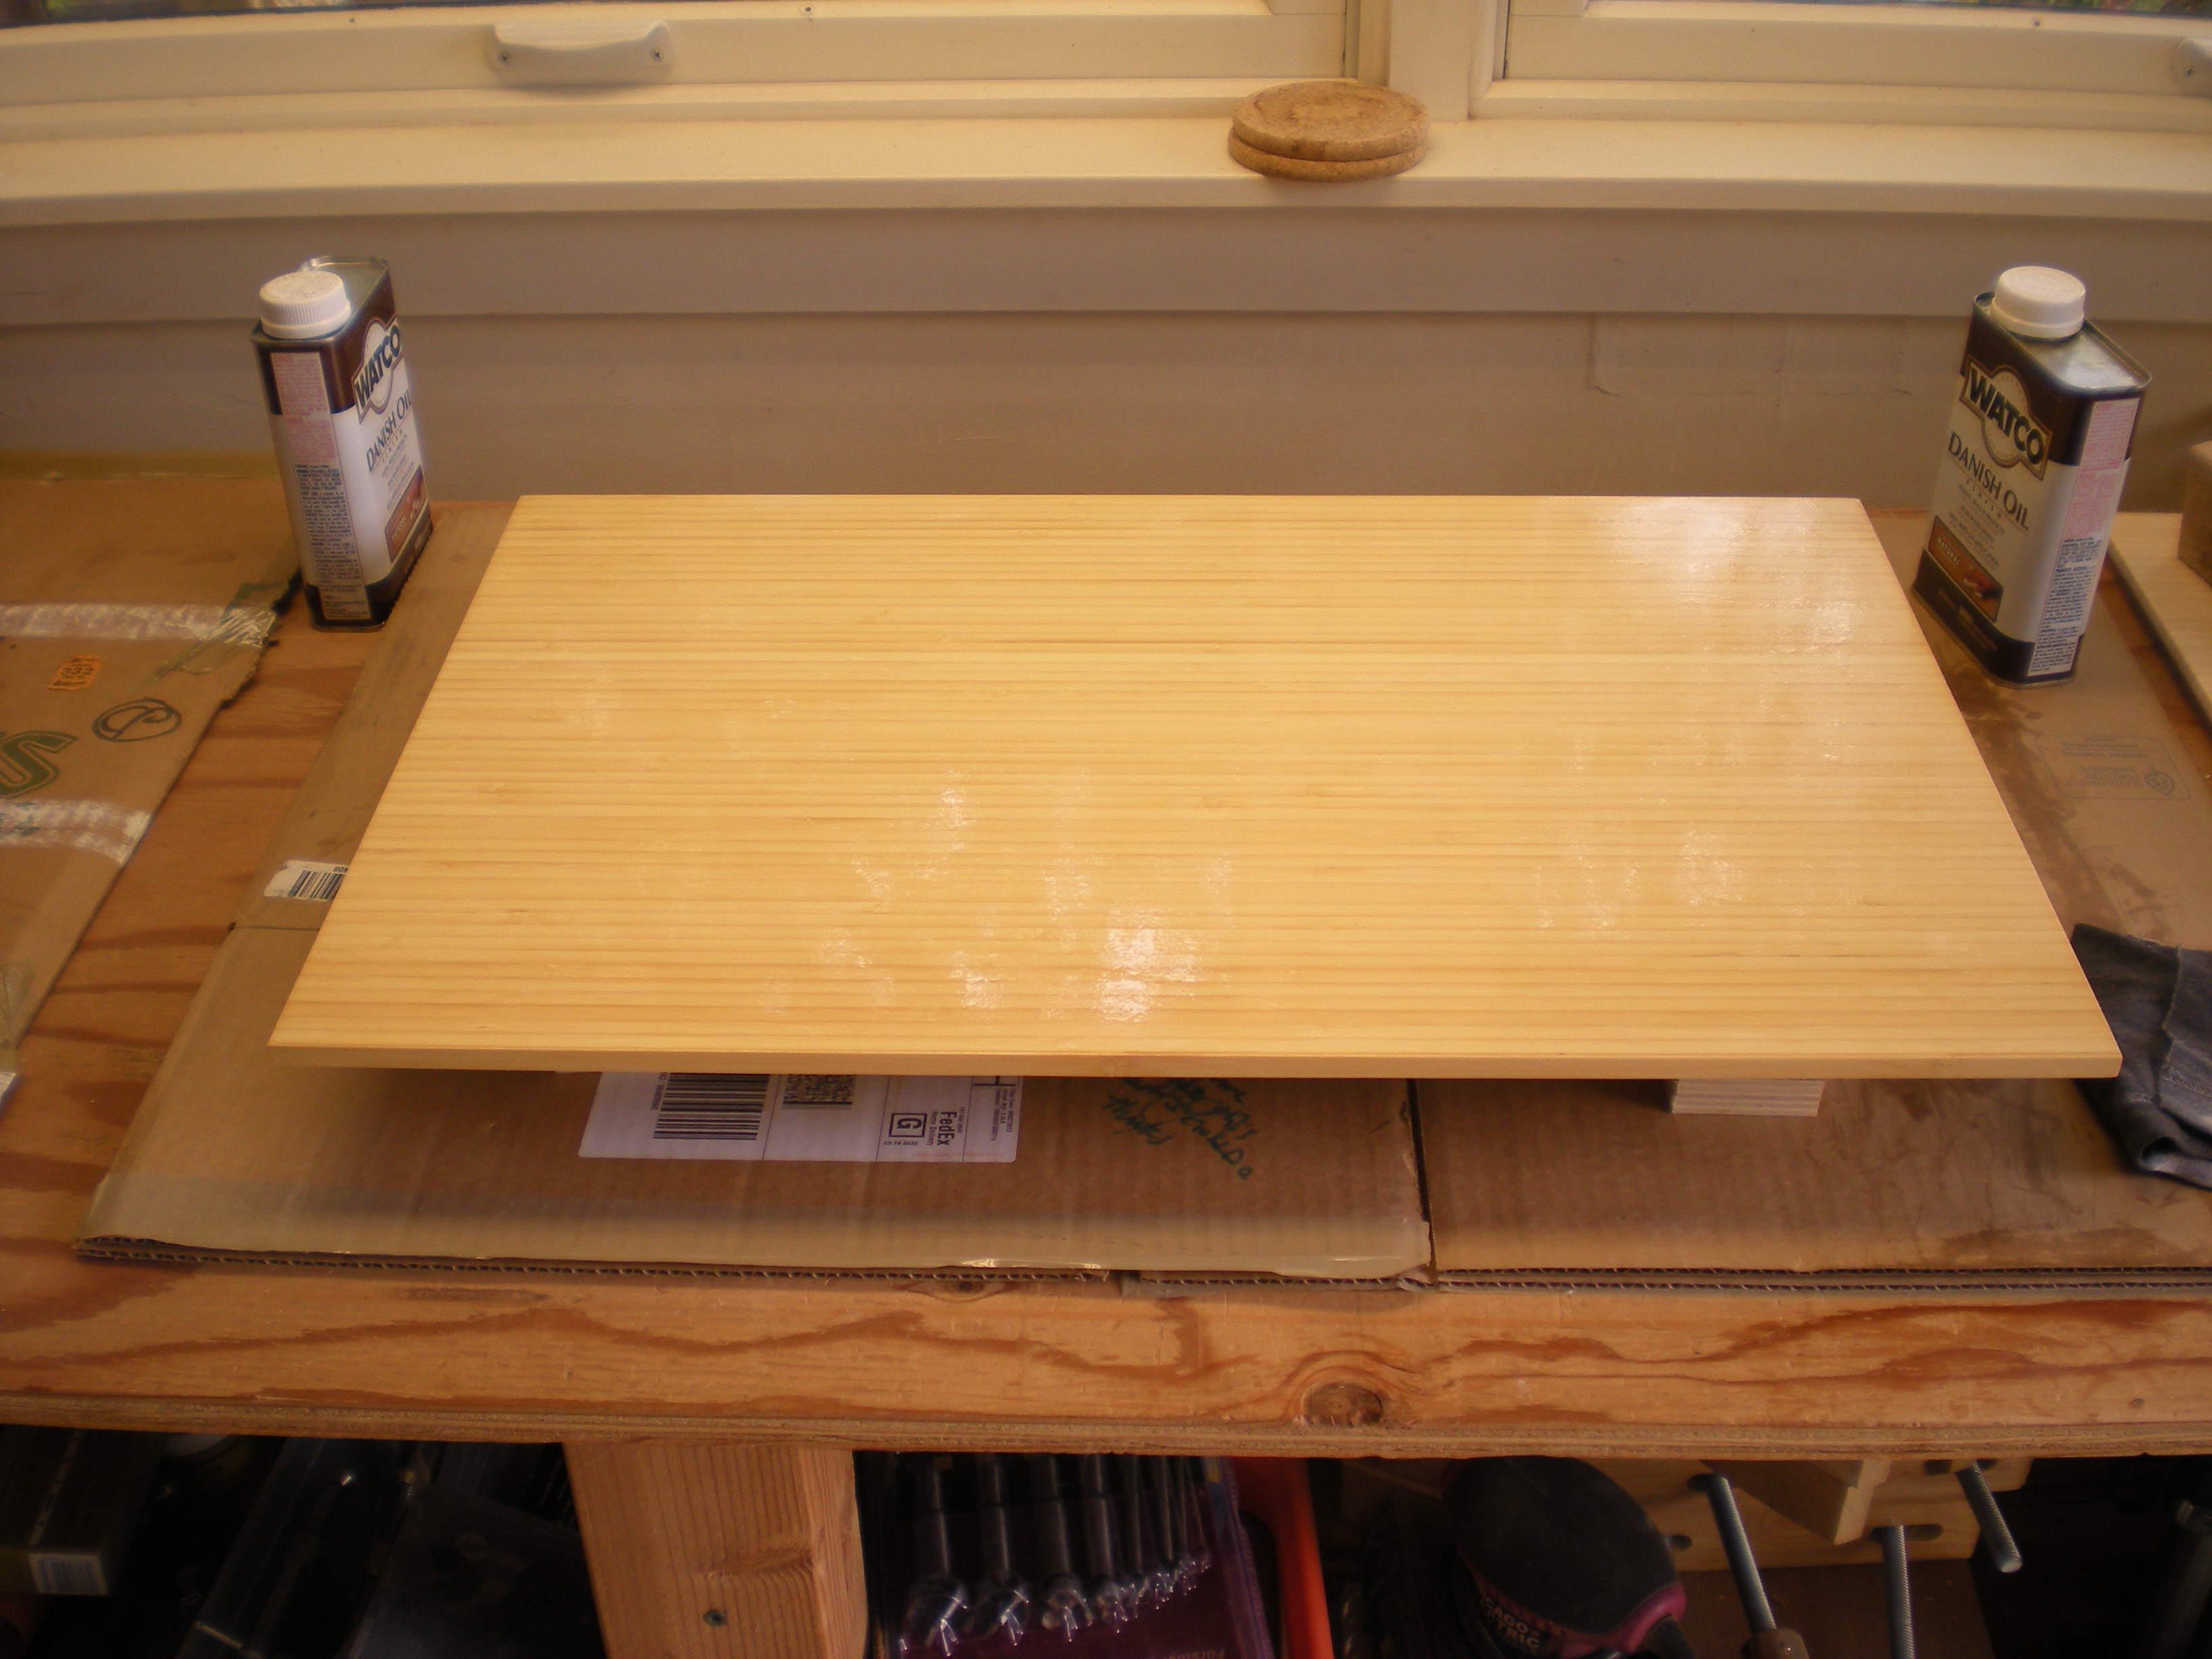
Next, I put a bevel on the underside of the top. I’ve not done this before, and I wasn’t sure what angle would look best. I did this by using a tall auxiliary fence attached to my tenoning jig which was attached to my fence, and holding the top vertical with the table saw blade at a 30 degree angle. That means a 60 degree bevel, which was about right for me. I had purposely left the top too deep, so as planned I did a few trials with that extra wood. I liked my approach, cut the top to final depth, and then put the bevel on all sides. Here is what it looks like.
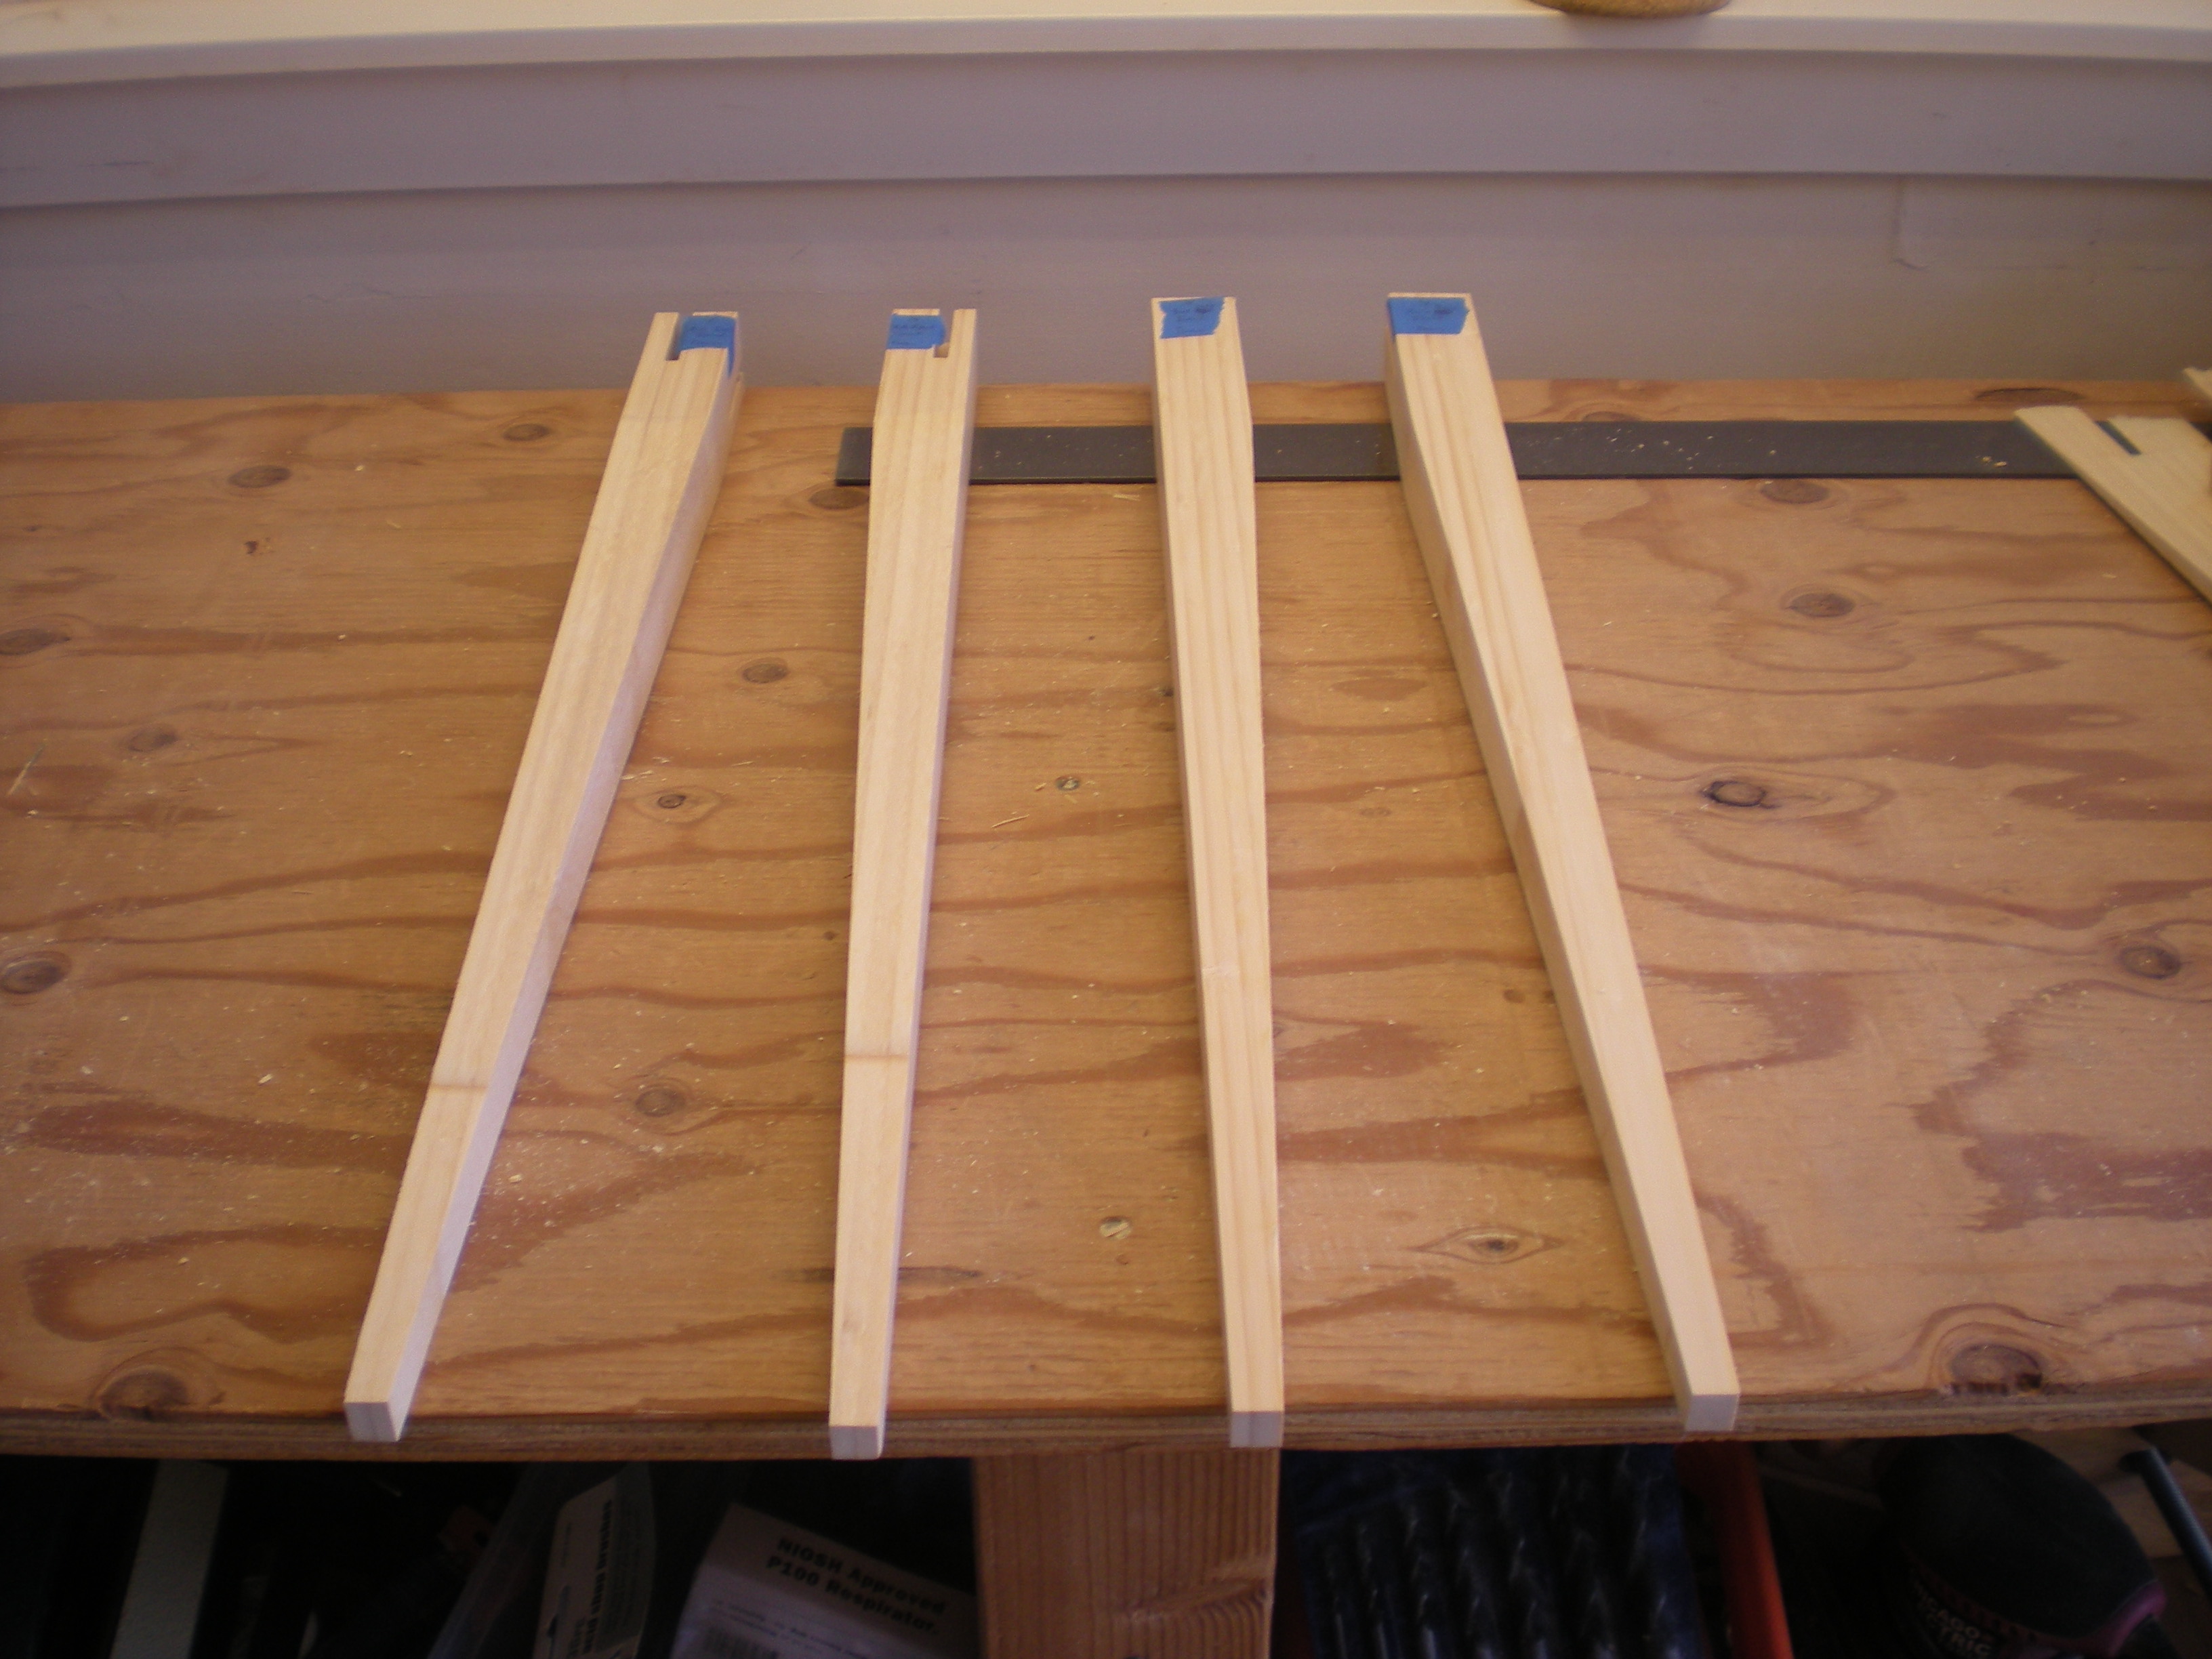
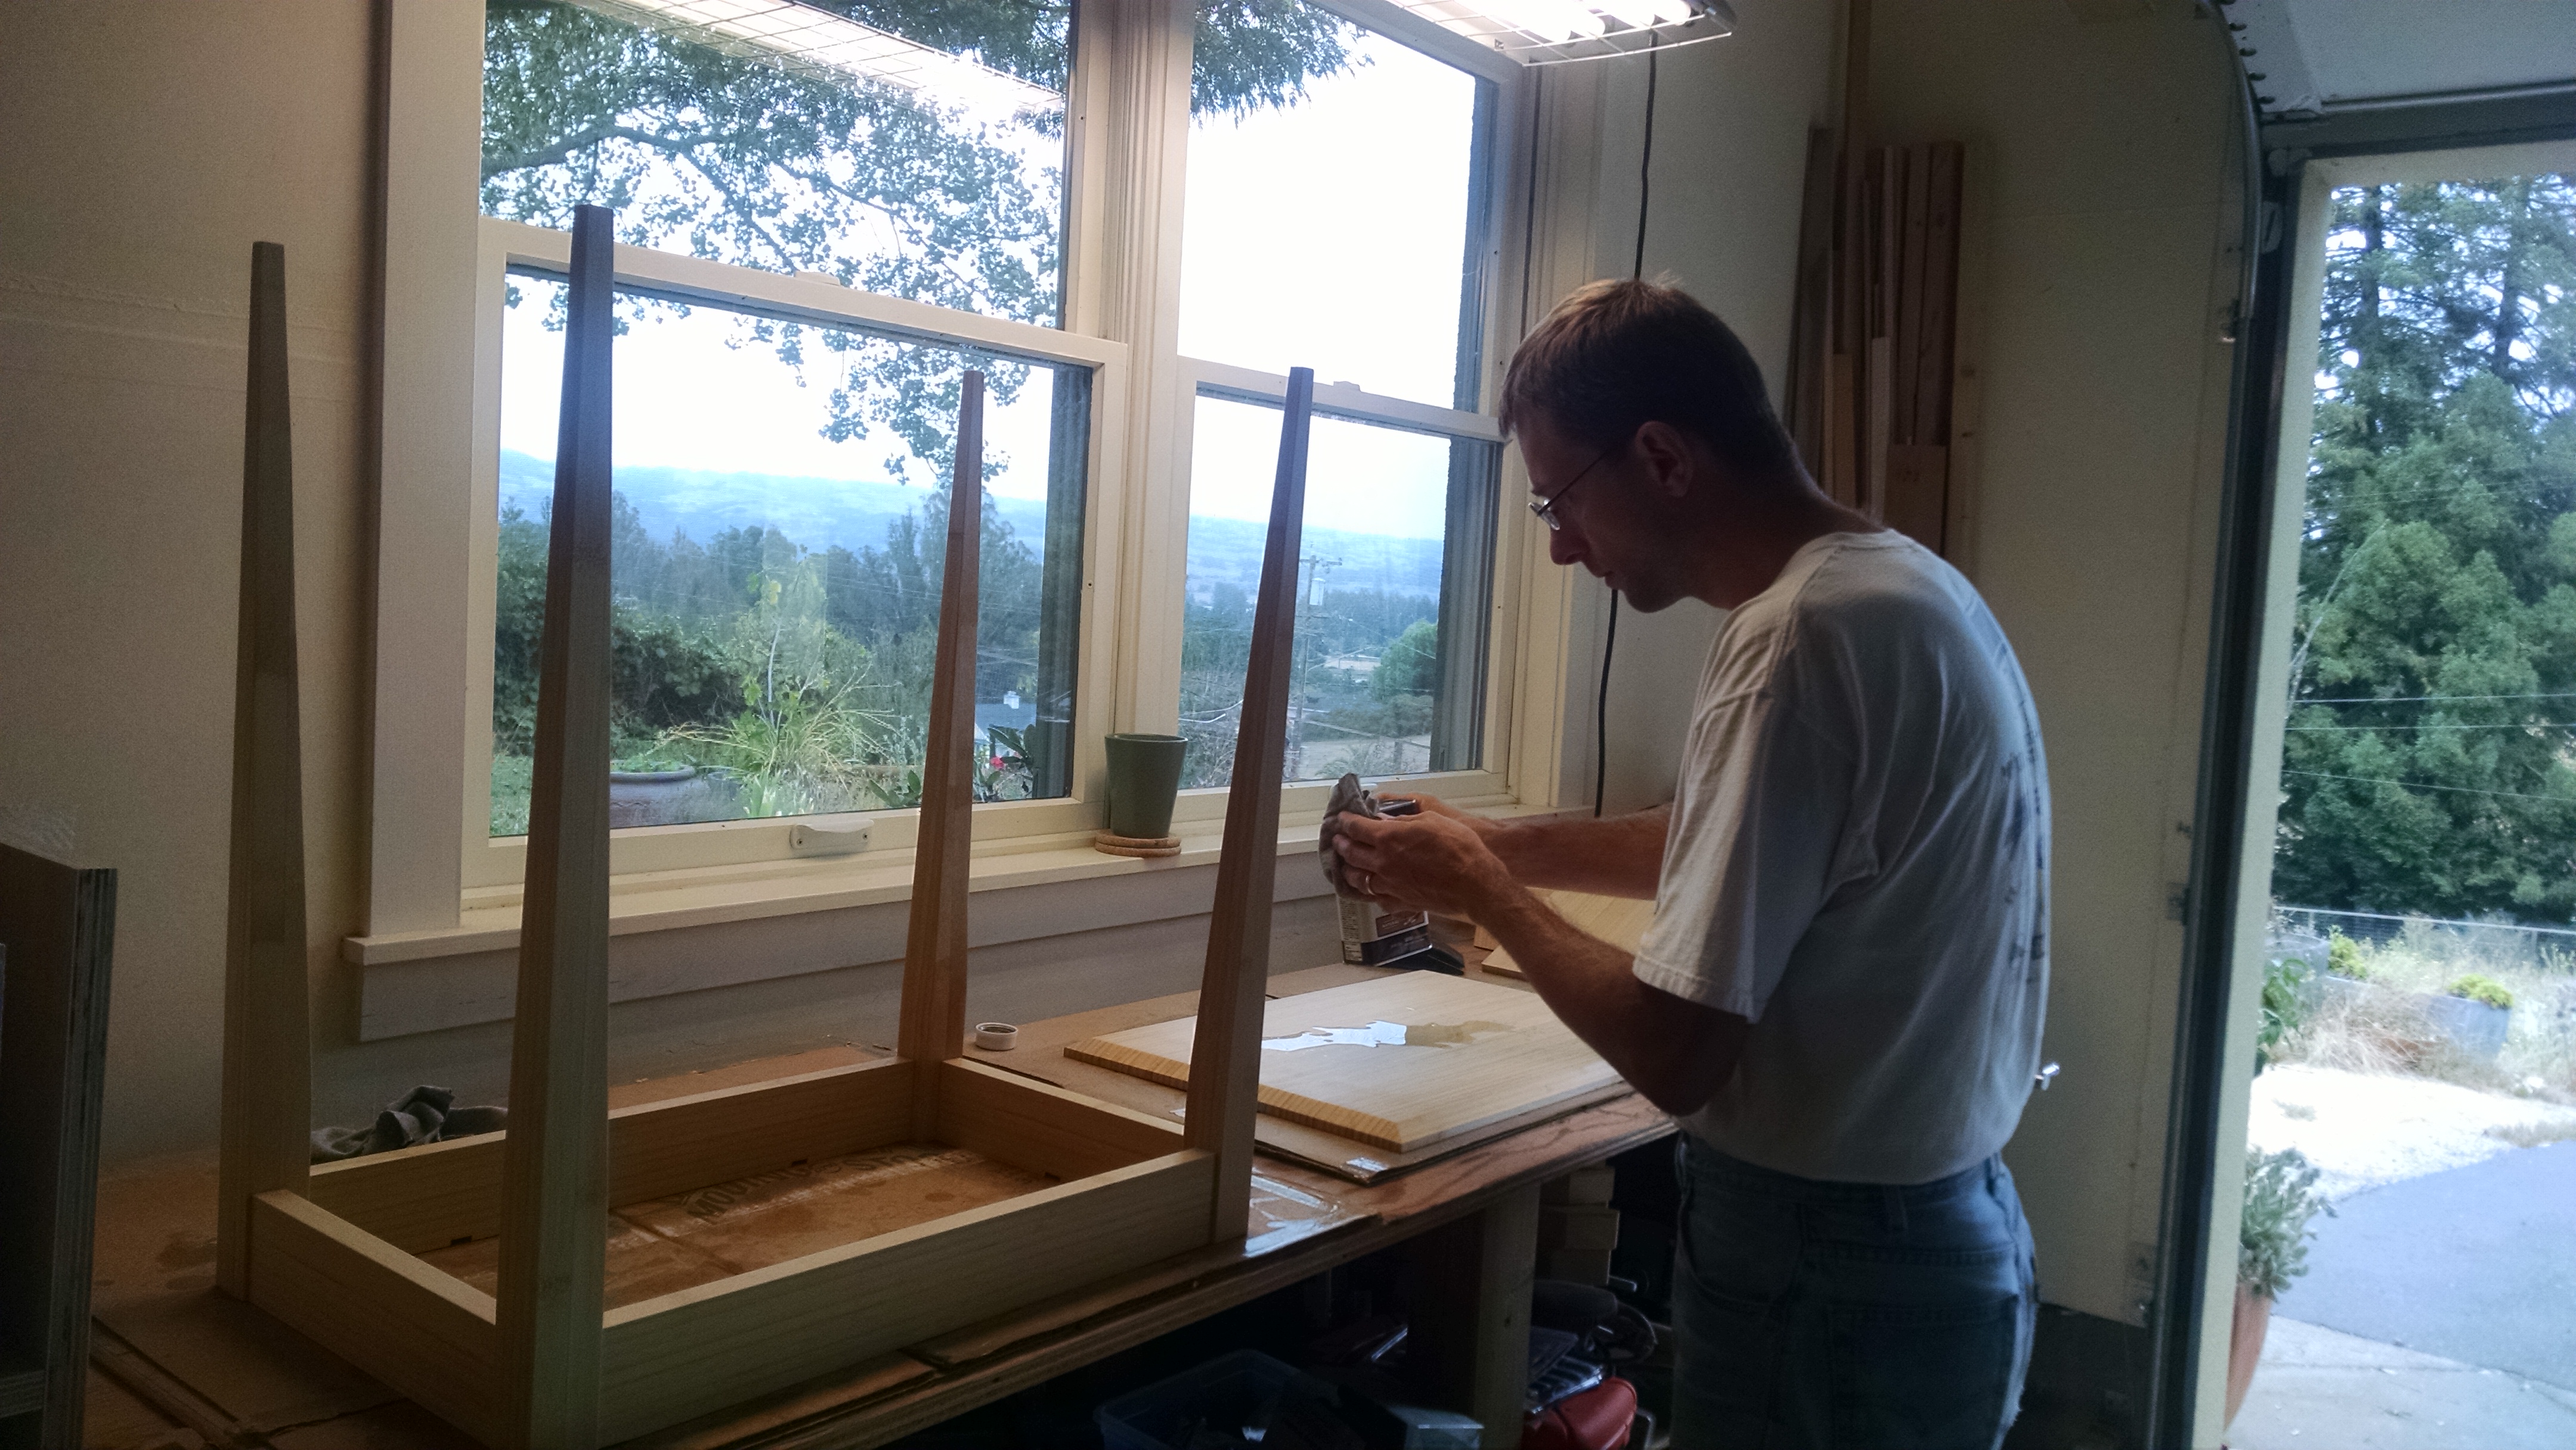
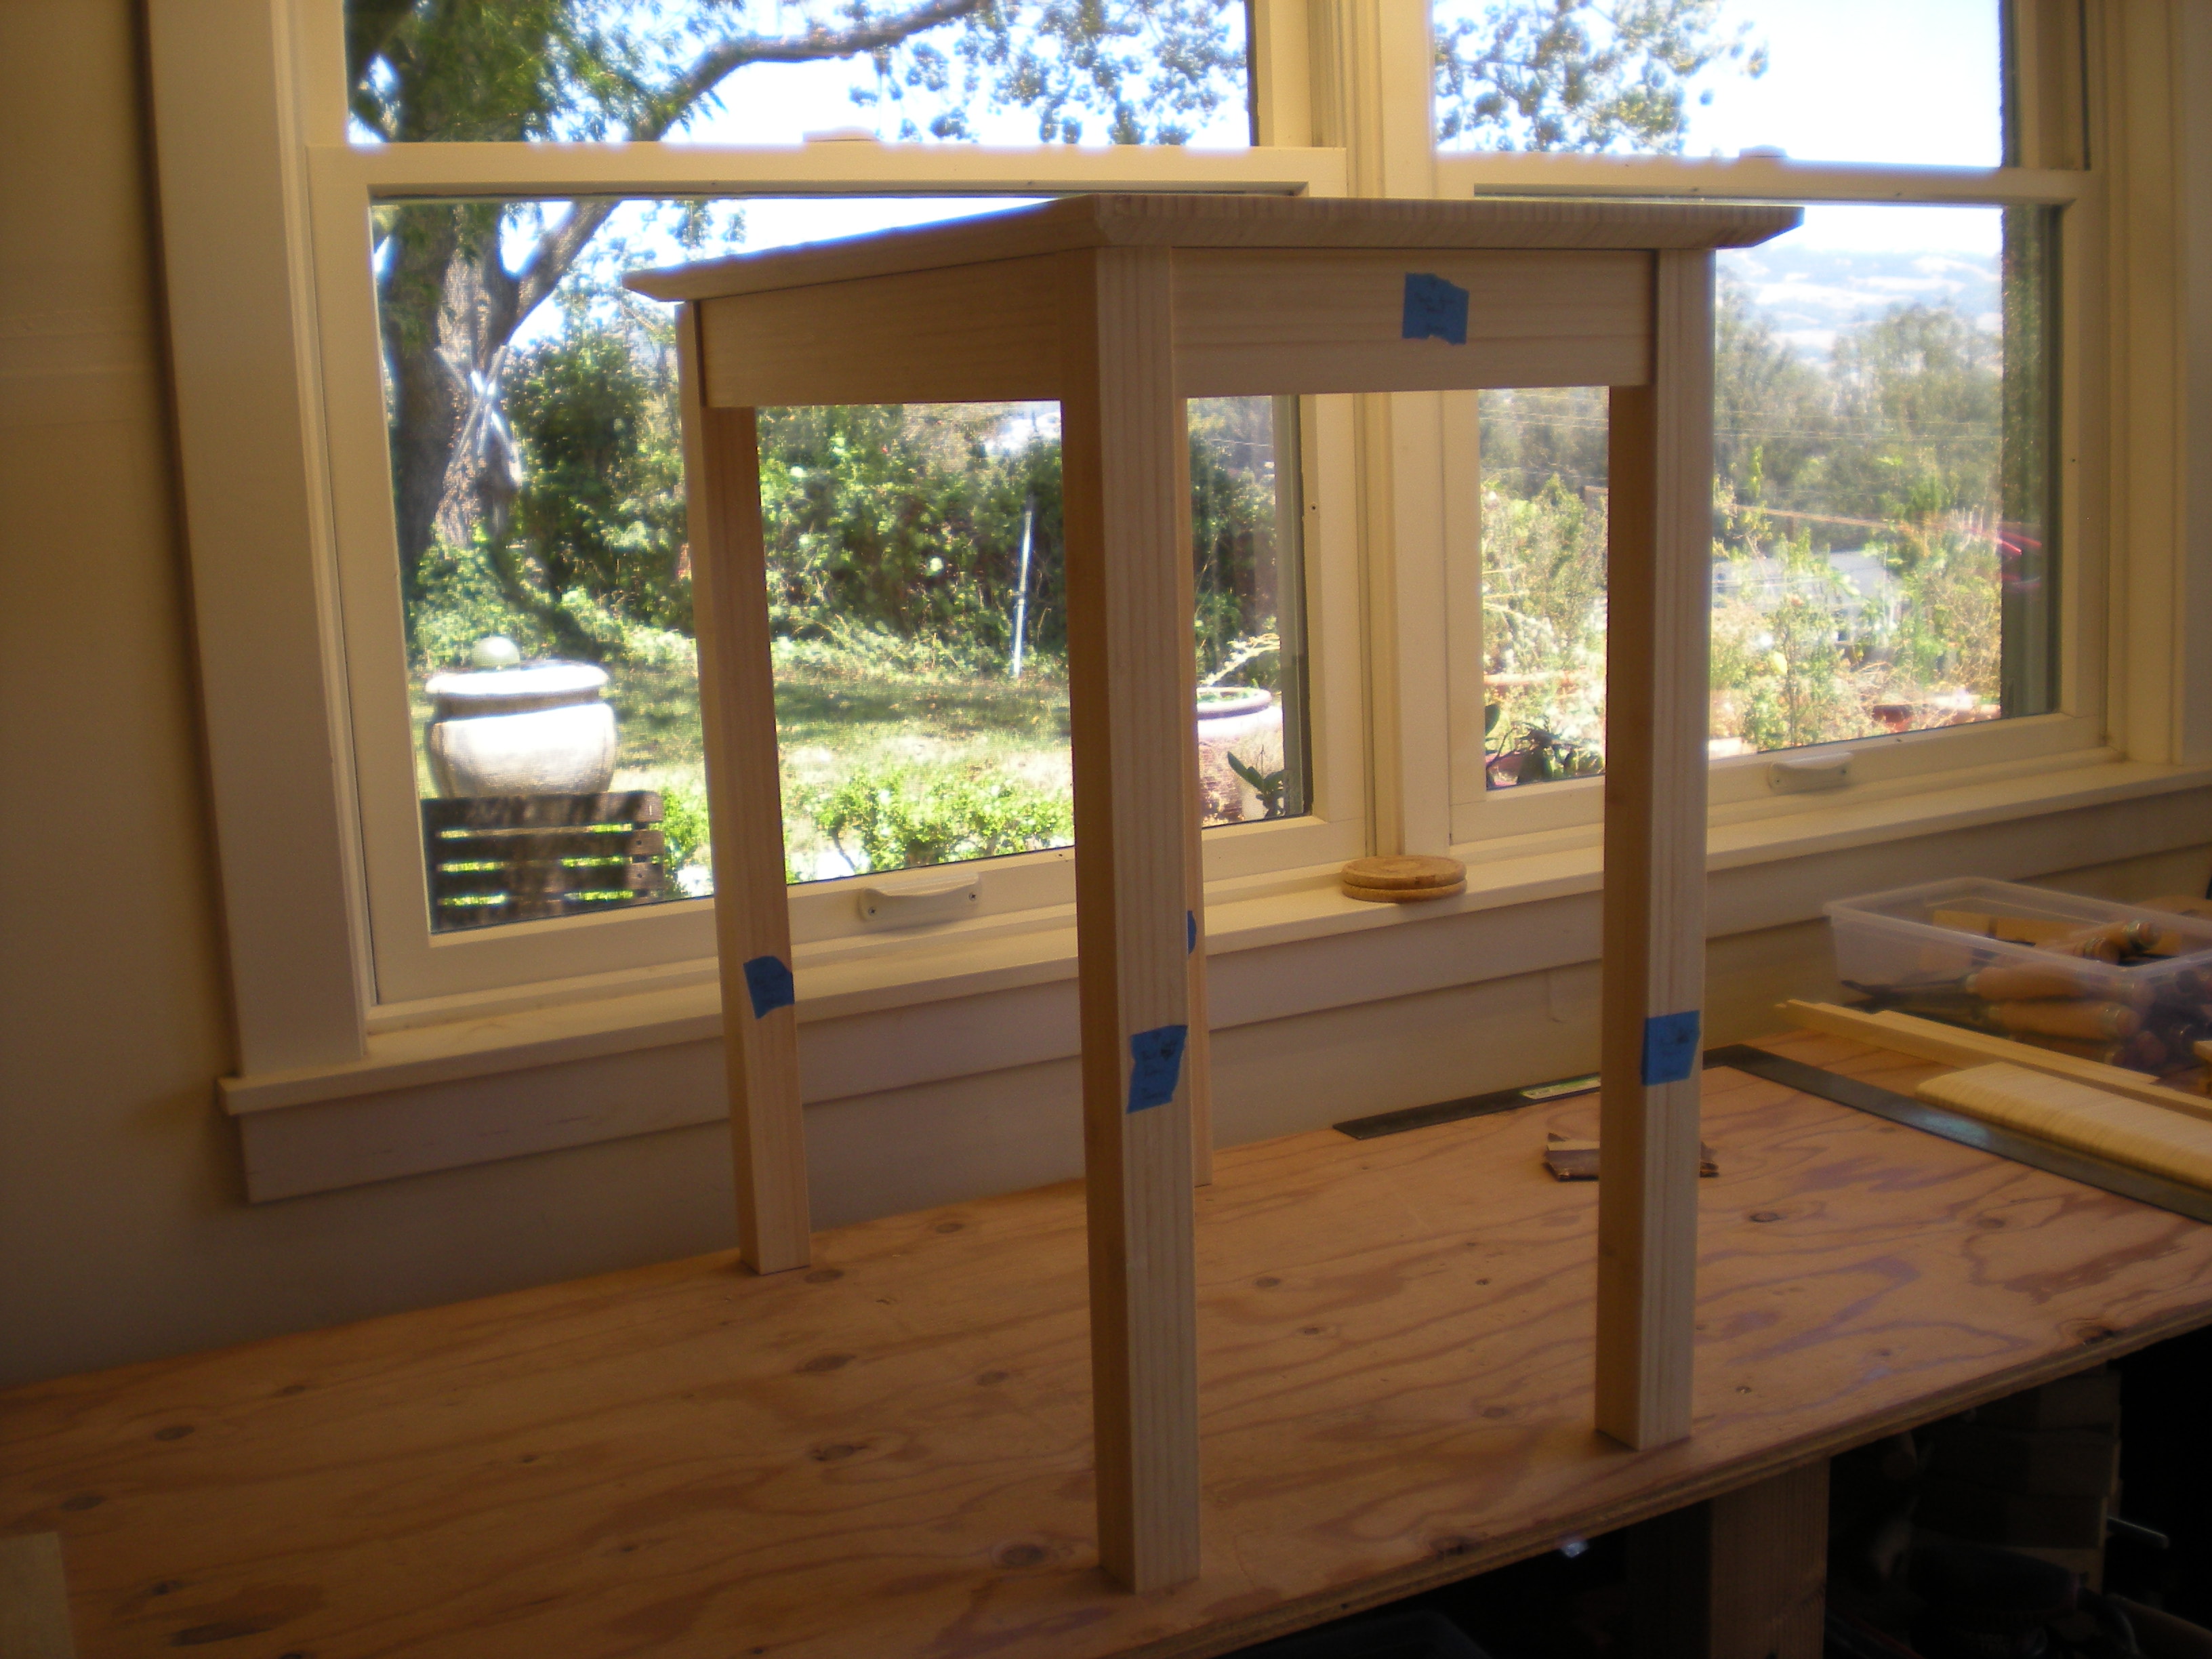 Next, I’m tapering the two insides of each leg. For this, I’ll need to build a tapering jig. There are a few ways to do this, but I’m pretty much following what Christian Becksvort proposed for the cherry night stands I made (where I didn’t do the taper, but instead added a lower shelf). The base is a square board that goes against the table saw fence. On top of that, you have another piece of wood at a slight angle. This becomes the fence for the table leg, so when you push the whole shebang thru the table saw you get the leg tapered at an angle. You add a stop, and some sort of hold-down mechanism. I just screwed mine together, but with a bit more thought and a hinge I’m sure you can build a general-purpose adjustable one. This is what it looks like:
 I did a trial. It worked fine, but we decided to go with a more aggressive taper, so I adjusted the slope on the jog for a shallower angle. Then I tapered the four legs.
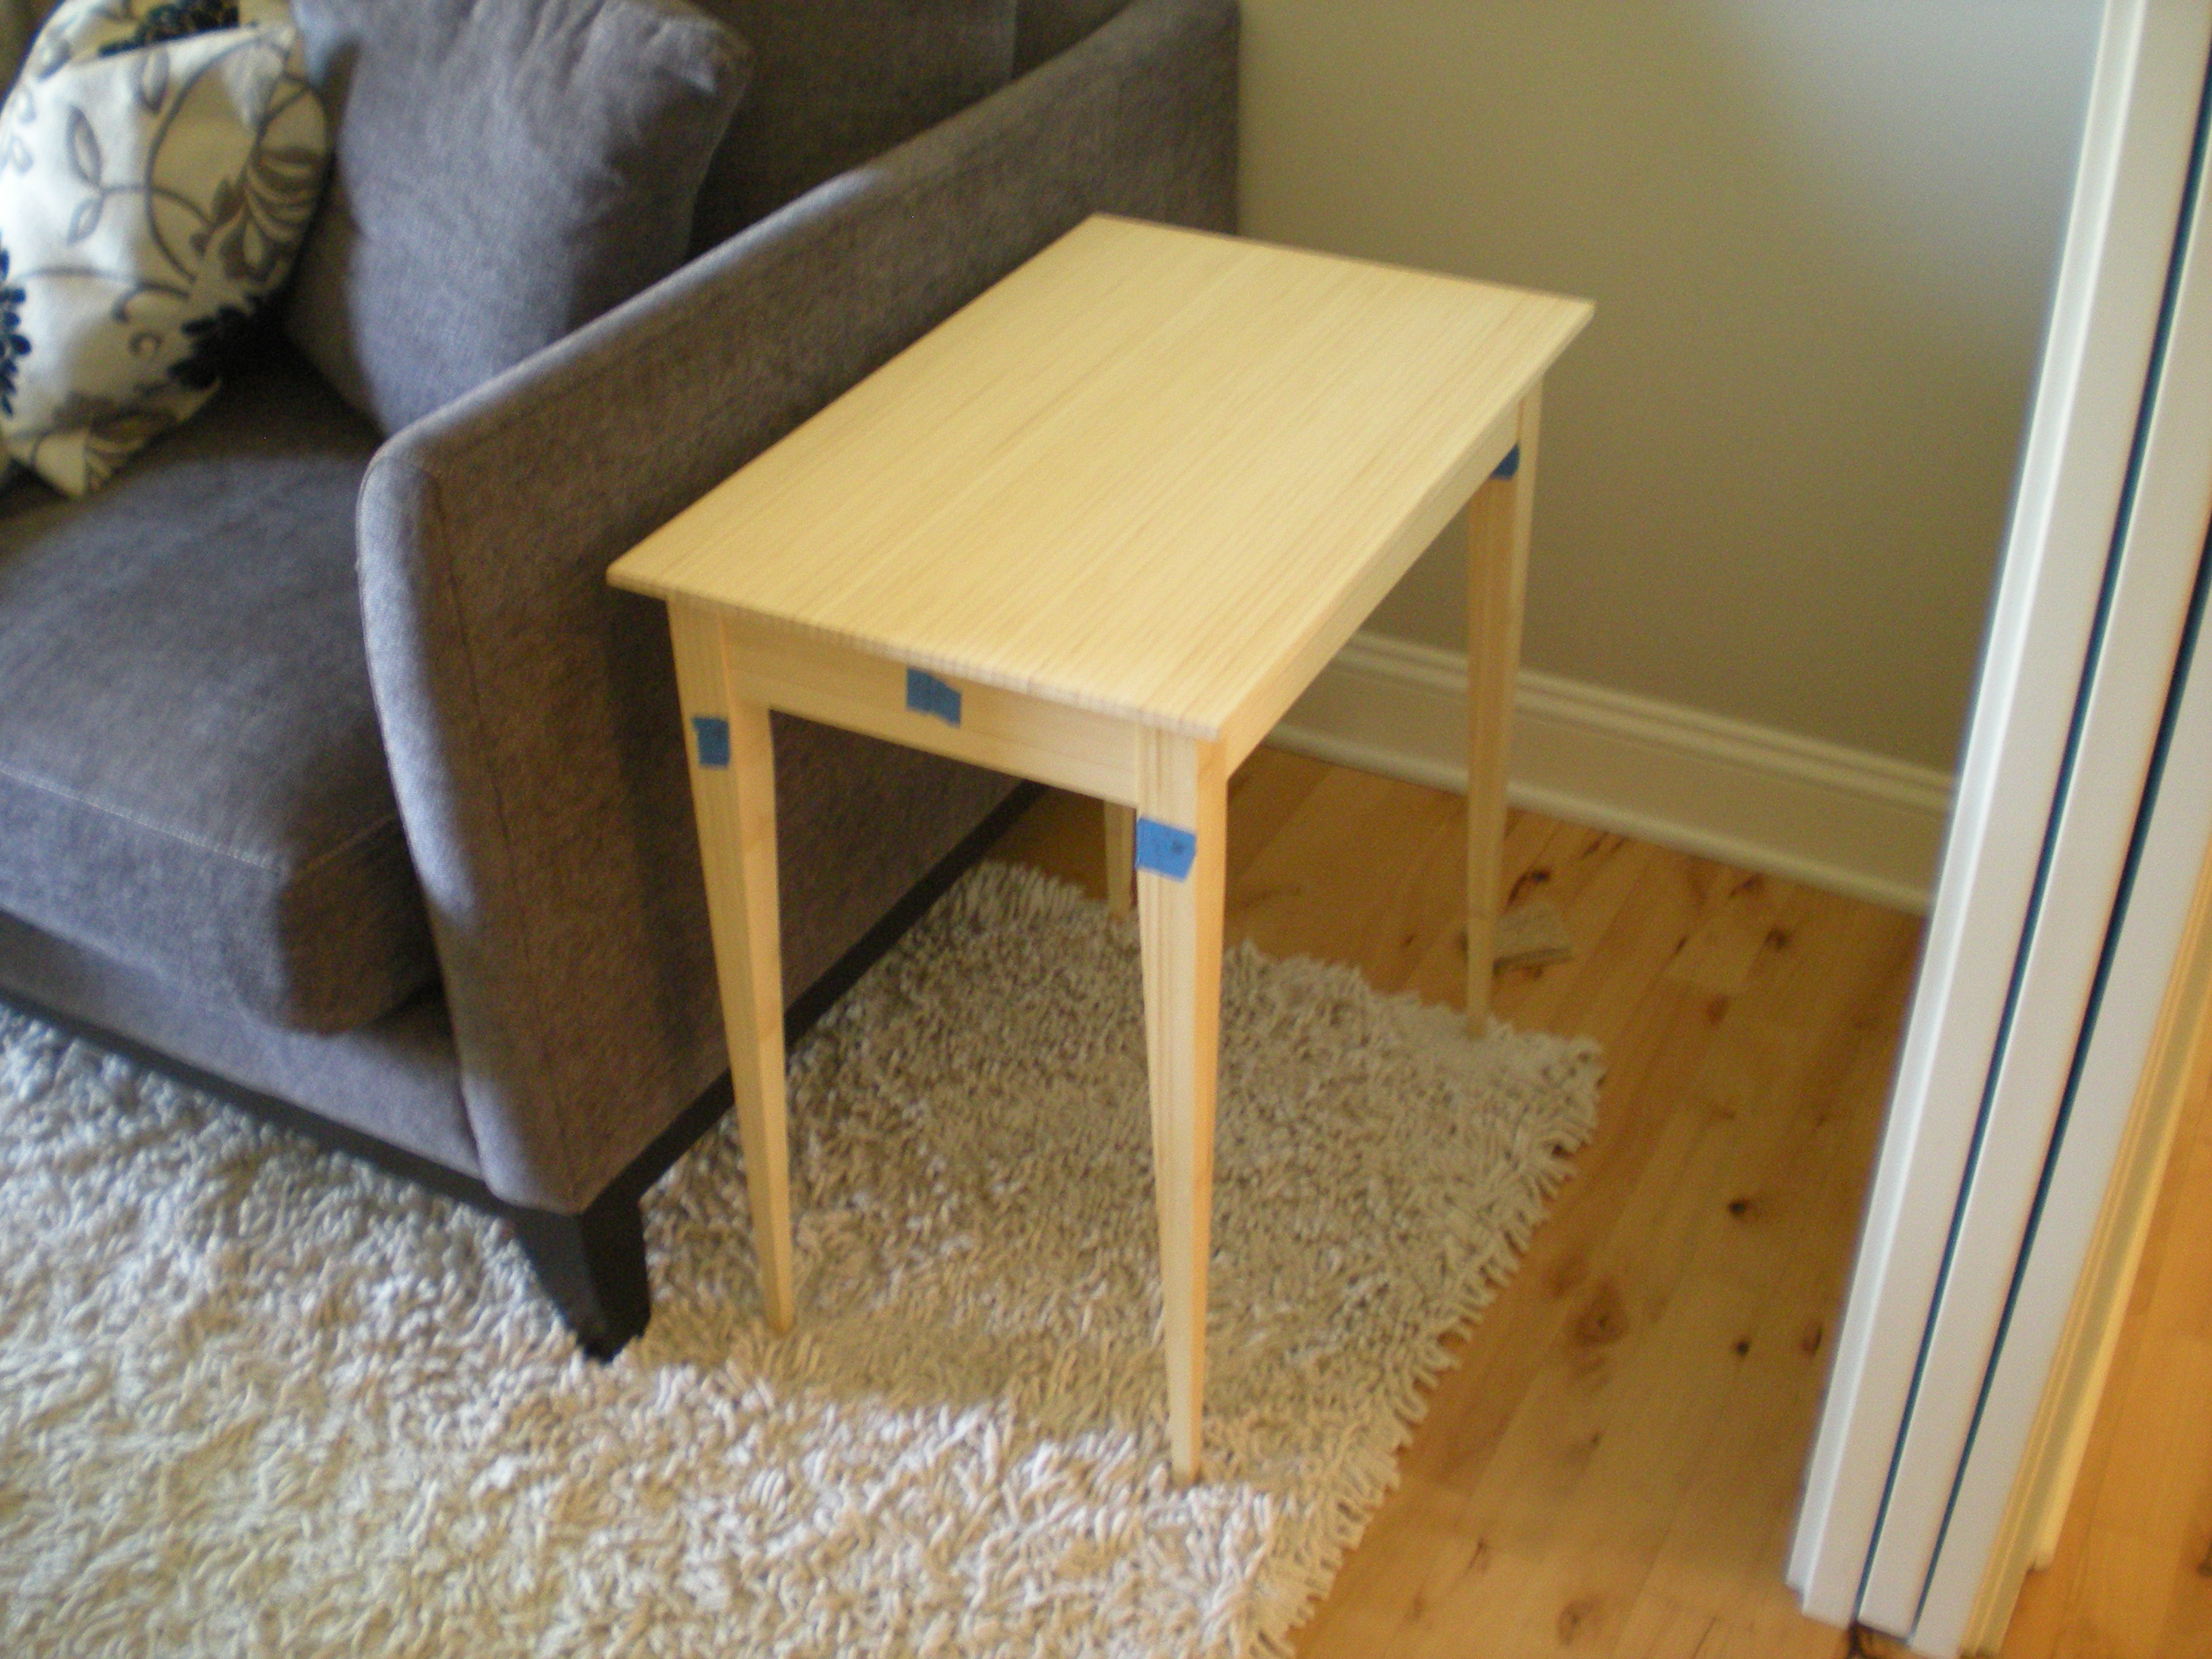
 I did the final dry-fit. We discussed whether to make the aprons smaller, or trim the legs. It’s 25” tall, which is a bit more than what you’ll typically see. But our couch is tall, and has tall armrests, so we decided to leave it as-is.
 I sanded everything down to 100-grit, and gently broke all edges. This is not rough wood, so a lot of it is much smoother than the 100-grit might normally suggest.
I bought some high-quality figure-of-eight table top attachment hardware. They attach to aprons, and screw into the top. On the aprons, you use a Forstner bit overlapping the edge. I wanted to do this on the drill press, so I made these holes before the glue-up.
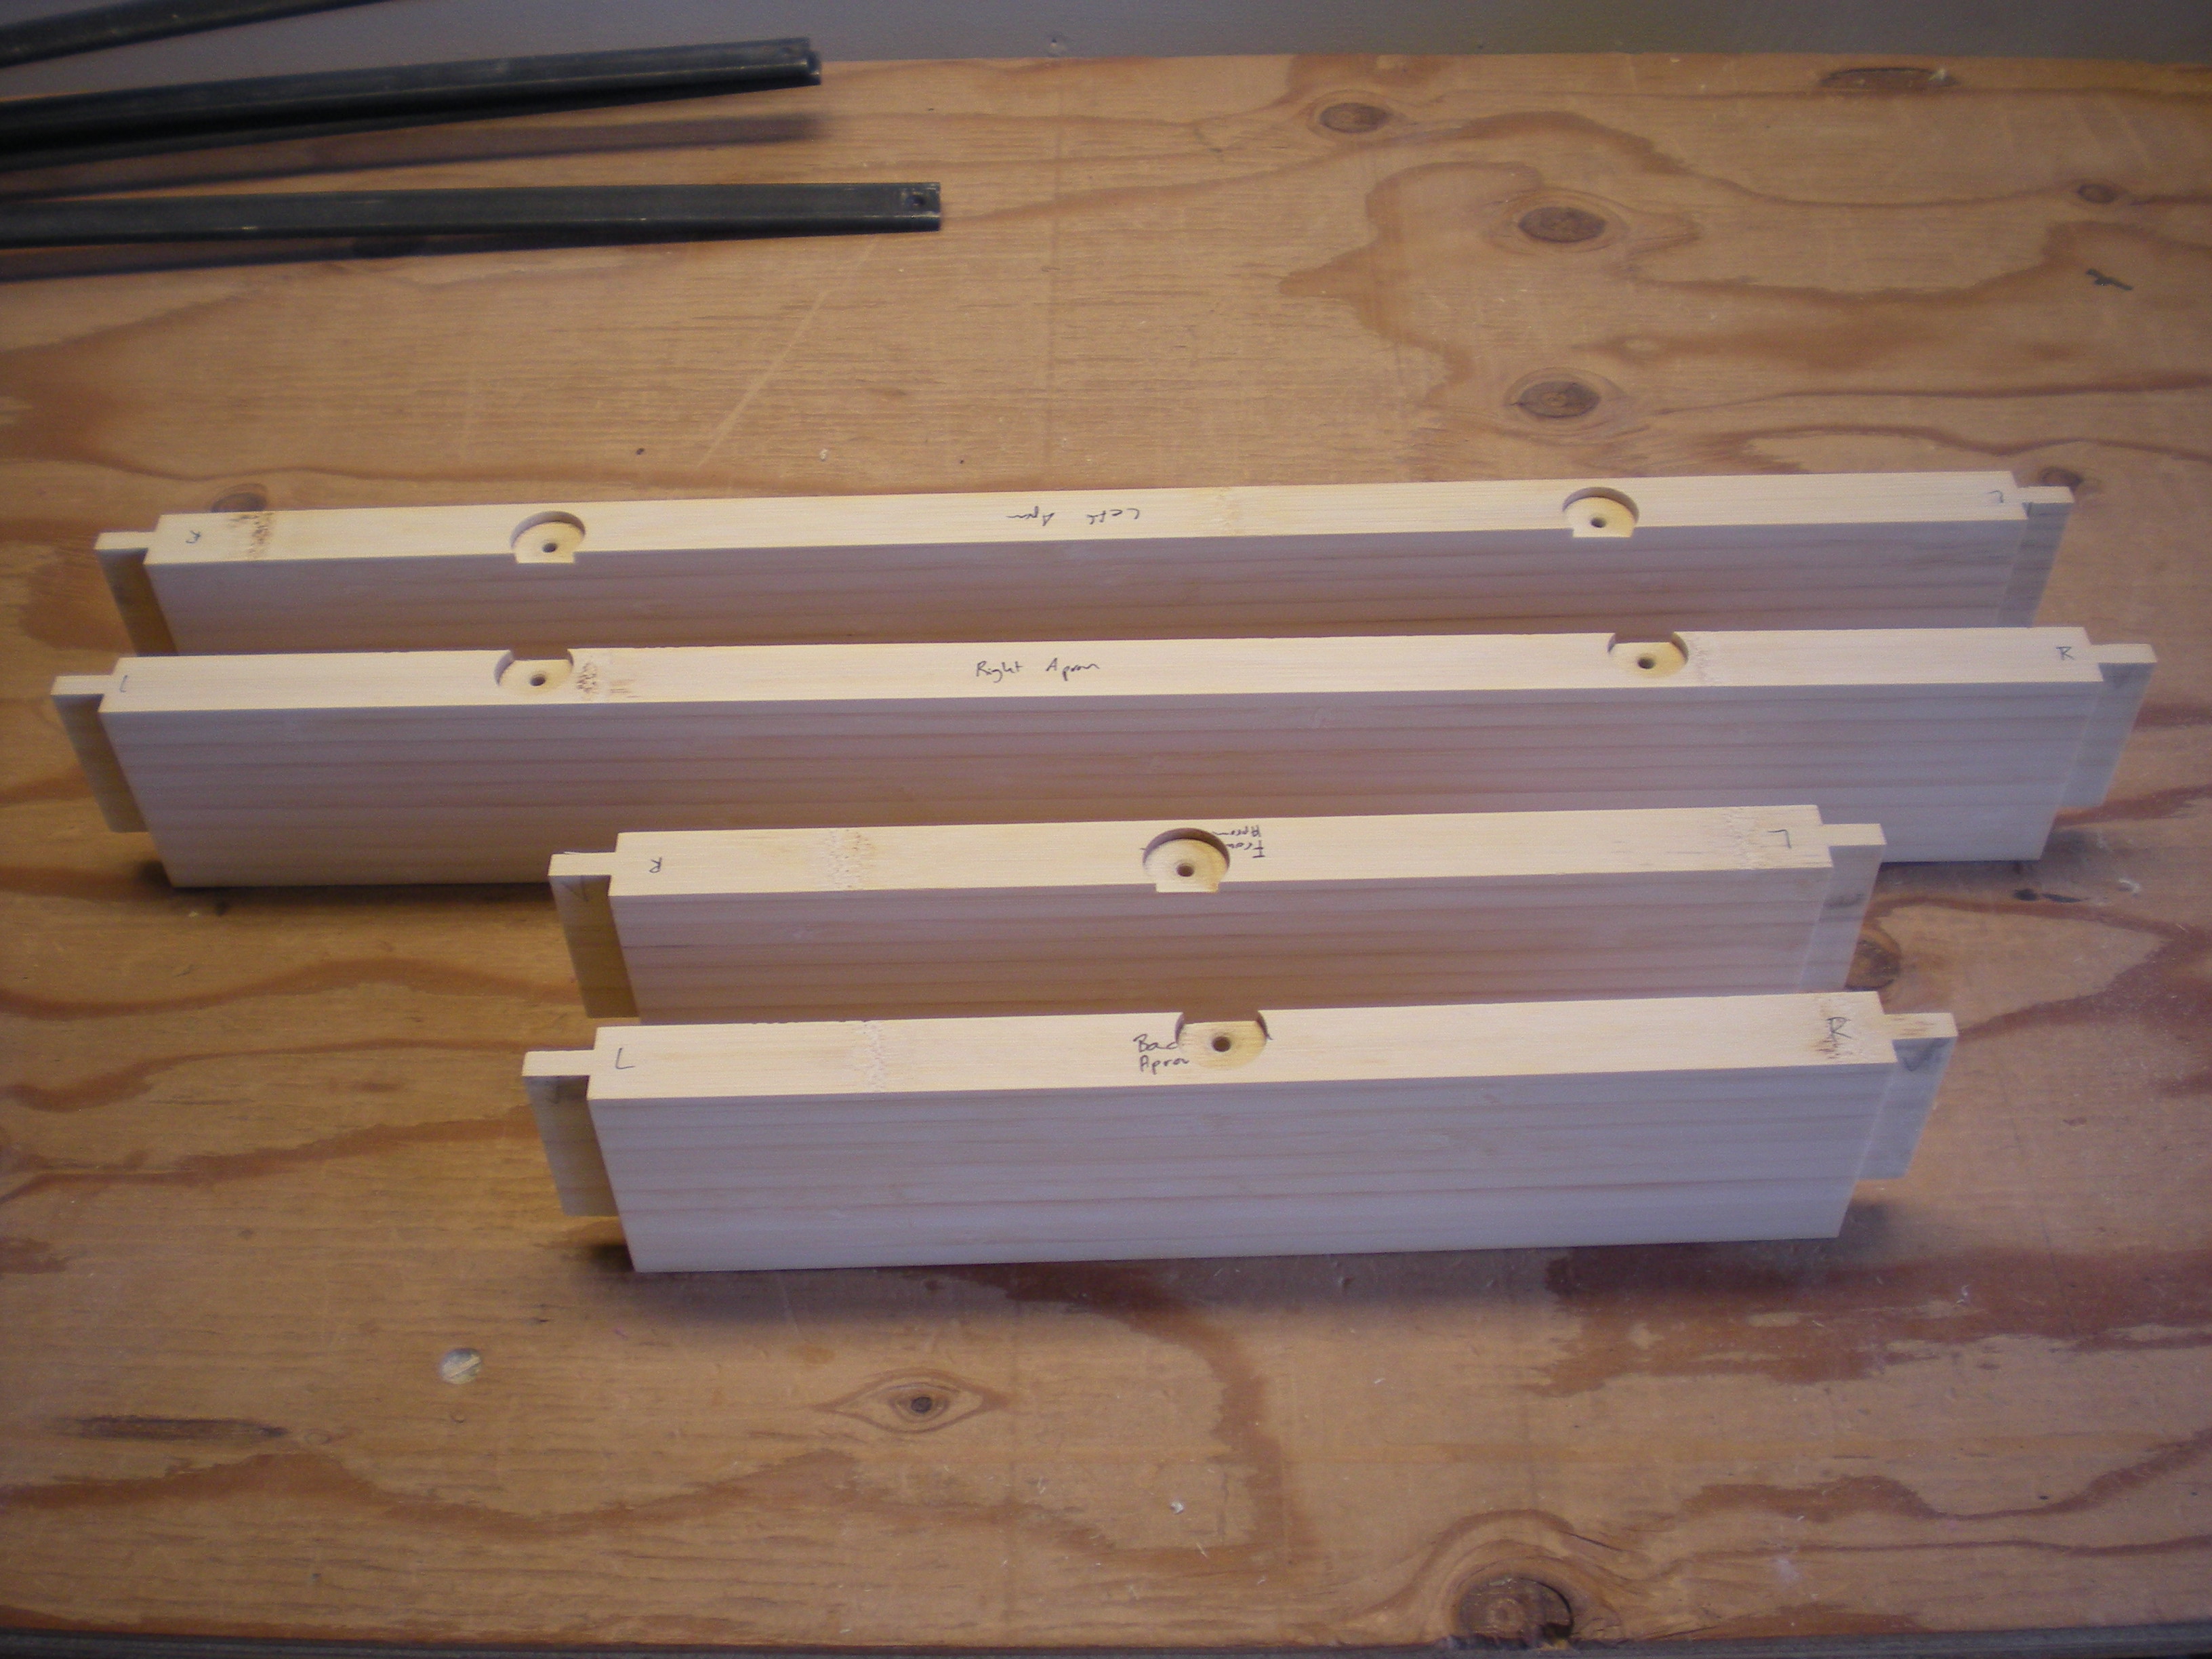 I first glued up the two sides, then the full base.
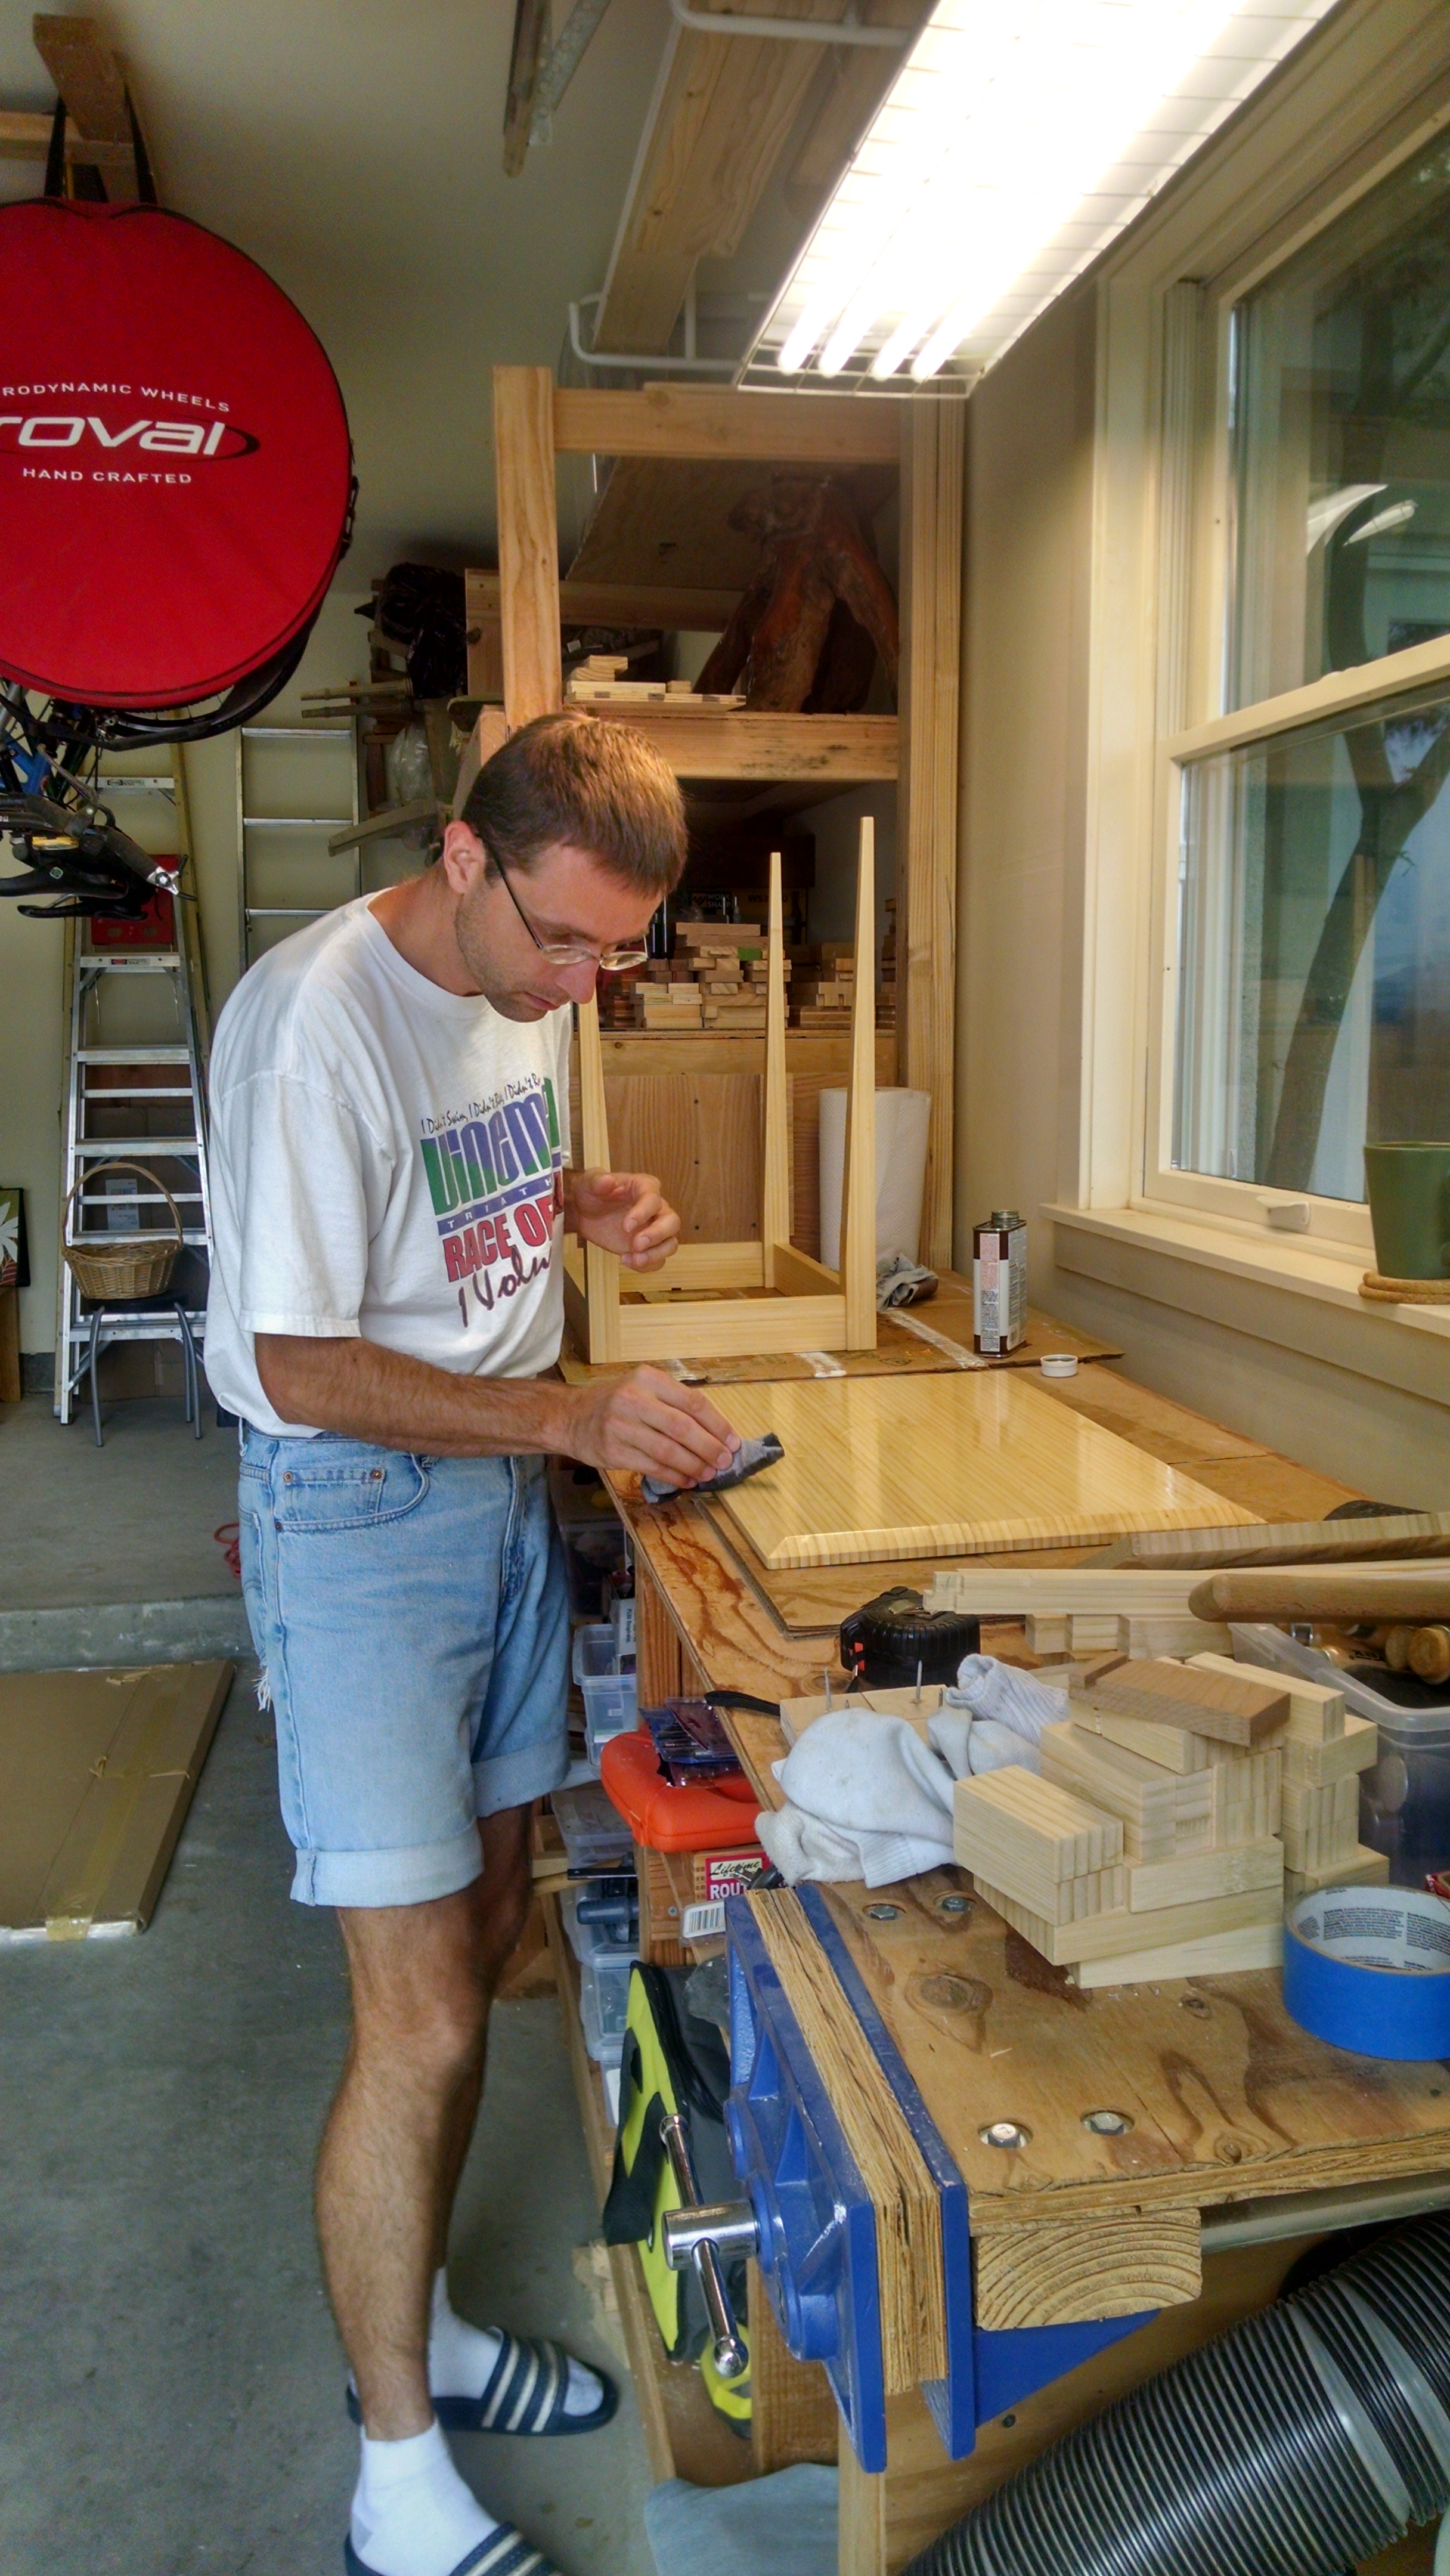
 Then I sanded everything down to 220-grit, and applied the Watch Danish Oil finish. Pour it on, leave it for ~10 min, wipe it off repeatedly. I did two coats 24 hours apart, sanding to 400-grit to smooth the surface between coats. The first two pictures are from the first coat/day, the second two pictures are from the second coat/day.
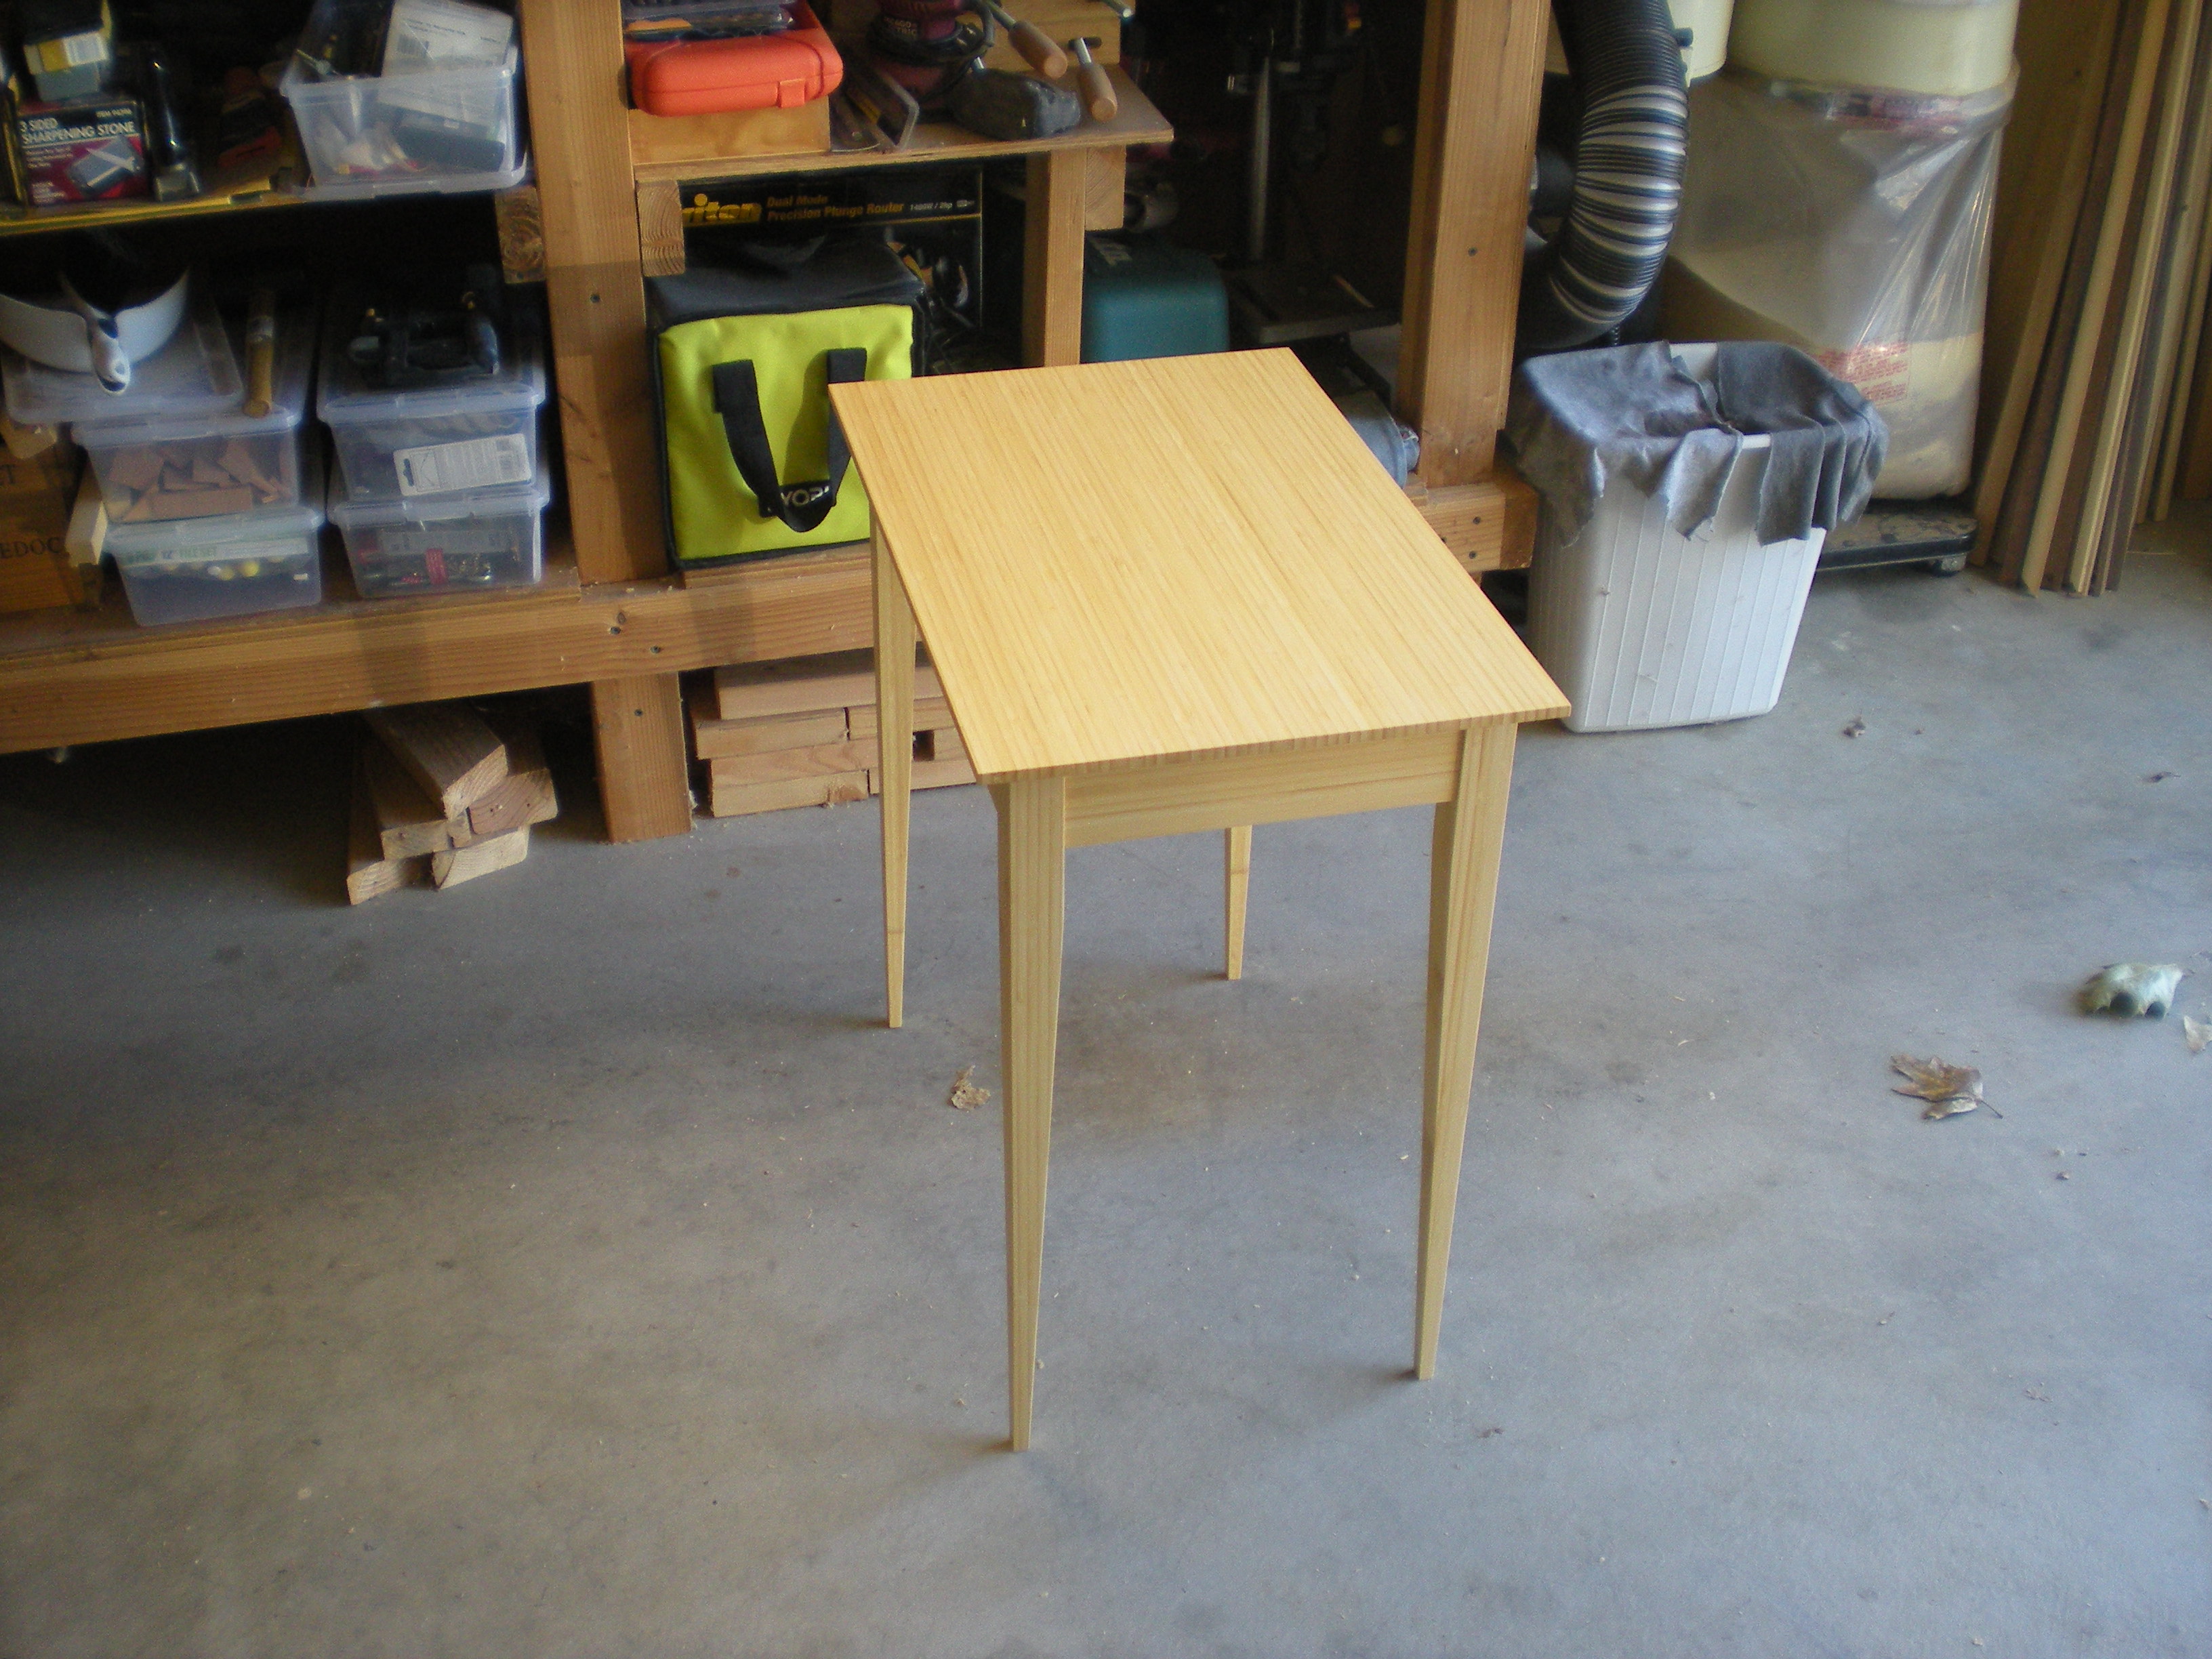
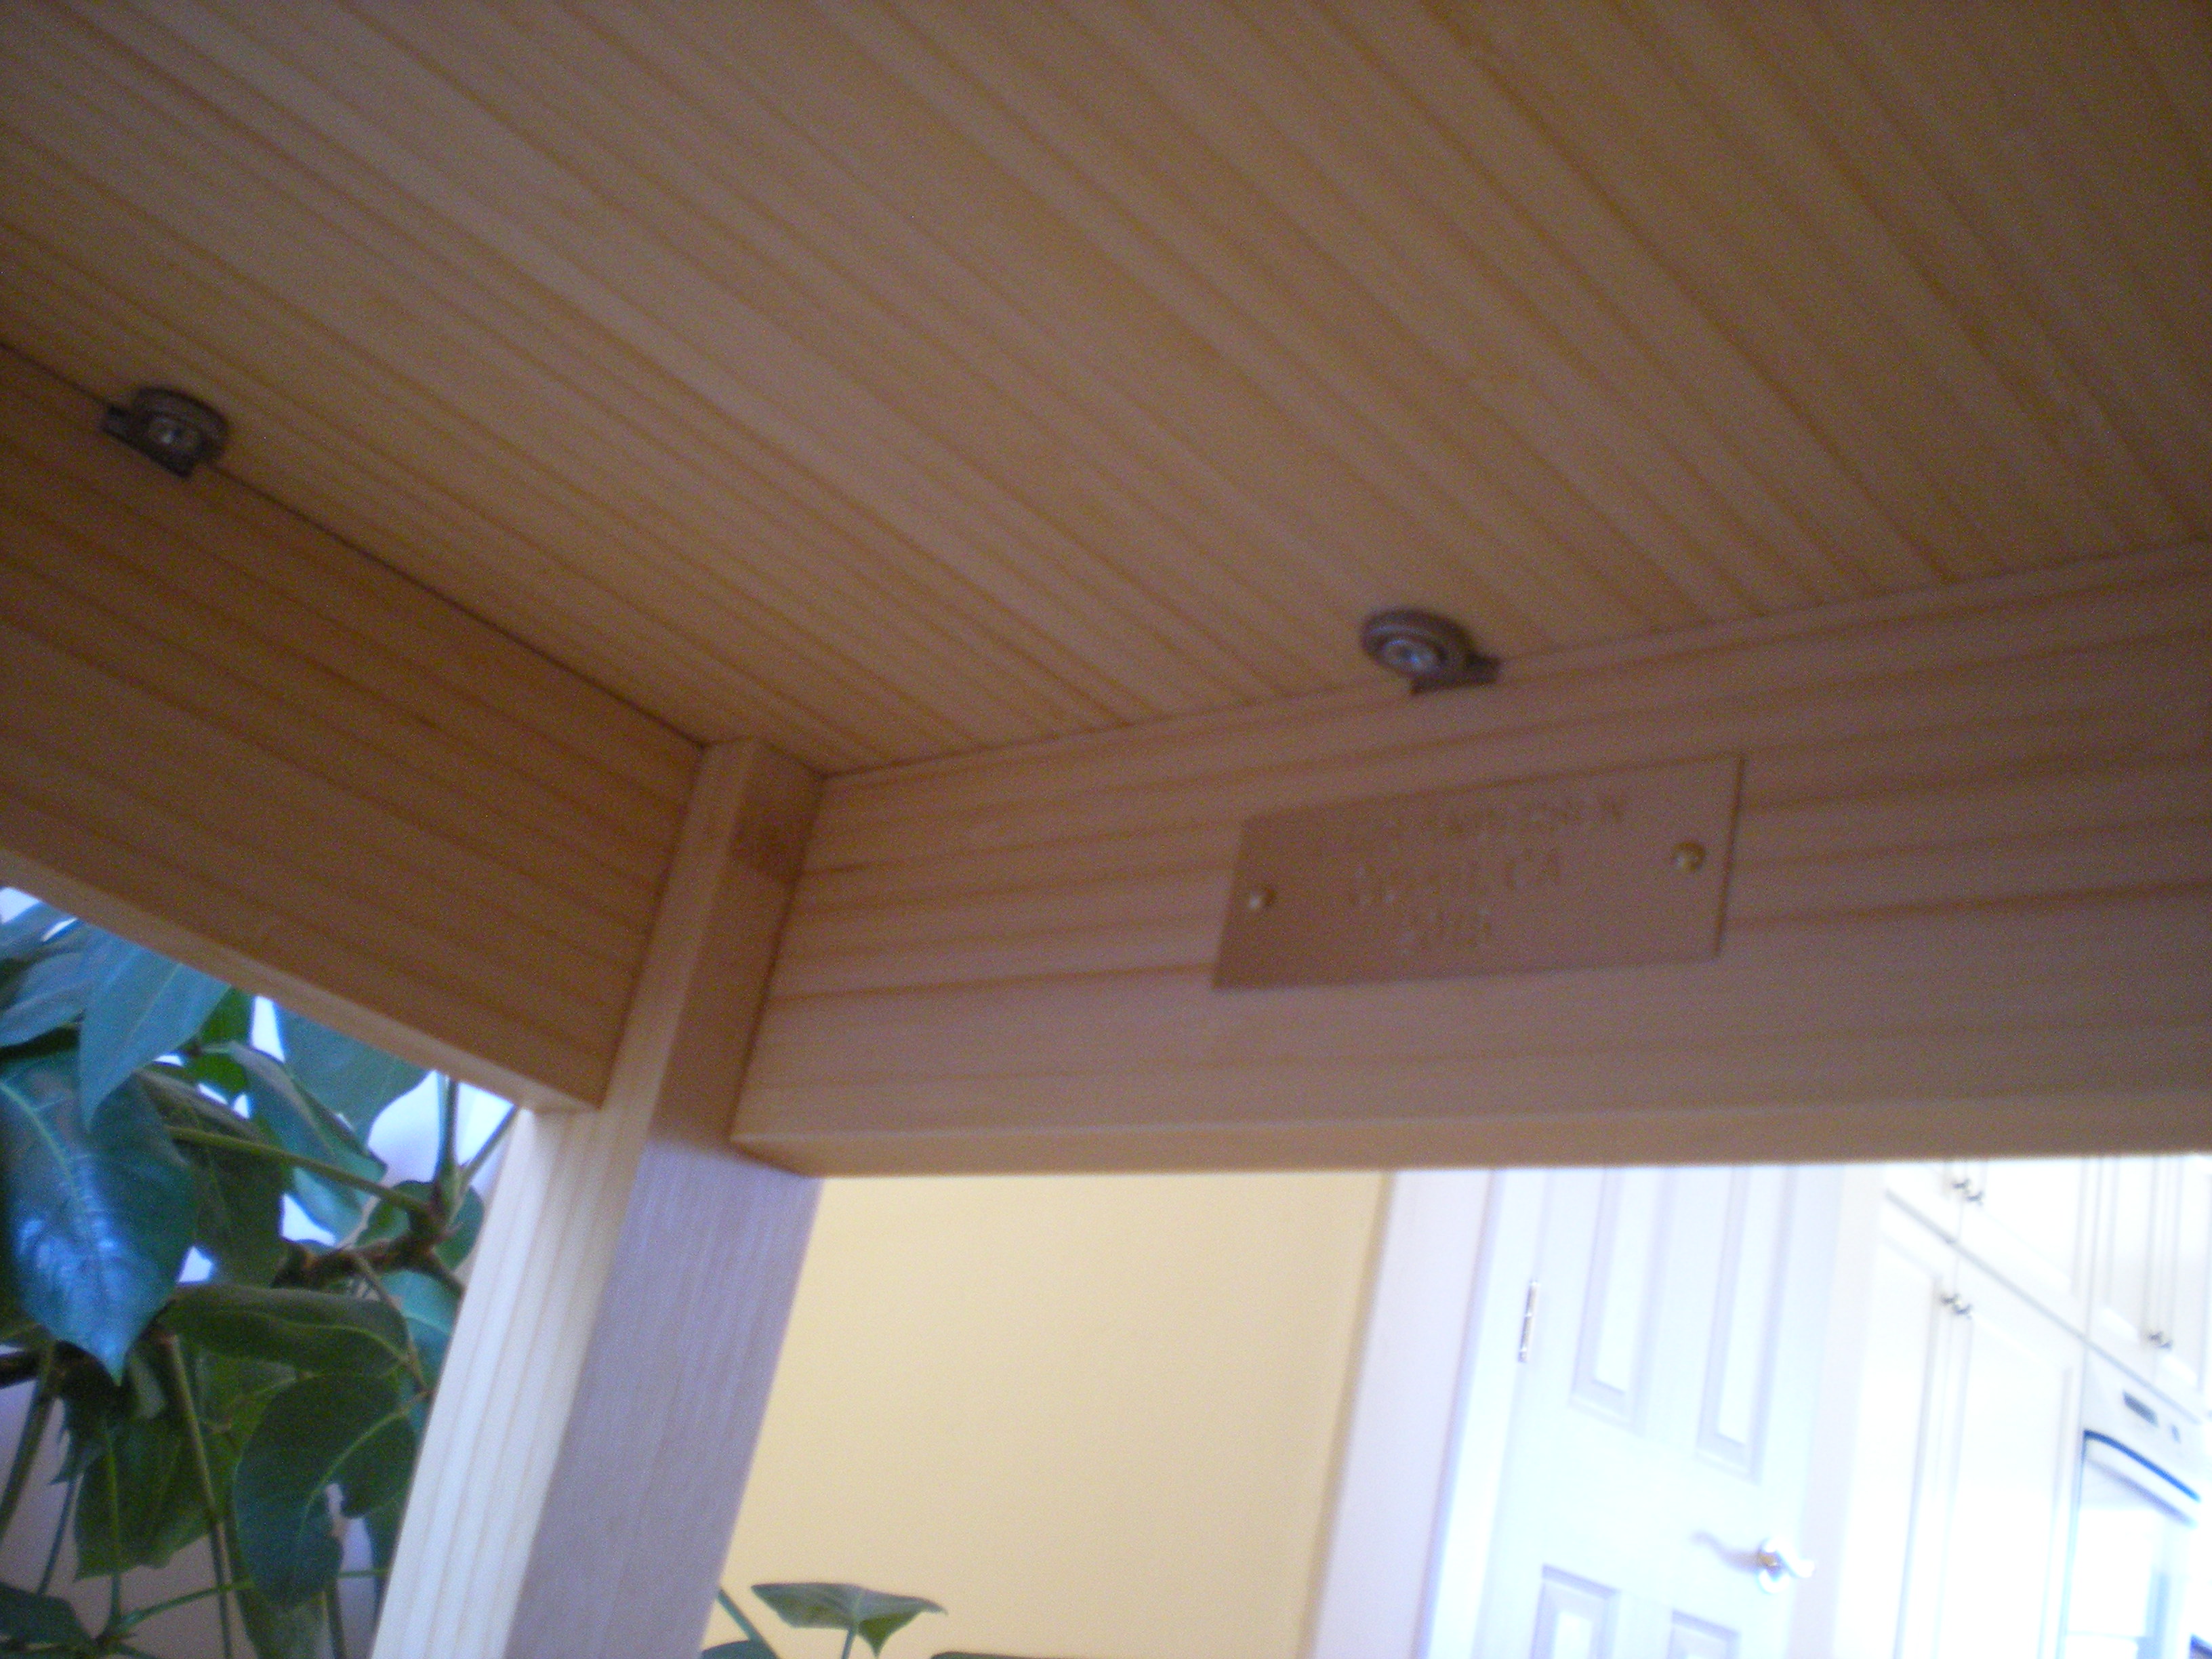
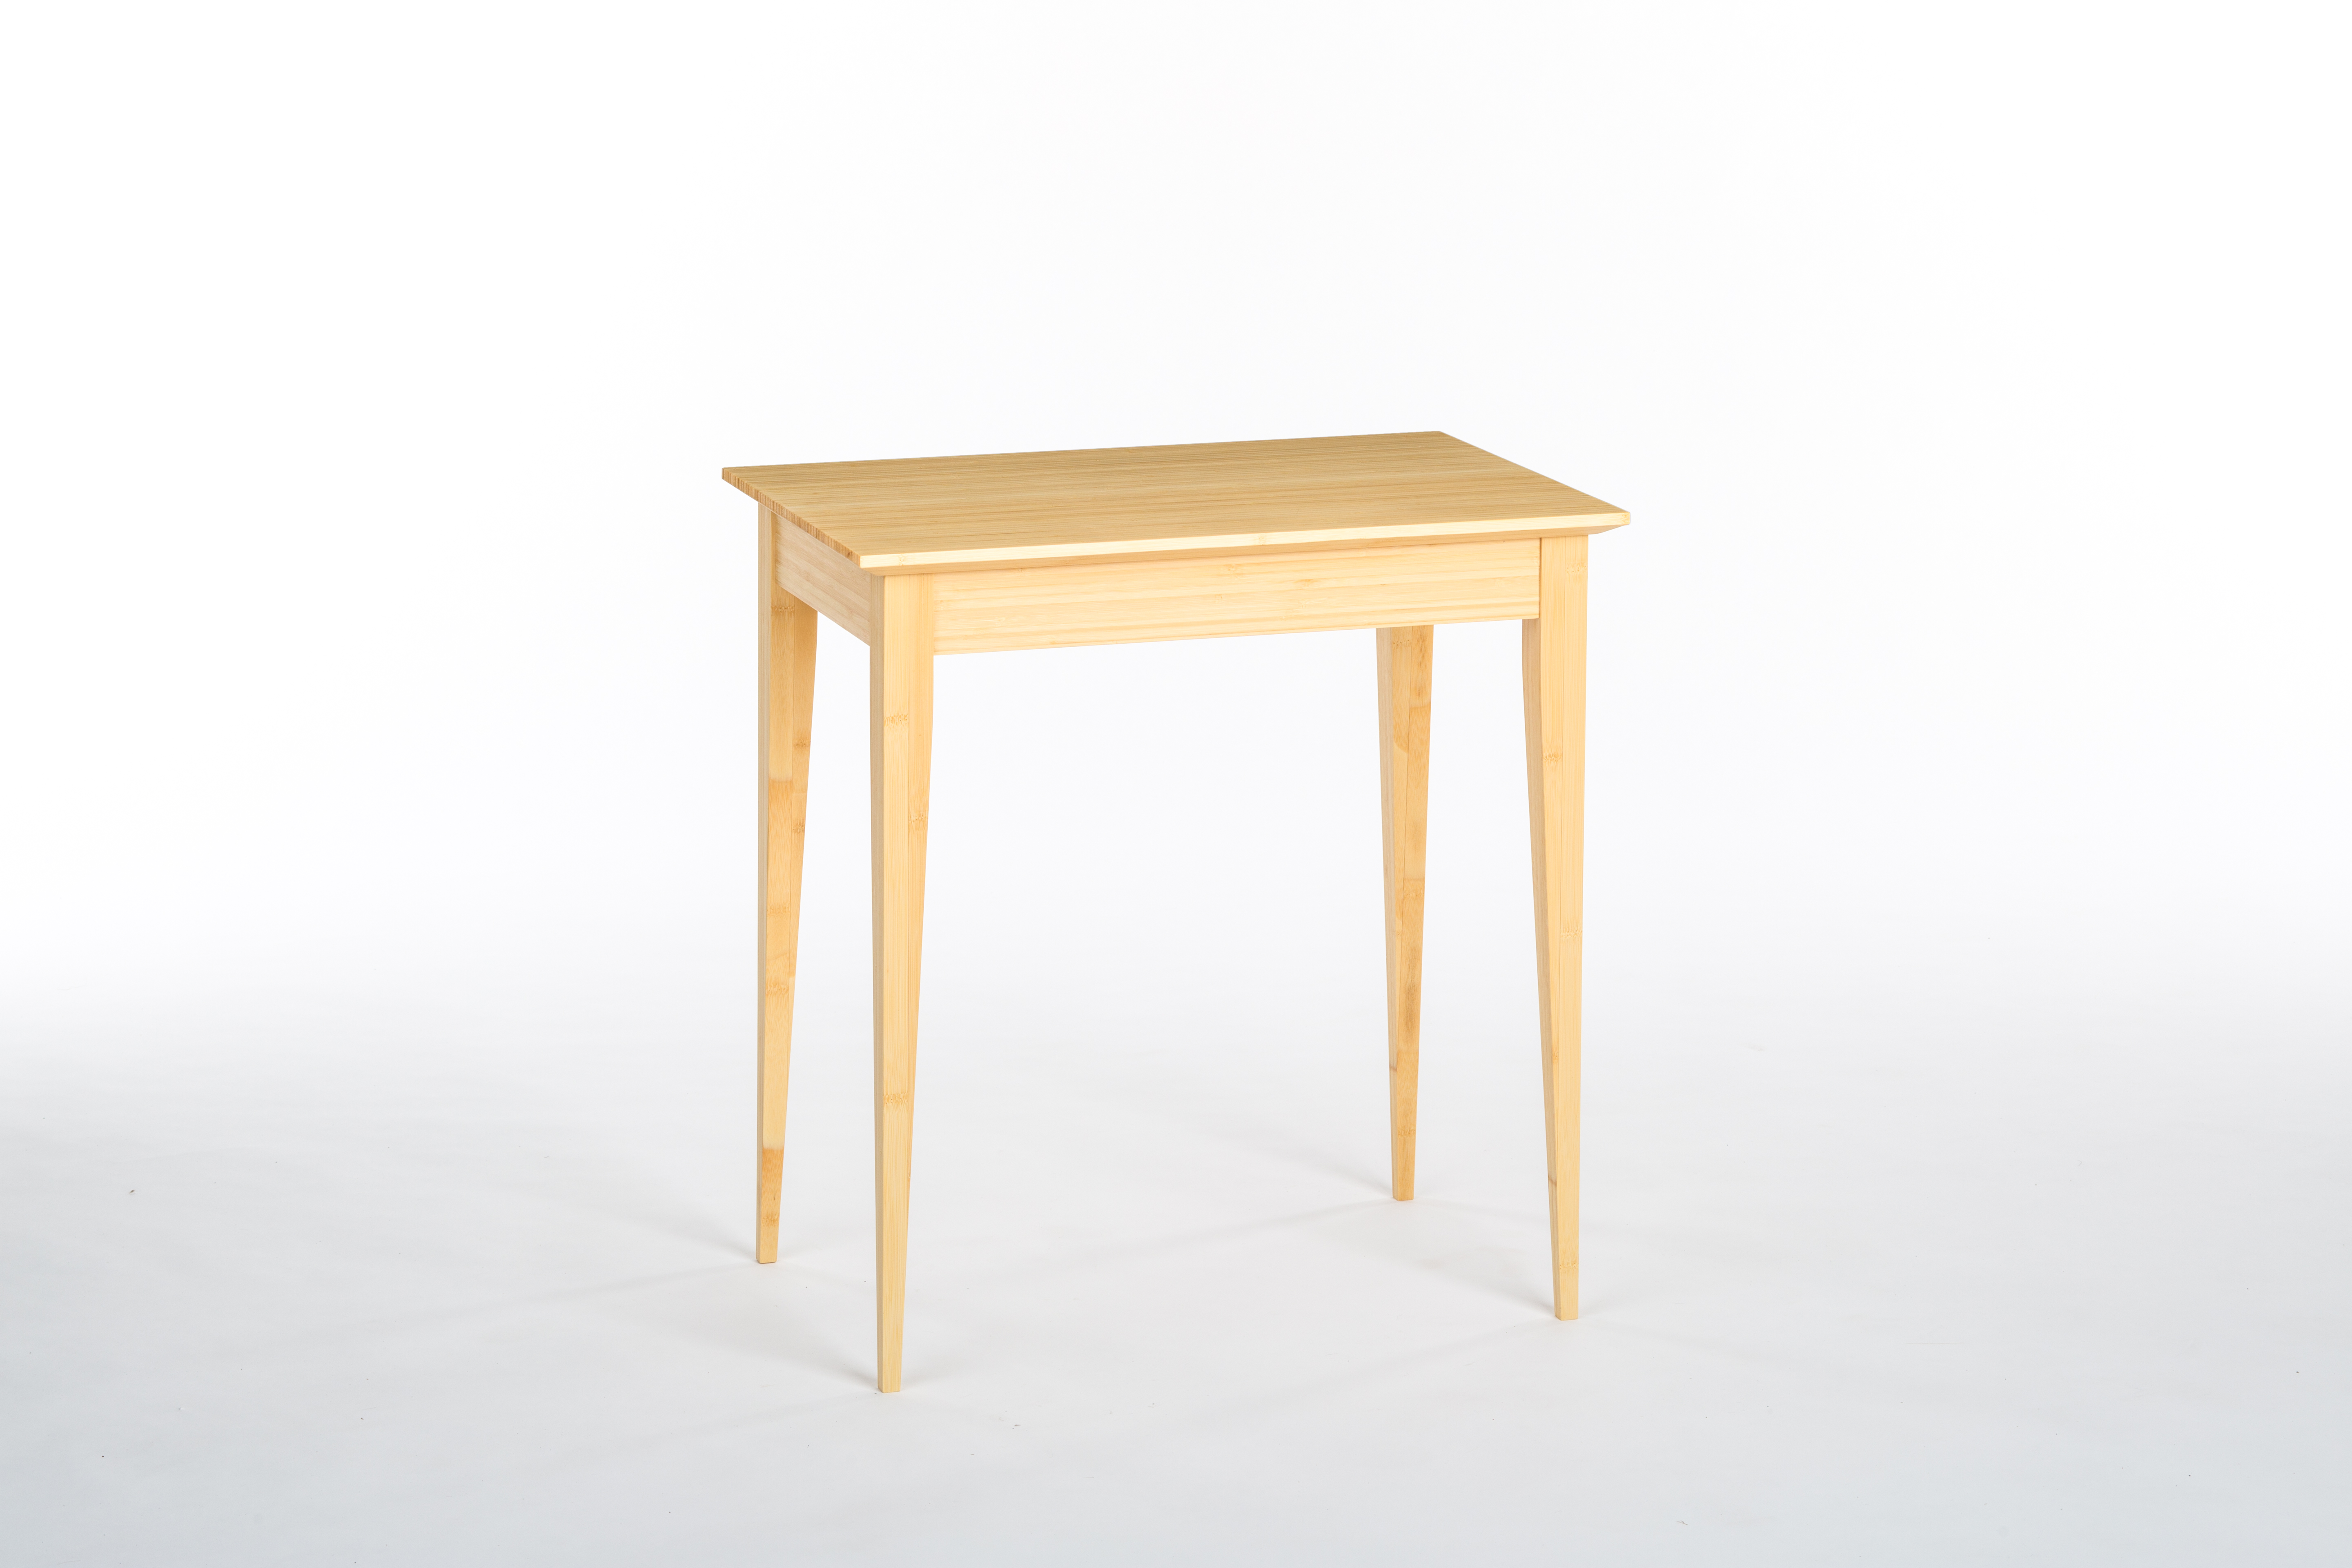
At this point, all that’s left is to buff the base and the top, screw the six figure-of-eights into the aprons, center the top, drill six holes in the bottom of the top, screw in the top, attach a brass plate which serves as my signature of the piece, and wipe it down. Here’s a few pictures of the final piece.
 Next, a matching piece. The steps are not detailed. Here’s what the set looks like.
 I submitted the second table to the Sonoma County Woodworkers Association’s 27th Annual Artistry in Wood 2015 exhibit Sep 11 – Oct 22 at the Sonoma County Museum in Santa Rosa. The piece was accepted for the exhibit. Every accepted piece is evaluated by three judges selected by the SCWA. The table received an Award of Excellence.

Great job Lars! The project write-up is excellent and the finished table looks great. Have you thought about submitting something like this to Joe Scannel for publication in the Wood Forum?
I’m impressed! Beautiful!!….and I think it’s time for you to start writing a wood working book!!
Do you make these bamboo tables for sale?
Jane
Excellent job Lars! I really appreciate all the high-res photos as well. They answered some questions that I thought of while going through the build.